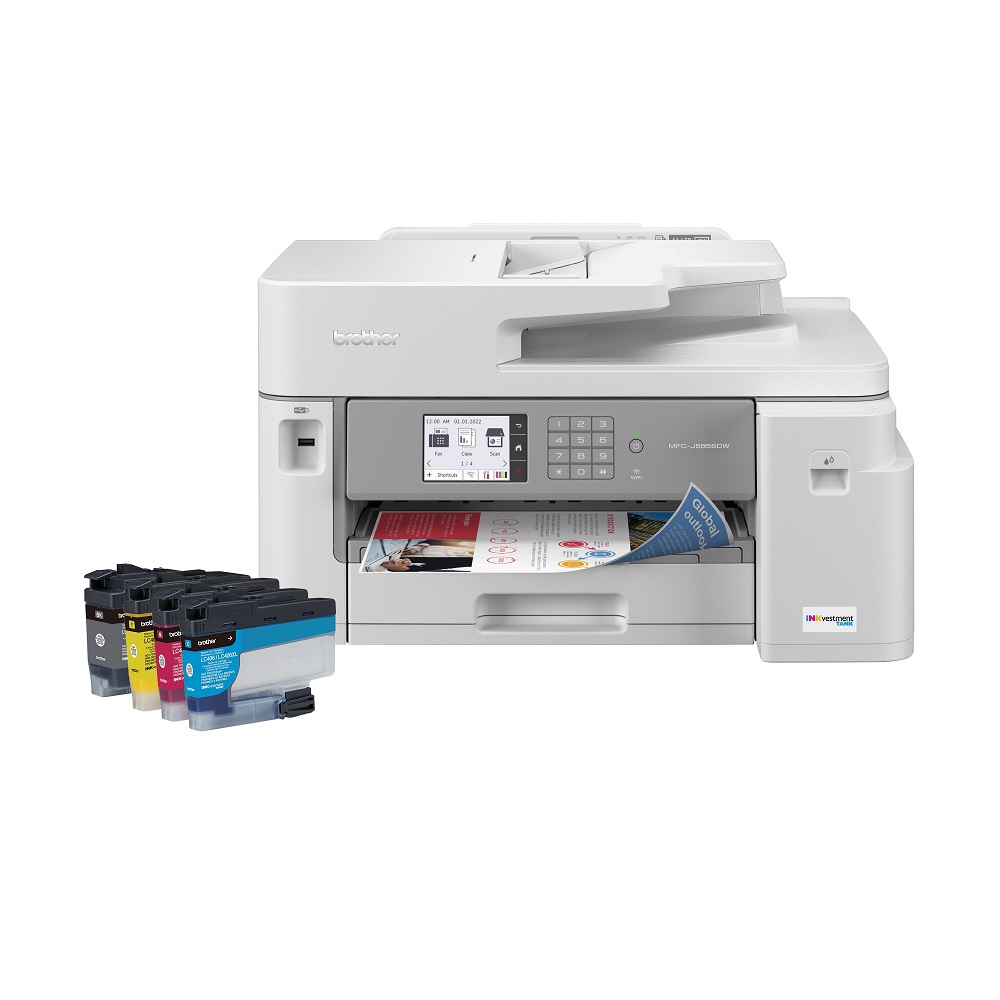
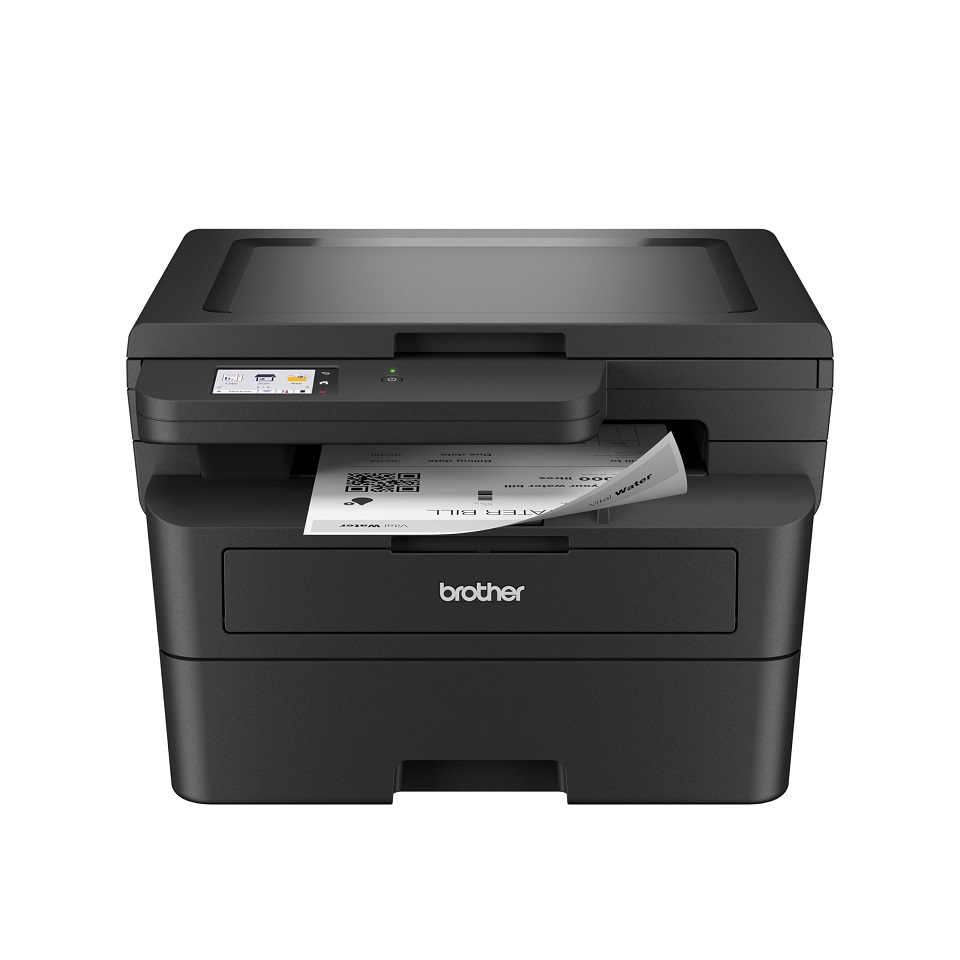
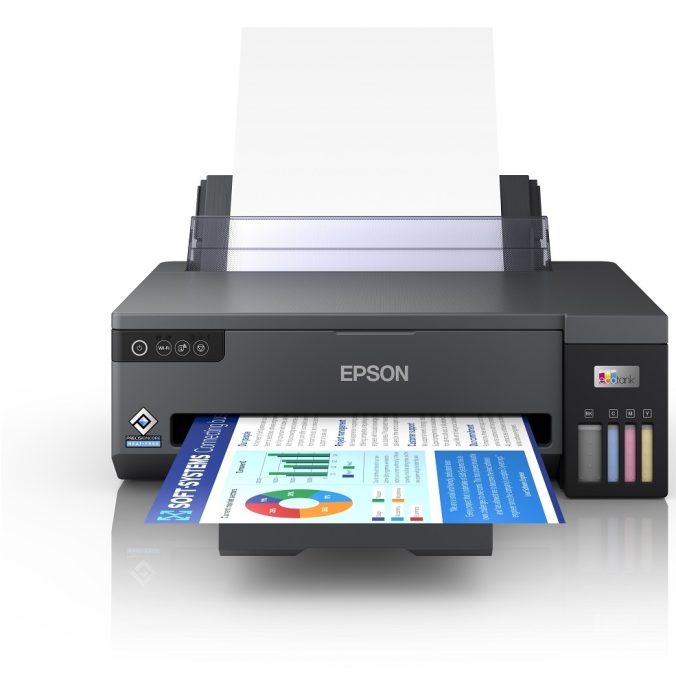
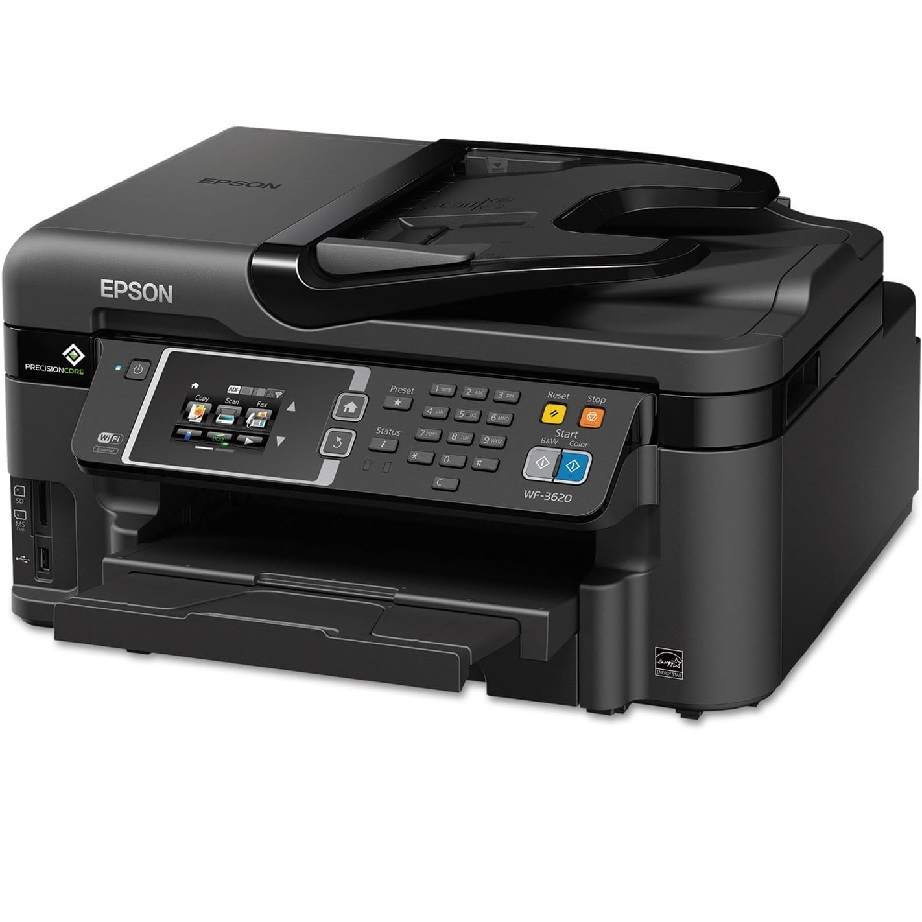
Here you can learn about a variety of electronic equipment and office items to help you work and study better. What are you waiting for? Come and take a look!

Tag: equipment (Page 2 of 4)

Inkjet Printers 101: Understanding How They Work

Introduction to Inkjet Printers

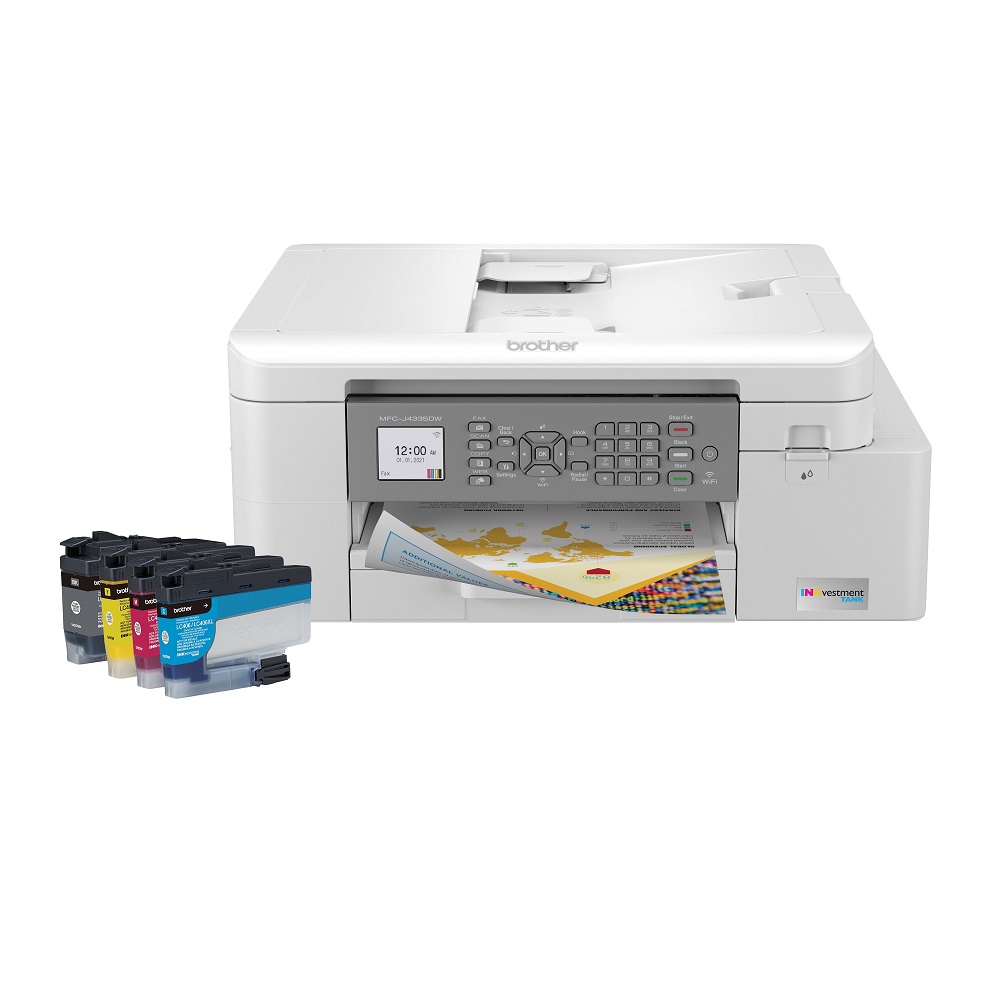
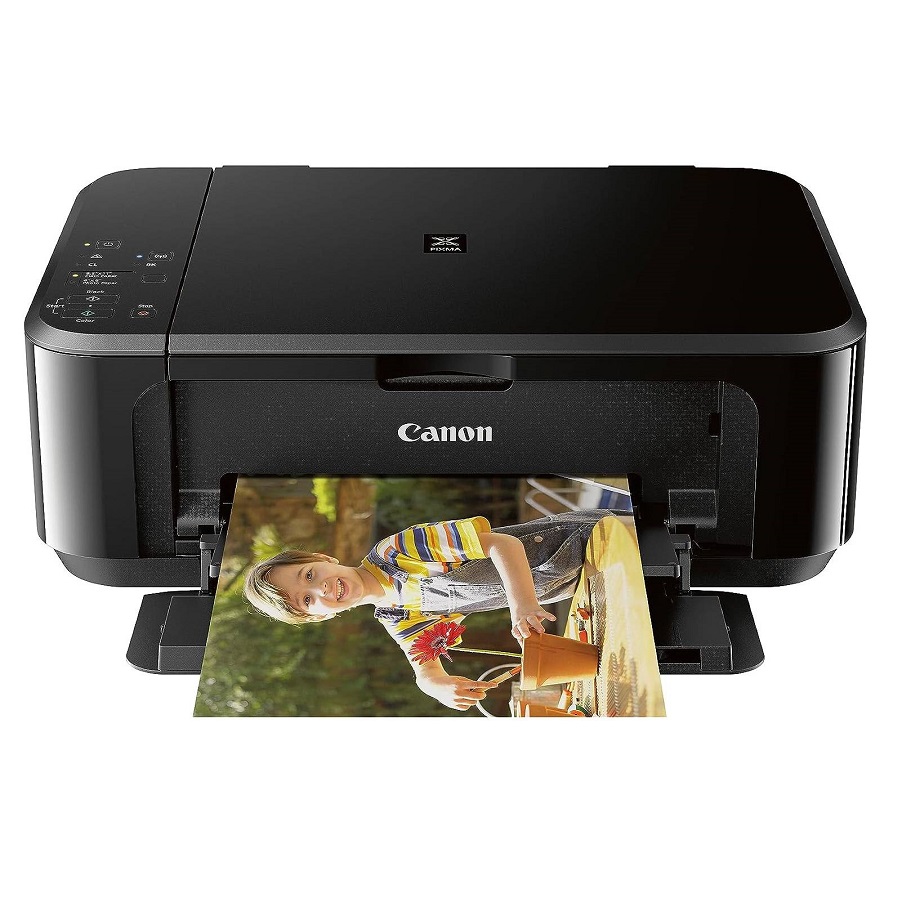
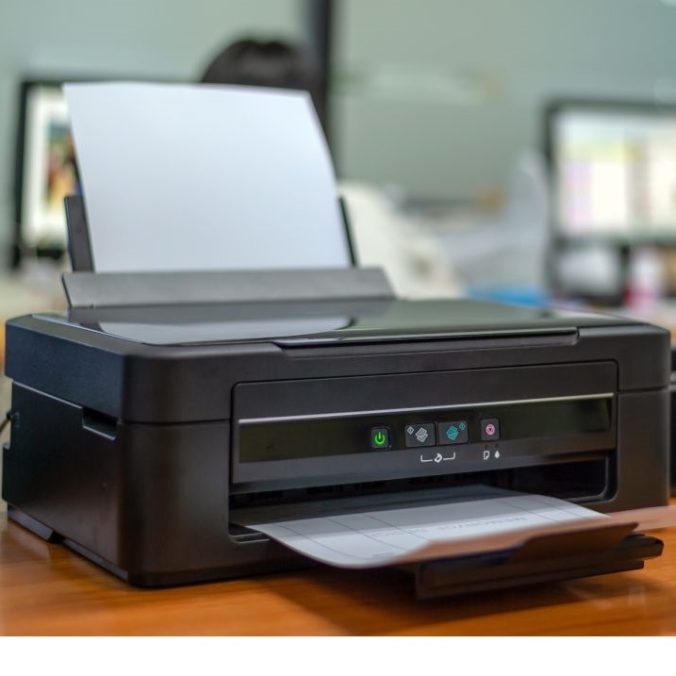
Inkjet printers are common in homes and offices alike. They use ink to create text and images on paper. Unlike laser printers that use toner, inkjet printers spray tiny ink droplets onto the paper. This allows for detailed and vibrant color prints, ideal for photos and colorful documents. They come in different sizes for various printing needs. Recognizable brands include Epson, Canon, and HP. Users choose inkjet printers for their affordability and quality printouts. But, they also consider the cost of ink and printer maintenance.

Core Technology: How Inkjet Printers Function

Inkjet printers bring images and text to life using intricate technology. At the heart of an inkjet printer is the print head equipped with numerous tiny nozzles or jets. As the print head moves across the paper, it sprays ink droplets strategically to create the desired output. The precision of this ink placement allows for high-quality color representations and sharp text clarity.

The Role of Microdroplets

A key aspect of inkjet printers is the microdroplet technology. The printer propels these tiny ink droplets, measured in picoliters, onto the paper. The size and distribution of these droplets determine the sharpness and detail of the print.

Ink Cartridge Mechanics

Ink cartridges in these printers typically come in two forms: combined color cartridges and individual color cartridges. Combined cartridges have separate chambers for cyan, magenta, yellow, and black inks. Some printers use individual cartridges for each color, providing a more economical ink management.

Integration with Printer Software

The synchronization between printer software and the hardware is crucial. The software directs the print head, adjusting droplet size and placement according to the image. This coordination ensures accurate color mixing and image reproduction.

The inkjet technology may seem simple, but it’s the result of refined engineering designed for efficiency and quality output. The method enables printing from 100 to several hundred pages before needing an ink refill, depending on print nature. While the technology has its pros and cons, its ability to render detailed images makes it a favored choice for many users.

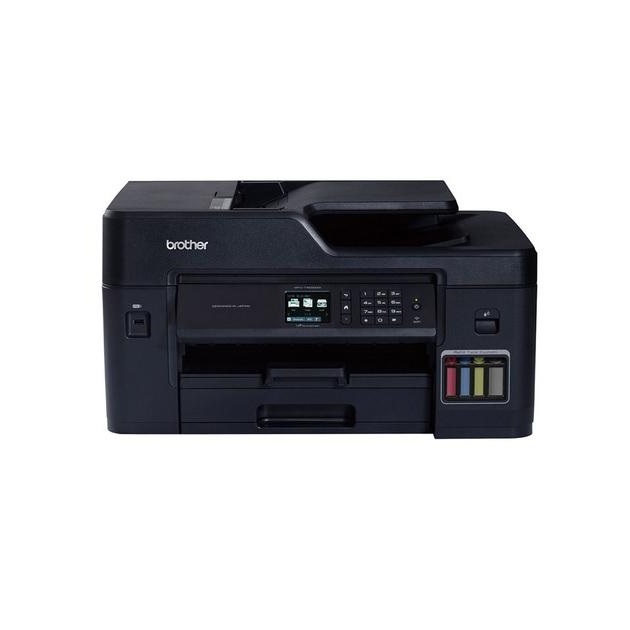
an inkjet printer

Inkjet Printer Types and Models

Selecting the right inkjet printer is based on personal or business needs. Discovering the ideal model means considering functionality, price, and features. From sleek designs intended for homes to robust ones for businesses, choices vary. Recognized printer brands include Epson, Canon, and HP.

Recognizable Home and Business Brands

Popular brands for home office printing are Epson XP, Canon Pixma, and HP DeskJet. These are known for affordability and decent print quality. For businesses, Canon ImageCLASS and HP OfficeJet offer all-in-one solutions. Sturdier and faster, they cater to heavier workloads.

Models with Varying Ink Configurations

Different inkjet models come with varying ink cartridge configurations. Some have a single cartridge that combines all colors, while others require individual ones for each color. This influences ink management efficiency and replacement cost.

Printers for Specialized Tasks

High-end inkjets can tackle specialized tasks like printing glossy or matte photos. They’re on par with professional print quality, meeting the needs of photography enthusiasts. This versatility is something to contemplate when sifting through options.

In summary, inkjet printers range from basic to advanced models. Home users might prefer compact and budget-friendly printers, whereas businesses may lean towards feature-rich, durable machines. The brand and model chosen should align with the printing demands and quality expectations.

Pros and Cons of Inkjet Printers

Inkjet printers are popular for their color print quality. They suit many types of printing jobs, like photos and graphics. However, inkjet printers have both upsides and downsides. Users should know these before buying one.

Advantages of Inkjet Printers

  • Cost-Effective: Inkjet printers are often less costly upfront. This makes them an easy choice for many users.
  • High-Quality Prints: These printers are great for detailed images and color depth.
  • Versatile Printing: They can handle a variety of paper types and sizes.
  • Compact Design: Inkjet printers usually take up less space. Ideal for small offices or home setups.

Disadvantages of Inkjet Printers

  • Ink Costs: Over time, buying ink can get expensive. It’s a recurring cost that adds up.
  • Speed: Compared to laser printers, inkjets are slower. This might be a problem for high-volume printing needs.
  • Maintenance: They need regular upkeep. Ink clogging is a common issue that requires attention.
  • Drying Time: Inkjet prints need time to dry. This can delay handling and use of the printed materials.

Understanding these pros and cons helps in making a wise decision. Inkjet printers can be the right choice if you need high-quality, color-rich prints and don’t mind slower speeds and maintenance tasks.

Toner vs. Ink Cartridges: Understanding the Differences

When it comes to printers, the battle often boils down to two contenders: inkjet printers that use ink cartridges, and laser printers which operate with toner cartridges. Understanding the key differences can greatly influence your purchasing and usage decisions.

  • Ink Cartridges: These are the staple of inkjet printers. They contain liquid ink and release it in microdroplets to form images or text on paper. Ink cartridges need frequent replacement, especially if you print a lot, which can add up in cost over time. However, they are excellent for producing vibrant, high-quality color prints perfect for photos and detailed graphics.
  • Toner Cartridges: Toner cartridges, on the other hand, are used in laser printers. Instead of liquid ink, they contain a fine powder that is transferred to paper using heat and pressure during the printing process. Toner often lasts longer than ink, making it a cost-effective option for high-volume printing. Laser printers are favored in business environments where fast, efficient, and large-scale printing is commonplace.

In summary, ink cartridges are ideal for high-quality color printing but can be more costly for heavy users. Toner cartridges are better suited for large printing needs and offer a faster print speed. Knowing these differences can help you choose the right printer to meet your printing volume, quality demands, and budget constraints.

inkjet printer

Paper Selection for Optimal Inkjet Printing

Selecting the correct paper is vital for achieving the best inkjet print results. The paper you use can influence clarity, color quality, and overall print appearance.

Importance of Paper Weight and Brightness

Paper weight and brightness affect ink absorption and image sharpness. Heavier, brighter paper typically delivers crisper images and vibrant colors. For regular documents, standard paper weight suffices. For photographs, opt for heavier, glossier paper.

Non-Porous vs. Porous Paper

Inkjet printers need non-porous paper. This prevents ink from bleeding and ensures crisp prints. Porous paper, like bond paper, can cause ink to smudge and reduce image quality.

Specialized Photo Paper

For high-resolution photo prints, specialized photo paper is recommended. This paper is designed to handle the ink density and provide a professional finish.

Coated Papers

Some inkjet papers are coated to improve print quality. Coatings can make paper glossy or matte and affect how ink settles. Coated papers often enhance color and detail.

Recycled Paper Considerations

Using recycled paper can be a sustainable choice. However, ensure it’s compatible with inkjet printing to avoid quality issues.

In conclusion, choose your paper wisely to get the most out of your inkjet printer. Heavier, brighter, and sometimes coated papers provide better results for specific printing needs. Always align paper type with the planned use to ensure quality.

Cost Considerations in Using Inkjet Printers

When exploring the world of inkjet printers, cost is a crucial factor to consider. These printers are generally less expensive upfront, appealing to budget-conscious consumers. However, there are ongoing expenses that aren’t always obvious at the outset.

  • Initial Purchase Price: Typically, the purchase price of inkjet printers is lower compared to laser printers. This affordability makes them an attractive option for home use or small businesses.
  • Cost of Ink Cartridges: One of the significant ongoing costs is replacing ink cartridges. While inkjet printers deliver high-quality color prints, they require frequent cartridge changes, especially if you print in color often. Remember to factor in the price of both black and color cartridges.
  • Page Yield: The number of pages you can print with a single ink cartridge, known as page yield, also affects your wallet. Often, inkjet printers have a lower page yield than laser printers, meaning more frequent purchases.
  • Ink Efficiency: Specific models of inkjet printers are more ink-efficient than others. Some use individual color cartridges that can be replaced separately, potentially saving money over combined cartridges if you tend to use one color more.
  • Long-Term Costs: An inkjet printer that is inexpensive initially might end up costing more in the long run due to the need for regular cartridge replacements and potential maintenance issues.

In summary, while inkjet printers are cost-effective in terms of initial investment, keeping an eye on the recurring costs of ink cartridges is essential. Consider your printing frequency and whether the affordability and photo-quality capabilities are worth the ongoing investment.

Maintenance Tips for Inkjet Printers

Maintaining your inkjet printer is crucial for optimal performance and longevity. Regular upkeep ensures high-quality prints and prevents common issues like ink clogging and print head problems. Here are some essential maintenance tips for keeping your inkjet printer in top condition:

Regular Cleaning

Execute routine cleaning of the print head and nozzles. This prevents ink from drying and clogging. Use your printer’s built-in cleaning function to remove any blockages effectively.

Keep it Covered

When not in use, cover your printer to shield it from dust. Dust can hinder printer operation and affect print quality.

Use Genuine Cartridges

Opt for genuine ink cartridges rather than third-party options. Genuine cartridges are tailored to your printer’s specifications, reducing the risk of malfunctions.

Paper Quality Matters

Always use the right type of paper. Poor quality paper can cause paper jams and affect print quality. Check your printer’s manual for recommended paper types.

Update Printer Software

Keep your printer’s software up to date to improve functionality and efficiency. Manufacturers often release updates that enhance performance and fix bugs.

Handle with Care

Transport your printer carefully. Bumps and drops can misalign the print head or damage other delicate components.

Regular Use

Print something at least once a week. Regular use keeps ink flowing and prevents it from drying out in nozzles.

Turn Off Properly

Always turn off your printer using the power button. This allows it to seal the nozzles properly, protecting the ink from drying out.

By adhering to these tips, you can extend the life of your inkjet printer and maintain its print quality. Remember, consistency in maintenance is key to avoiding many common printer issues.

printer

Comparing Inkjet Printers with Laser Printers

When choosing a printer, understanding the difference between inkjet and laser technology is key. Each has distinct features and benefits that cater to specific printing needs.

Inkjet vs. Laser: Quality and Speed

Inkjet printers excel in producing high-quality, vibrant images. They are ideal for photo prints and color-dense documents. Laser printers, however, are faster and better for high-volume text printing.

Cost-Effectiveness and Usage

Inkjets are generally cheaper upfront but can cost more in the long run with ink purchases. Laser printers have a higher initial price but tend to be cheaper per page over time.

Maintenance and Longevity

Laser printers often have a longer lifespan and require less maintenance than inkjet printers. Inkjet printers can experience issues like ink clogging, needing more frequent care.

Paper Handling and Media Types

Inkjets can print on a variety of papers and even fabric. Laser printers are limited to specific laser-friendly paper to avoid damage from heat.

Energy Consumption and Environmental Impact

Laser printers typically use more energy due to the fusing process. However, many modern inkjet printers are designed to be more energy-efficient.

In summary, inkjet printers are best for high-quality color printing and versatile media handling, while laser printers are more efficient for large volumes of text and faster output. Think about what you’ll print most when deciding between the two.

Choosing the Right Inkjet Printer for Your Needs

Selecting the perfect inkjet printer hinges on several key factors, tailored to your specific printing requirements. Whether you’re looking for home or office use, photo printing, or general document production, the right inkjet printer is out there for you. Here’s what to consider when making your choice.

Evaluate Printing Needs

First, assess the volume and type of printing you’ll do. For photos, prioritize image quality and color accuracy. For documents, consider print speed and ink efficiency. Think about how often you’ll print to determine if a model with lower operational costs is more suitable.

Ink Cartridge System

Decide between combined color cartridges and individual ink cartridges. Individual ones are cost-efficient if you frequently use specific colors. Combined cartridges offer convenience but may lead to more waste.

Printer Size and Features

Space constraints might influence your choice. Compact printers fit small desks or home offices. Also, look for additional features like wireless connectivity, double-sided printing, or scanning capabilities if these align with your needs.

Budget Considerations

Analyze both upfront costs and long-term expenses. Cheaper printers might have higher ink costs over time. Balance initial affordability with ongoing ink and maintenance costs.

Brand Reliability and Support

Choose reliable brands with good support and warranties. Brands like Epson, Canon, and HP are known for quality printers and customer service. Read reviews to gauge reliability.

Eco-friendliness

Factor in the printer’s environmental impact. Some inkjet printers are energy efficient and compatible with recycled ink cartridges. This can be a deciding aspect if sustainability is a priority for you.

Making an informed decision on an inkjet printer requires careful consideration of these points. Take your time, compare models, and ensure the one you select meets your printing demands and offers good value for money.
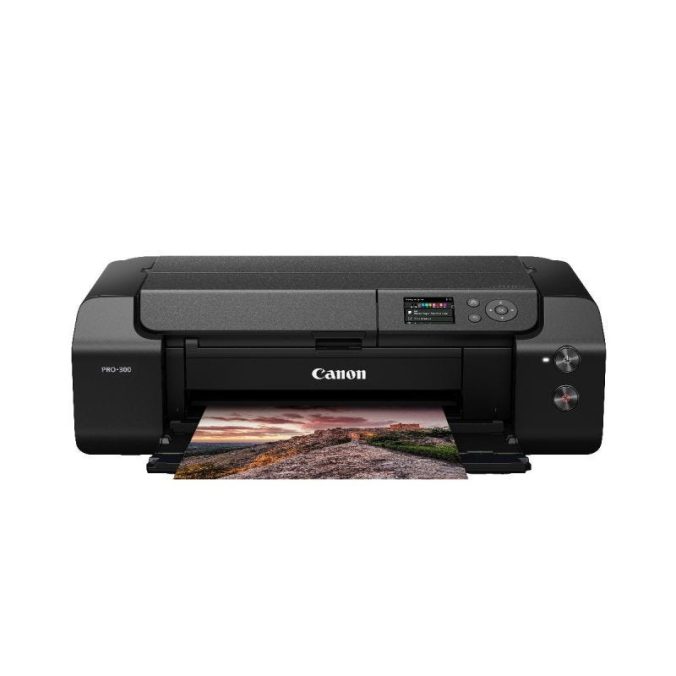
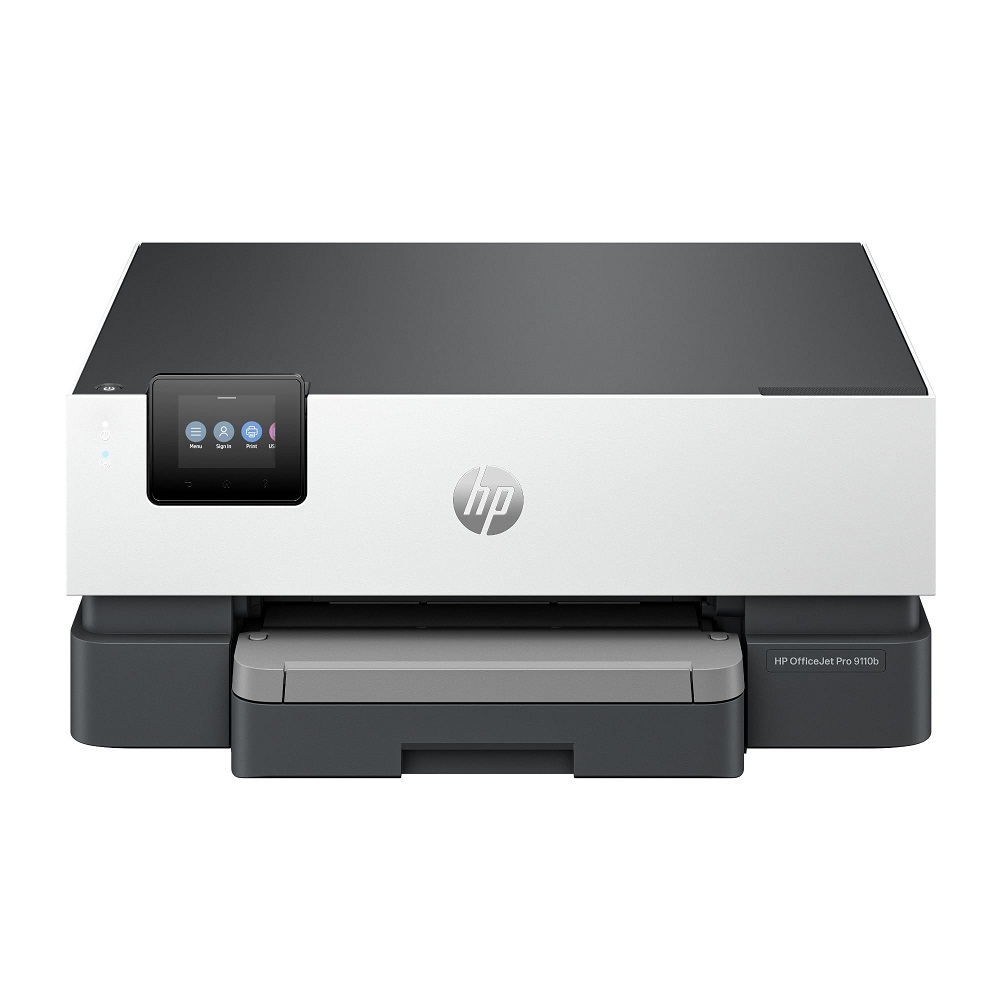
Fixing Your Printer Offline Issue in Windows 10

Introduction to Printer Offline Issues

Experiencing a ‘printer offline’ status on Windows 10 can be frustrating. This issue stops you from printing documents, no matter how urgent. The ‘offline’ status often suggests the computer can’t communicate with the printer. This could be due to various reasons; from connectivity problems to a paused print queue. ‘Printer offline windows 10’ is a common setback many users face.

Understanding why your printer shows as offline is the first step to fixing the issue. It’s not always clear-cut. The printer might be offline due to hardware, software, or network issues. We will explore various reasons and approaches to troubleshoot this pesky problem.

By grasping the basics of why your printer is offline, you can apply the right solution. Our guide will lead you through each resolution method thoroughly. We aim to get your printer back online and running smoothly as soon as possible.

Common Reasons for Printer Offline Status

When your printer indicates it’s offline on Windows 10, the root causes can be diverse. Here’s a rundown of common reasons that might lead to this troublesome status:

  1. Connection Issues: If your printer isn’t properly connected to your computer or network, it will show as offline. This includes both wired and wireless connections. Check cables for wired printers and wireless network connectivity for Wi-Fi printers.
  2. Print Jobs Stuck in Queue: Sometimes, unprocessed print jobs can halt the printing process. These jobs could be stuck due to errors or interruptions.
  3. Hardware Faults: Occasionally, printers become offline due to hardware issues. This may include low ink or toner levels, paper jams, or internal failures that prevent the printer from functioning.
  4. Outdated Drivers: Printers need up-to-date drivers to communicate with your computer. Outdated or corrupt drivers could render your printer offline.
  5. Computer or Software Glitches: Problems with your computer or printer software can also lead to offline status. These can stem from temporary software hiccups or system complications.
  6. Manual Settings: Sometimes, printers are set to use an offline mode manually. This setting might have been changed accidentally or forgotten.
  7. Sleep Mode: Printers in sleep mode might not wake up as expected when a print job is sent, which then leads to an offline status.
  8. Network Settings: For network printers, incorrect network settings or failures can disconnect the printer from the network, causing it to appear offline.

Understanding these common triggers can help you diagnose and focus your troubleshooting efforts on the right areas. In the next sections, we’ll discuss how to perform preliminary checks and outline a step-by-step guide to bring your printer back online.

printer offline

Preliminary Checks Before Troubleshooting

Before diving into deeper troubleshooting methods, let’s perform some basic checks. Simple actions often solve the ‘printer offline Windows 10’ issue. Start by ensuring the printer is on and ready.

  • Check Power: Confirm your printer is powered on. If it’s off, turn it on and check the status.
  • Verify Cable Connections: For wired printers, check all cable connections. Make sure USB or Ethernet cables are secure at both ends.
  • Inspect Wi-Fi Connectivity: For wireless printers, ensure the Wi-Fi connection is stable. Check if the printer is connected to the correct network.
  • Restart Printer and Computer: Rebooting your devices can resolve temporary glitches. Turn your printer and computer off, then on again.
  • Look at the Print Queue: Clear any stuck print jobs in the queue. A full queue can stop new jobs from processing.
  • Physical Inspection: Check for paper jams, ink levels, and other hardware issues. Resolve any problems found.
  • Manual Offline Setting: Ensure the printer is not set to ‘Use Printer Offline’ mode in Windows settings.

Conducting these checks can quickly bring your printer back online. If the issue persists, proceed to the next section for a detailed guide on reverting your printer to online status.

Step-by-Step Guide to Reverting Printer Online

When your printer shows an ‘offline’ message in Windows 10, it’s essential to act systematically. Following these steps may help to restore your printer’s status to ‘online’. Remember, each step is straightforward and can tackle different aspects of the offline issue.

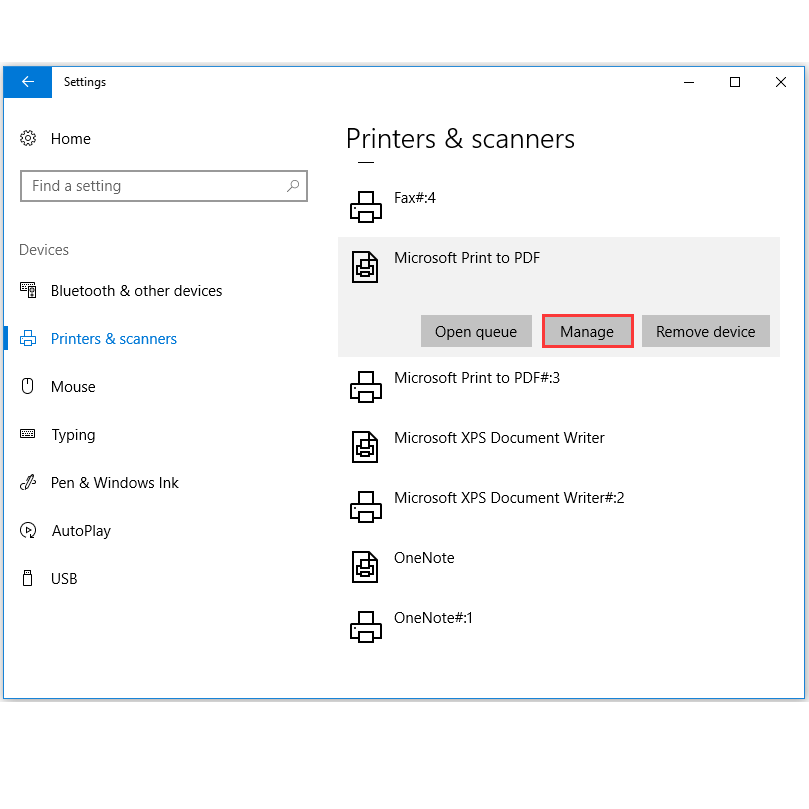
  1. Check Printer Status: Go to ‘Settings’, then ‘Devices’, and select ‘Printers & scanners’. Find your printer and make sure it’s set to ‘Online’.
  2. Run the Printer Troubleshooter: Use Windows 10’s built-in troubleshooter. Go to ‘Settings’, select ‘Update & Security’, then ‘Troubleshoot’. Choose your printer to begin the diagnostic.
  3. Set as Default Printer: Ensure your printer is the default. Right-click on your printer in ‘Printers & scanners’ and select ‘Set as default printer’.
  4. Clear the Print Queue: Open the printer queue and remove any stuck jobs. Right-click on your printer in ‘Printers & scanners’ and choose ‘See what’s printing’ to manage the queue.
  5. Disable ‘Use Printer Offline’ Setting: Sometimes, the printer is set to ‘offline’ mode. Change it by unchecking ‘Use Printer Offline’ in the printer’s menu.
  6. Restart the Spooler Service: Press ‘Win+R’, type ‘services.msc’, and hit ‘Enter’. Find the ‘Print Spooler’ service, right-click, and ‘Restart’ it.
  7. Check for Windows Updates: Install any pending Windows updates. Go to ‘Settings’, choose ‘Update & Security’, and click ‘Check for updates’.
  8. Reinstall the Printer: If necessary, remove and reinstall your printer. In ‘Printers & scanners’, remove your device and add it back using the ‘Add a printer or scanner’ option.

By following these steps, the ‘printer offline Windows 10’ issue often gets resolved. Move through each step methodically to ensure no solution is overlooked. If the problem persists, proceed to the ‘Advanced Troubleshooting Techniques’ section for further assistance.

Advanced Troubleshooting Techniques

When the basic steps don’t resolve the ‘printer offline Windows 10’ issue, it’s time for advanced troubleshooting. These techniques delve deeper to address less common, but more complex problems. Tackle each step carefully to avoid further complications. Here’s what to do:

  • Update Printer Firmware: Check the manufacturer’s website for firmware updates. Download and install any that are available. This can fix bugs causing offline status.
  • Check Firewall Settings: Sometimes, your firewall may block printer communication. Ensure your firewall isn’t stopping your printer from connecting.
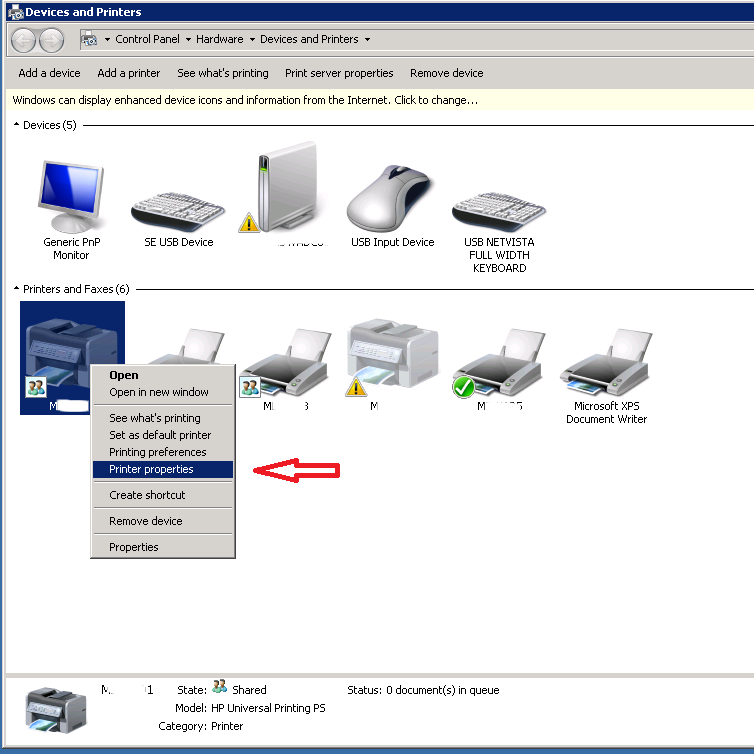
  • Adjust Printer Properties: Right-click your printer in ‘Devices and Printers’. Choose ‘Properties’, then look for settings that might cause offline issues. Make necessary changes.
  • Inspect Port Settings: The incorrect port can disconnect your printer. Go to printer properties, click on the ‘Ports’ tab, and select the right one for your printer.
  • Change Advanced Settings: Some printers offer advanced configuration options. These can be accessed through the printer’s software or web interface. Explore and adjust as needed.
  • Ensure Service Dependencies: The Print Spooler service relies on other services. Make sure services like ‘Remote Procedure Call’ are running.
  • Uninstall Conflicting Programs: Some applications can interfere with printer software. Uninstall any recent programs that might conflict with your printer.
  • Factory Reset: As a last resort, reset your printer to factory settings. Refer to the printer’s manual or support site for instructions.

Tackle these advanced steps one by one. With patience and persistence, you’ll likely get your printer back online. If you’ve gone through all these steps without success, it may be time to seek professional help or consider hardware replacement.

printer offline

Updating Printer Drivers and Software

One key step in solving the ‘printer offline Windows 10’ issue is updating drivers and software. Device drivers serve as a bridge for communication between your operating system and printer hardware. When they are going to outdate or corrupt, printers may go offline. Follow these simple steps to ensure your printer drivers and software are up to date:

  1. Visit the Manufacturer’s Website: Navigate to your printer manufacturer’s official website. Look for the support or download section.
  2. Find the Correct Drivers: Search for your printer model. Download the latest driver version compatible with Windows 10.
  3. Install the Drivers: Open the downloaded file and follow the on-screen instructions to install the updated drivers.
  4. Update Printer Software: If your printer came with software, check for any available updates. Install them as prompted.
  5. Use Device Manager: Alternatively, you can update drivers through Windows Device Manager. Right-click on ‘Start’, select ‘Device Manager’, find your printer, right-click, and choose ‘Update driver’.
  6. Automatic Updates: Enable automatic updates for the future. This will keep your printer drivers up to date without manual checks.

By keeping your printer’s drivers and software current, communication with Windows 10 remains smooth. This reduces the chance of experiencing an offline status. Regular updates can also bring new features, improved performance, and security enhancements for a better printing experience.

Network Printer Specific Solutions

When dealing with a ‘printer offline windows 10’ issue for network printers, specific solutions are going to need. Network printers connect over Wi-Fi or an ethernet cable and can have unique challenges. Here are solutions tailored for network printers:

  • Check Network Connection: Ensure your printer is still going to connect to the network. Confirm the signal strength for Wi-Fi printers, or check that ethernet cables are securely plugged in.
  • Print Network Configuration Page: Most printers can print a network configuration page. Use it to verify that the printer’s network settings are correct.
  • Restart Your Router: Sometimes, the problem lies with your network hardware. Restarting your router can clear up networking errors that cause offline status.
  • Modify IP Address Settings: Ensure your printer’s IP address is not conflicting with other devices. Set a static IP if needed to avoid future conflicts.
  • Update Network Drivers: Like printer drivers, network adapter drivers in your computer may need updating. Check the manufacturer’s website for the latest driver software.
  • Check for Network Changes: If there were recent changes to your network settings, they could affect printer connectivity. Make sure these changes don’t block printer access.

By focusing on these network-specific measures, you can more effectively troubleshoot and resolve the ‘printer offline windows 10’ situation for network printers.

printer

Tips to Prevent Future Offline Problems

Ensuring your printer remains online in Windows 10 requires proactive measures. To prevent future offline problems with your printer, consider these tips:

  • Regularly Update Drivers: Keep your printer’s drivers up-to-date. Check the manufacturer’s website for the latest versions.
  • Maintain Consistent Network Settings: For network printers, avoid changing network settings frequently. This can help maintain a stable connection.
  • Monitor Printer Usage: Regularly check your printer’s status. Be aware of low ink warnings and paper supplies.
  • Schedule Regular Restarts: Periodically restart your printer and computer to clear temporary glitches that may cause offline issues.
  • Turn Off Manual Offline Mode: Always ensure that the ‘Use Printer Offline’ setting in Windows is going to not select.
  • Use Quality Cables and Connections: For wired connections, use high-quality cables and ensure they are going to securely connect.
  • Regularly Clear the Print Queue: Avoid buildup of print jobs by frequently clearing the queue.
  • Check for Software Conflicts: Be cautious when installing new software. It could conflict with your printer software and cause offline issues.
  • Consider a Static IP Address: Assign a static IP to your network printer to prevent IP conflicts that lead to offline status.
  • Test Printer Functionality: Run test prints occasionally to ensure everything is working smoothly.

These preventative steps can help minimize the risk of the ‘printer offline windows 10′ issue arising again. Keep them in mind to enjoy a more reliable printing experience.

Troubleshooting Brother Printer Issues Effectively

Introduction to Brother Printer Problems

Brother printers are popular for their reliability and quality. However, like all technology, they can sometimes encounter issues. In this introduction, we will briefly cover the types of problems that can arise with Brother printers. Users often face paper jams, connectivity challenges, print quality issues, and various error messages. Understanding these common problems is the first step in troubleshooting. By learning to troubleshoot effectively, you can often resolve these issues without the need for professional help. But in some cases, you may still need to contact Brother printer customer service for expert assistance. Keep reading to learn how to identify and fix these common problems, maintain your Brother printer properly, and when to reach out to customer support. Our goal is to help you minimize downtime and maintain optimal printer performance.

Common Issues with Brother Printers

Brother printers are dependable, but problems do pop up. Knowing these issues helps fix them fast.

Paper Jams and Feed Problems

Paper jams can stall printing jobs. Common causes include misaligned paper or worn rollers. Check for paper bits and align stacks correctly to prevent jams.

Connectivity Issues

Printers might lose connection to devices or networks. Ensure Wi-Fi stability and check cable connections to solve this. Update network settings if necessary.

Print Quality Concerns

Blotchy prints or poor colors can indicate low ink or toner. Clean printheads and check ink levels. Also, use recommended paper types for best results.

Error Messages and Codes

Error alerts can be cryptic, but they guide troubleshooting. Refer to the manual or contact brother printer customer service for clarification. Reset or update the printer to clear these errors.

printer

Step-by-Step Guides for Common Fixes

Dealing with Brother printer issues can be straightforward if you know the right steps to take. In this section, we will provide simple and concise guides to rectify the most frequent problems you might encounter.

Clearing Paper Jams

To clear a paper jam:

  1. Turn off your printer to avoid injury or damage.
  2. Open the cover and gently remove any stuck paper.
  3. Check for and remove small paper pieces.
  4. Ensure the paper tray is not overfilled.
  5. Align the paper correctly before printing again.
  6. Restart your printer and conduct a test print.

Follow these steps to avoid damage to your printer and resume your work quickly.

Solving Wireless Connectivity Problems

If your Brother printer disconnects from Wi-Fi:

  1. Verify the printer is within range of your router.
  2. Restart your printer and computer or mobile device.
  3. Check if your Wi-Fi network is working properly.
  4. Reconnect to the network with the correct password.
  5. Update your printer’s firmware if updates are available.

These steps will help you re-establish a stable wireless connection.

Improving Print Quality

For better print quality:

  1. Check if ink or toner cartridges are low and replace them.
  2. Use the correct paper type as specified by Brother.
  3. Run the printer’s built-in cleaning function to clean printheads.
  4. Adjust print settings on your device for better results.
  5. Ensure the printer is calibrated correctly.

Regular maintenance can vastly improve print quality.

Resolving Error Messages

To resolve error messages:

  1. Note down the error code displayed.
  2. Refer to the Brother manual for specific instructions.
  3. Reset your printer to clear temporary glitches.
  4. Update software and drivers from the Brother website.
  5. If issues persist, contact brother printer customer service.

Often, error codes can be addressed with these basic troubleshooting steps. However, for complex issues, don’t hesitate to reach out to Brother printer customer service for assistance.

Maintenance Tips for Brother Printers

Maintaining your Brother printer is crucial for its longevity and performance. Simple, routine care can prevent many common problems.

Regular Cleaning Routines

Keep your printer in top shape with regular cleaning. Dust off the exterior weekly. Use a soft cloth lightly moistened with water to clean the surface, avoiding harsh chemicals. Periodically, open the printer and gently remove dust and debris from the inside. Brother recommends using their cleaning kit for best results. Remember to power off the printer before any internal cleaning.

Updating Printer Software and Drivers

Software and driver updates often include fixes and improvements. Regularly check the Brother website for updates. Downloading the latest software and drivers ensures your printer runs smoothly and stays compatible with your devices and operating system. Schedule a monthly reminder to check for updates.

Effective Ink and Toner Management

Monitor ink or toner levels to avoid running out at inconvenient times. Use only Brother-approved cartridges to guarantee quality. When replacing them, follow the printer’s manual to avoid mistakes. Store spare ink or toner in a cool, dry place to preserve their quality. Managing your supplies helps maintain print quality and reduces waste.

brother printer

When to Contact Brother Printer Customer Service

While many printer issues can be resolved with the troubleshooting steps provided, there are times when it’s necessary to seek professional help. Contacting Brother printer customer service should be considered if you encounter complex problems that go beyond basic fixes.

Identifying Issues That Require Professional Help

Some issues need expertise beyond routine maintenance and troubleshooting. It is crucial to recognize when to seek professional help:

  • Persistent error messages after following manual instructions.
  • Mechanical faults such as strange noises or movements inside the printer.
  • Connectivity problems that persist even after updating network settings.
  • Poor print quality that does not improve with cleaning and cartridge replacement.
  • Software glitches that cause consistent crashes or failing print jobs.

These problems often require technical knowledge and specialized tools, so Brother’s support team can provide the necessary assistance. Do not attempt to disassemble or repair the internal components of your printer, as this could void your warranty or cause further damage.

How to Reach Brother Printer Support

When you decide to contact customer service, here’s how to reach out efficiently:

  • Use the official Brother printer website to find contact options.
  • Have your printer’s model number and error codes handy.
  • Be ready to describe the issue and any troubleshooting steps you’ve taken.
  • Choose between phone, email, or live chat support based on your preference.

Quick access to support ensures you can get back to printing with minimal disruption. Keeping a record of all interactions with Brother printer customer service can also be helpful for future reference.

Alternative Solutions and Resources

When troubleshooting Brother printers doesn’t solve the issue, alternative solutions and resources may help.

Using Online Forums and Support Communities

Online forums are a goldmine of information. Other Brother printer users share their experiences and solutions to common problems. Not only can you find answers to similar issues, but you can also contribute your knowledge. Being a part of support communities like Brother’s official forum or technology forums on Reddit can be helpful. Always remember to describe your problem accurately to get the most helpful advice from these resources.

Popular forums include:

  • Brother’s official support forum
  • Technology sections of Reddit and Quora
  • Dedicated printer support communities

brother printer

Utilizing Third-Party Repair Services

At times, reaching out to a third-party repair service can be the right call. Choose a reputable service with experience in handling Brother printers to ensure quality work. Local services might offer quicker turnaround times. Keep in mind that using non-official repair services may affect your warranty; always check your printer’s warranty status first.

Things to consider include:

  • Reputation and reviews of the service provider
  • Proximity of the repair service
  • Warranty status of your printer

In conclusion, utilize online forums and communities for extra support and consider third-party repair services if needed. Remember to maintain regular care to minimize issues and enhance your printer’s performance.

Conclusion: Ensuring Long-Term Performance and Reliability

In conclusion, effectively troubleshooting Brother printers is key to their long-term performance and reliability. Regular maintenance, like cleaning and updating software, is essential. Always keep an eye on your ink or toner levels and use approved replacements to maintain print quality. When problems arise, follow our guides for quick fixes.

If basic troubleshooting doesn’t resolve the issue, don’t hesitate to reach out to Brother printer customer service. They can help with complex problems that need expert advice. Remember to use online forums and communities for additional support. These can offer valuable insights and shared experiences from other users.

Lastly, if problems persist, consider using reputable third-party repair services. They can provide fast solutions, especially when the warranty period has ended. By consistently caring for your printer and being proactive in seeking help when needed, you can ensure your Brother printer operates smoothly for years to come.

Streamline Your Printing: Embracing WiFi Direct Technology

What is WiFi Direct and How Does it Work?

WiFi Direct is a wireless technology that allows devices to connect directly. It gets rid of the need for a traditional wireless network or a hotspot. You can think of it like Bluetooth, but faster and for a wider range of devices, including a wifi direct printer.

Devices with WiFi Direct have software to communicate without an intermediary. When you enable WiFi Direct, the device creates a software access point. Other devices can detect this point and connect to it after authentication.

The process works in a few simple steps:

  • Discovery: Devices with WiFi Direct search for each other.
  • Pairing: When they find each other, one device sends a connection request.
  • Connection: After the receiving device accepts, they connect. The connection doesn’t need Internet access.
  • Communication: The devices can now share files, data, or use the printer.

This technology is perfect for printing directly from your smartphone or tablet. Just connect your device to the wifi direct printer. No need for cables or joining a pre-existing network. Simple, quick, and efficient.

The Benefits of Using WiFi Direct for Printing

WiFi Direct printing offers several advantages for both personal and professional use. Here are some key benefits:

  • Ease of Connection: Setting up a wifi direct printer is straightforward. Link devices without complex network configurations.
  • Speed: Enjoy fast data transfers. WiFi Direct boasts higher speeds than Bluetooth.
  • Convenience: Print from mobile devices without using cables or needing network access.
  • Mobility: Carry a wifi direct printer anywhere. Print without searching for a network.
  • Cost-Effectiveness: Save money on network hardware. WiFi Direct devices connect directly.
  • Immediate Printing: Share documents quickly. Perfect for urgent or on-the-spot printing needs.
  • No Internet Dependency: Network outages won’t affect your ability to print.

WiFi Direct simplifies the printing process, making it an appealing choice for anyone in need of efficient and reliable printing solutions.

printer

Setting Up a WiFi Direct Printer: A Step-by-Step Guide

Setting up a wifi direct printer is easy and efficient. By following this simple step-by-step guide, you’ll be printing wirelessly in no time.

  1. Check Printer Compatibility: Ensure your printer supports WiFi Direct. Look for this feature in the printer’s manual or online specifications.
  2. Activate WiFi Direct on Printer: On your wifi direct printer, navigate to the WiFi settings. Look for the WiFi Direct option and enable it.
  3. Connect Your Device: On your smartphone or tablet, open the WiFi settings. Locate and select the printer’s WiFi Direct network.
  4. Enter Password if Required: Some printers might need a password. This information usually appears on the printer’s display or in the manual.
  5. Install Printer Software: If necessary, download the relevant printing app or driver for your device. Install it following the on-screen instructions.
  6. Print a Test Page: Test the connection by printing a test page from your device. Ensure everything is working smoothly.

Remember, the exact steps might vary depending on your printer model and device. Always refer to the printer’s user manual for specific instructions. By using a wifi direct printer, you enjoy quick and convenient printing without a network.

Compatibility: Devices and Printers That Support WiFi Direct

Not every device or printer comes with WiFi Direct capability. For seamless integration, you need to ensure your gadgets are compatible. Here’s how to assess the compatibility of devices and printers with WiFi Direct:

  • Check for WiFi Direct Certification: Look for a certification from the WiFi Alliance. Certified devices will work well with other WiFi Direct products.
  • Refer to Device Specifications: Scan the specs of your devices and printers. Manufacturers specify if WiFi Direct is supported.
  • Update Your Software: Some devices can support WiFi Direct after a firmware update. Check with the manufacturer for updates.
  • Test with Multiple Devices: Check connectivity between various devices. This helps to ensure wide compatibility.
  • Printer Brands That Support WiFi Direct: Many leading printer brands offer models with WiFi Direct. Brands like HP, Canon, Epson, and Brother have options available.

Remember, for the best experience, the wifi direct printer and connecting devices should support the same version of WiFi Direct. This ensures fast connections and optimal performance. Prioritize checking compatibility before buying new devices or printers for WiFi Direct printing.

Troubleshooting Common Issues with WiFi Direct Printers

Despite the convenience of WiFi Direct printing, users may sometimes encounter issues. The good news is that most of these problems are common and have straightforward fixes. Here are solutions to typical challenges you might face with a wifi direct printer.

  • Printer Not Found: If your device can’t find the wifi direct printer, ensure both devices have WiFi Direct enabled. Also, check if the printer is within the device’s wireless range.
  • Connection Failure: A failed connection could be due to incorrect passwords or signal interference. Double-check the password and minimize interference by moving closer to the printer.
  • Slow Printing Speed: Slow prints might happen if there’s a large distance between devices or many tasks in the printer queue. Move closer and clear the printer’s queue to improve speed.
  • No Response from Printer: Make sure the printer is turned on and not in sleep mode. Restart the printer if necessary, and try reconnecting your device.
  • Unable to Print from Mobile: Mobile devices may require specific printing apps or drivers. Install the needed software and ensure it’s up to date.
  • Frequent Disconnections: If your device often disconnects, check for environmental factors causing the drop. Other wireless signals nearby may interfere with the connection.

By addressing these common issues, you can ensure a smoother experience with your wifi direct printer. For persistent problems, consider consulting the printer’s user manual or seeking professional support.

wifi direct printer

Advanced Features and Security of WiFi Direct Printing

WiFi Direct printing doesn’t just simplify the process; it also offers advanced features and security enhancements that make it a preferable choice for both businesses and personal use. Let’s delve into some of the technicalities that give WiFi Direct an edge over traditional printing methods.

  • Enhanced Security Protocols: WiFi Direct uses Wi-Fi Protected Setup (WPS) to maintain the security of your connection. It ensures safe data transfer between devices.
  • Peer-to-Peer Connection: Since the connection is direct and doesn’t rely on an external network, there’s less risk of data interception by unauthorized parties.
  • Device Management: You can manage which devices can connect to your wifi direct printer. This control prevents unwanted access to your printer.
  • Authentication and Encryption: WiFi Direct incorporates WPA2 encryption, which offers robust protection against potential breaches.
  • Easy Sharing Among a Group: Set up a group owner on your network who can manage connections and permissions, streamlining the process for group projects.
  • Support for Multiple Connections: Unlike Bluetooth, WiFi Direct can support simultaneous connections with several devices, making it ideal for collaborative settings.
  • Power Saving Features: WiFi Direct is designed to conserve energy, with power-saving measures that extend the life of mobile devices when printing large documents.

In terms of security, WiFi Direct has clear advantages. Secure authentication and strong encryption protocols make it difficult for cyber intruders to compromise your data. For advanced features, the ability to manage device connections and the support for multiple users at once are particularly beneficial for offices and collaborative environments where multiple print jobs might be sent simultaneously. Thus, a wifi direct printer is not only convenient but also a secure and sophisticated solution for modern printing needs.

Comparison: WiFi Direct vs Traditional Wireless Printing

When comparing WiFi Direct to traditional wireless printing, several key differences stand out. WiFi Direct offers unique benefits that set it apart, making it a compelling option for many users. Here’s a straightforward comparison between these two technologies:

  • Direct Connection: With WiFi Direct, printers connect directly to devices without a network intermediary. Traditional wireless printing often relies on a home or office network.
  • Setup Simplicity: Setting up a WiFi Direct printer is less complex. Traditional setups may need more steps, involving routers and network configurations.
  • Speed Efficiency: WiFi Direct generally provides faster speeds, which leads to quicker prints. Traditional wireless connections may encounter more delays.
  • No Network Necessity: A wifi direct printer doesn’t require an internet connection or network access for printing, unlike traditional methods.
  • Ease of Mobility: WiFi Direct supports printing on the go. Traditional wireless printers are less convenient for mobile use due to network dependency.
  • Instant Connectivity: Devices can instantly link up for an immediate print job with WiFi Direct. Traditional methods may involve logging into a network and finding the printer.

In summary, a wifi direct printer is ideal for those needing quick, simple, and mobile printing solutions. Traditional wireless printing still works well within networked environments and is a dependable option, especially when print jobs come from multiple networked computers. Both have their place in the modern world, but WiFi Direct is paving the way for the future of hassle-free, on-demand printing.

wifi direct printer

The Future of Printing: Trends and Developments in Wireless Technology

The landscape of printing technology is constantly evolving. Emerging trends are shaping a future where wireless technology takes the forefront. Here are some key developments:

  • Increased Mobility: Portable printers are becoming more compact and efficient. Expect to see a rise in mobile-friendly options.
  • Improved Connectivity: Advances in WiFi Direct will likely enhance connection stability and range.
  • Eco-friendly Solutions: Wireless printers are moving toward sustainable practices, with eco-friendly designs and power-saving modes.
  • Cloud Printing: Integration with cloud services for printing from anywhere is becoming standard.
  • Smart Home Integration: Printers are adapting to be part of smart home ecosystems, responding to voice commands and automated workflows.
  • Enhanced Security: As threats evolve, so do security measures in wireless printing. Look for more advanced encryption and user authentication.
  • Innovative Interfaces: User interfaces on printers will improve for easier navigation and control from connected devices.

These advancements ensure that a wifi direct printer remains not only a current solution but a growing trend that will further simplify our printing experience in the years ahead.

Effortless HP Printer Setup on Windows 10

Introduction to HP Printer Setup on Windows 10

Setting up an HP printer on Windows 10 is a straightforward process. With a compatible set of hp printer drivers for Windows 10, you can get your printer up and running in no time. Whether you are dealing with documents, photos, or projects, a proper setup ensures your printer functions seamlessly with your PC.

Before diving into the setup, it’s crucial to understand why it’s important to choose the right drivers. HP printer drivers for Windows 10 are software components that enable communication between your printer and computer. They ensure that your print commands translate correctly and that the output is as expected. Installing the correct drivers will avoid many common issues such as printer malfunctions, poor print quality, or connectivity problems.

hp printers

This guide will walk you through choosing the right drivers, installing them, and connecting your HP printer to your Windows 10 computer. We’ll also cover troubleshooting steps for any issues that might arise during installation, and provide tips on keeping your HP printer drivers updated for optimal performance. Stay tuned to ensure your printing tasks are handled efficiently and effectively.

Choosing the Right HP Printer Drivers for Windows 10

Selecting the correct HP printer drivers for Windows 10 is essential. The right drivers make sure that your printer and PC communicate well. Here’s how to choose them correctly:

  • Check Printer Model: Before downloading, know your HP printer model. Each model has specific drivers.
  • Visit HP Support: Go to the official HP support website. It offers the latest drivers.
  • Operating System Compatibility: Make sure the drivers match your version of Windows 10. Compatibility is key.
  • Driver Types: HP offers full feature or basic drivers. Full feature drivers provide all functionalities.
  • Download from Trusted Sources: Always download drivers from reliable sources, like HP’s website, to avoid malware.
  • Read Reviews: Look at user reviews for the drivers. They can signal common issues or reliability.

Following these steps will help you to install the right HP printer drivers. This ensures smooth setup and operation. Remember to use hp printer drivers for Windows 10 that match your system. Proper drivers prevent many common printing problems. They also ensure your print jobs look their best. Keep your printer’s performance top-notch by choosing suitable drivers.

hp printer

Step-by-Step Guide for Installing HP Printer Drivers

Once you’ve selected the correct HP printer drivers for Windows 10, it’s time to install them. Follow these simple steps to ensure a smooth installation process:

  • Prepare for Installation: Ensure your HP printer is on and connected to your computer or network.
  • Download Drivers: Visit the HP support website and download the right drivers for your printer model.
  • Run Installation File: Open the downloaded file to begin installation. It usually has an ‘.exe’ extension.
  • Follow Prompts: The installation wizard will guide you. Follow the on-screen instructions. Choose the recommended installation options for the best results.
  • Connect Printer When Prompted: If the installer asks, connect your printer to your PC using the recommended connection method.
  • Complete Setup: Finish the installation process. The wizard will confirm when the drivers are installed.
  • Print Test Page: It’s wise to print a test page. This confirms if the setup is successful.
  • Register Product: If prompted, register your printer with HP for support and product updates.

By following these steps, you will have successfully installed the HP printer drivers for Windows 10. This will allow your printer and PC to work together well, ensuring smooth printing experiences. If you encounter any issues during installation, see the section on troubleshooting for guidance.

Connecting Your HP Printer to Your Windows 10 PC

Connecting your HP printer to a Windows 10 PC might involve a few steps. Here’s a quick guide to establish the connection efficiently:

  • Turn on Your Printer: Make sure your HP printer’s power button is on. It’s a simple but vital step.
  • Use the Right Cable: For wired printers, use the USB cable that came with it. Check it’s securely plugged into both the printer and PC.
  • Wireless Setup: If it’s a wireless model, use your PC’s Wi-Fi settings to find the printer. Then, connect to it.
  • Add Printer to Windows: Go to ‘Settings’ on your PC. Click ‘Devices’ and then ‘Printers & Scanners’. Hit ‘Add a printer or scanner’.
  • Choose Your Printer: Your HP printer should appear in the list. Select it and follow any further prompts.
  • Install Printer Software: Some printers need additional software. If yours does, Windows will suggest installing it.
  • Confirm Connection: Check that your printer shows up in ‘Printers & Scanners’. It’s now ready to use.

By following these steps, you can connect your HP printer to your Windows 10 PC with little trouble. Whether it’s wired or wireless, your printer should be ready to start tackling print jobs right away.

Troubleshooting Common HP Printer Installation Issues on Windows 10

Even with careful preparation, you may encounter issues when installing hp printer drivers for Windows 10. Let’s troubleshoot some common problems to get your printer running smoothly:

  • Printer Not Recognized: If your PC doesn’t recognize your printer, check the connections. Make sure cables are secure or Wi-Fi is connected. Restart both devices.
  • Driver Installation Fails: This problem may occur if the system blocks the installer. Check your antivirus settings and ensure the driver is from a trusted source.
  • Print Jobs Stuck in Queue: Clear the print queue. Then try printing again. Ensure the correct printer is set as the default.
  • Poor Print Quality: This could be due to incorrect driver settings. Reinstall the drivers and check for updates.
  • Printer Offline Error: Restart your printer and check the network settings. Ensure the printer is set to ‘Online’ in your PC’s settings.

If these steps don’t resolve your issue, visit the HP support site for more detailed help. Keep your HP printer drivers updated and consult your printer’s user manual for specific troubleshooting steps.

Updating Your HP Printer Drivers on Windows 10

Maintaining the latest HP printer drivers for Windows 10 is crucial for seamless printing. Here’s how to keep them up to date:

  • Check Driver Version: Look at your current driver version. Find this in your printer’s properties in the ‘Devices and Printers’ section.
  • Visit HP Support: Head to the HP support website regularly. They post updates and fixes for drivers.
  • Automated Tool: Use HP’s automated tool for updates. This tool checks and installs driver updates.
  • Manual Update: For manual updates, select your printer model at the HP site. Then, download the latest drivers.
  • Install Updated Driver: Run the downloaded driver file and follow the prompts to upgrade your existing drivers.
  • Restart Computer: After updating, restart your PC. This ensures all changes take effect properly.

Updating your HP printer drivers can resolve issues, improve performance, and unlock new features. It’s a step not to be skipped for optimal printing experiences.

printer

HP Printer Setup: Wired vs Wireless Connection

Choosing between a wired and wireless HP printer setup can shape your printing experience. Here’s what to consider:

  • Check Printer Capabilities: Some HP printers only support wired connections, while others are compatible with both.
  • Wired Connection Benefits: Wired setups are simple and reliable. They need a USB cable to connect your printer directly to your computer.
  • Wireless Connection Benefits: Wireless printers offer flexibility. You can print from anywhere in your Wi-Fi network range.
  • Setup Complexity: Wired setup is often plug-and-play. Wireless setup may require a few more steps to connect to Wi-Fi.
  • Connection Stability: Wired connections are stable. Wireless connections can vary based on network strength.
  • Mobility: A wireless printer can move freely without the need for proximity to your computer. Wired printers need to be near your computer.
  • Multiple Users: Wireless printers allow multiple users to connect easily. A wired printer connects to one PC at a time.

When choosing between wired and wireless hp printer drivers for Windows 10, think about what works best for your needs. If reliability and simple setup are your priorities, a wired connection might be the way to go. For convenience and sharing between many users, wireless is excellent. Always use the latest hp printer drivers for Windows 10 to ensure a smooth setup, regardless of wired or wireless connection.

Ensuring Optimal Functionality of Your HP Printer on Windows 10

To ensure your HP printer operates at its best on Windows 10, follow these tips:

  • Regularly Update Drivers: As discussed, keep your HP printer drivers for Windows 10 up to date. This helps fix bugs and improves performance.
  • Maintain Printer Hardware: Clean your printer’s exterior and interior parts. Follow the HP manual for safe cleaning practices. Dirt can affect print quality.
  • Check Ink or Toner: Monitor ink or toner levels often. Replace them when low to avoid poor print quality and other issues.
  • Use Recommended Paper: Stick to the type of paper HP recommends. Wrong paper can cause jams and affect print quality.
  • Set Printer as Default: Ensure your HP printer is the default printer on your PC. This avoids mix-ups when sending print jobs.
  • Run Troubleshooters: Use built-in Windows troubleshooters if you encounter problems. They can quickly identify and fix issues.
  • Monitor Printer Queue: Keep an eye on the printer queue. Remove stuck print jobs to prevent delays in printing.
  • Consider Printer Placement: Place your wireless printer within good range of your Wi-Fi router. This ensures a stable connection.
  • Restart Devices Regularly: Sometimes, simply restarting your PC and printer can solve minor connectivity issues.

By taking these steps, you can maintain optimum functionality of your HP printer with Windows 10. Smooth performance means less frustration and more efficient work or home office operations. Always use the right HP printer drivers for Windows 10, and you will maximize your printer’s capabilities.

Demystifying Regular Printer Paper Size for Your Office

Introduction to Printer Paper Size Standards

Navigating the world of printer paper sizes can be a puzzle. With various standards in place, it is important to know the right size for your needs. Whether you are printing a simple letter, a detailed contract, or a vivid poster, using the proper paper dimensions is crucial for a professional outcome. Printer paper sizes are based on established standards that govern dimensions and usage.

In North America, common sizes include the Letter, Legal, and Tabloid formats. Each has a specific role in day-to-day office tasks. International standards, however, follow the ISO 216, introducing the A-series, ranging from A4, the most widely used size globally, to both larger and smaller alternatives like A3 and A5.

Understanding these dimensions not only aids in creating high-quality prints but also ensures compatibility when dealing with international documents. This guide will outline the key sizes and their standards, helping you choose the right paper for every print job.

North American Paper Sizes Explained

Navigating North American printer paper sizes is critical for office efficiency. Three popular sizes dominate this region: Letter, Legal, and Tabloid. Each serves unique print needs and fits different content types. Selecting the correct size ensures professional-looking documents and smooth printer operation.

printer paper

Letter Size: The Everyday Printing Standard

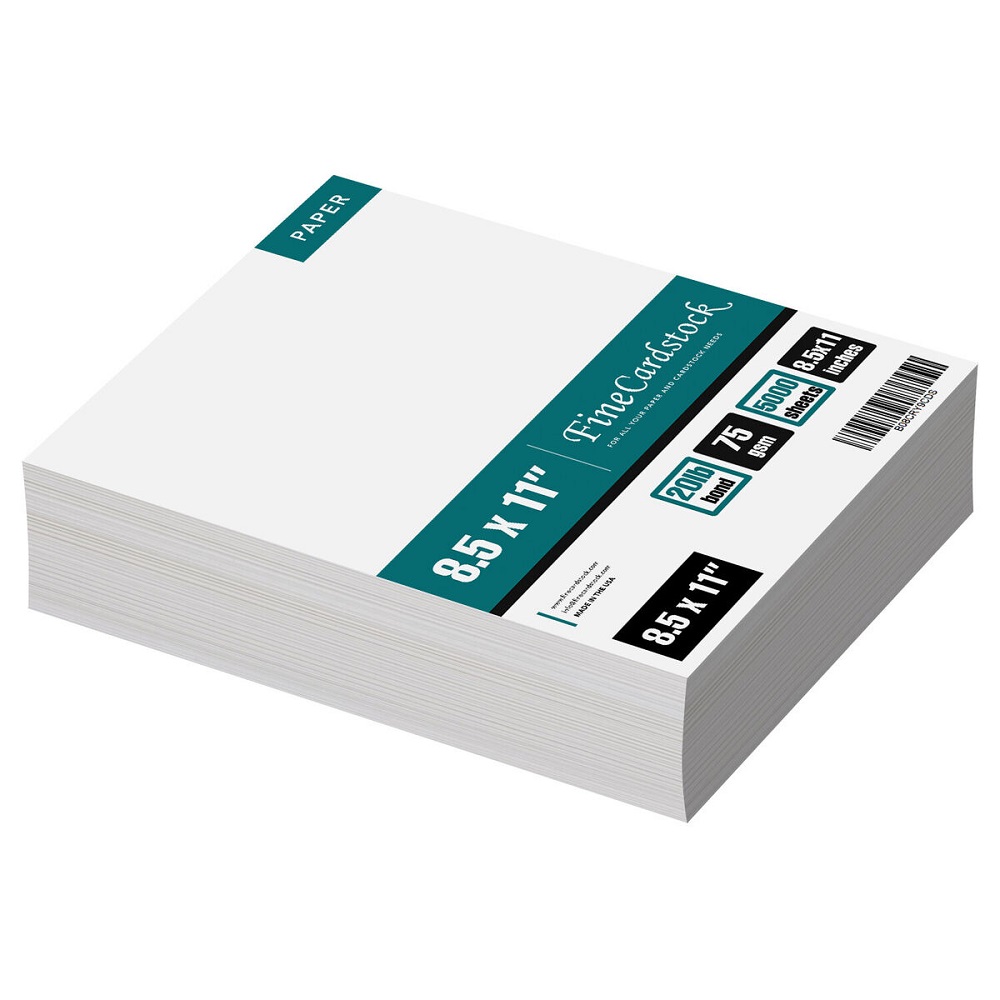
Letter size is the most common in North America, measuring 8.5 x 11 inches. It’s the default setting for many printers. Companies use it for daily print tasks like memos, emails, and forms. This size’s universality ensures ease of use and consistent compatibility.

Legal Size: Tailored for Detailed Documents

Legal size measures 8.5 x 14 inches, providing extra length for more content. It suits documents that need more space, such as contracts and legal filings. Professionals in legal fields often use this size for its ability to fit longer text blocks without shrinking font sizes.

Tabloid Size: Ideal for Larger Formats

Tabloid, or “Ledger” size is 11 x 17 inches. It’s perfect for larger visual materials like charts, tables, and layouts. Designers and marketers prefer tabloid for its space, fitting big images or multiple content sections. It’s less common but vital for impactful presentations.

International Paper Sizes Under ISO 216

While North America has its own set of paper standards, much of the world follows the ISO 216 system. This international framework defines the A Series sizes, which range from A0 to A10. This setup simplifies document exchange across countries, ensuring that important materials meet global size expectations.

The Prevalence of A4 in Global Use

A4 is a regular printer paper size widely accepted outside of North America, especially in Europe, Asia, and Australia. It measures 210 x 297 mm, making it slightly narrower and longer than the North American Letter size. A4 paper is the go-to choice for day-to-day printing tasks such as office communications, official reports, and academic papers. Its ubiquitous nature makes it an essential item for international businesses and academic institutions.

Larger and Smaller ISO Sizes: From A3 to A5

The A4 size might dominate, but other sizes in the ISO 216 A series also have their places. A3 paper, measuring 297 x 420 mm, offers a larger canvas for posters, architectural plans, and charts. Its use extends to education and professional presentations that demand a bigger display of information. On the smaller end, A5 paper, at 148 x 210 mm, serves well for notepads, booklets, and flyers. Known for ease of handling and distribution, these smaller formats cater to needs where portability and conciseness are key.

Historical Development of Paper Size Standards

Understanding the origins of printer paper size standards helps in making informed decisions.

Origination of ANSI and ISO Paper Size Systems

The ANSI system, used in the USA, started in the early 20th century. Businesses needed a standard system, which led to sizes like Letter and Legal. The ISO paper size system began in Germany in 1786. Georg Christoph Lichtenberg suggested the 1:√2 ratio for paper sizes. Later, the ISO system was officially formed in 1975.

The Global Adoption of ISO 216 and A-Series Sizes

Countries around the world adopted ISO 216 quickly. By 1977, about 88 nations were using the A Series sizes. These series made global document exchange simpler. A4 became the standard business paper globally, except in North America.

Printing Across Different Paper Size Systems

When dealing with documents internationally, it’s essential to understand the differences between North American and ISO paper size standards. These differences can cause formatting challenges when documents are shared or printed across different countries. In this section, we’ll explore how to overcome such challenges.

Handling Size Discrepancies in Document Formats

Ordinarily, documents are created with specific paper sizes in mind. This ensures correct formatting and professional appearance. However, when a document formatted for one paper size system (say, ANSI Letter) is sent to a region using another system (like ISO A4), the content may not align properly when printed.

This can result in cut-off text, awkward margins, or empty spaces on the printed page. The main contrast lies between the North American sizes—Letter, Legal, and Tabloid—and the corresponding sizes in the ISO 216 series, mainly A4, A3, and A5. Since these sizes aren’t identical, document transfer between the two systems requires special attention.

printer paper

Tips for Adjusting Document Sizes for Printing

To ensure that your documents print correctly regardless of the paper size system, here are some practical tips:

  • Check the Paper Size Settings: Before printing, always check the print settings to ensure the document’s size matches the available paper size. This is usually done in the ‘Page Setup’ section of your word processor or print dialog.
  • Scale the Document: If you must print a document designed for a different paper size system, adjust the scaling. As a guideline, an A4 document can be scaled down to 94% to fit on Letter paper, while a Letter document might be scaled to 97% to print on A4.
  • Use Digital Formats Wisely: For critical documents that require exact formatting, share them in digital format (PDF, for example) to preserve the layout across different systems.
  • Adjust the Layout: If necessary, edit the document to reposition elements like text and images, ensuring nothing is lost or misaligned on a different paper size.

By applying these strategies, you can effectively manage document formatting across various regular printer paper size systems, ensuring a smooth printing experience and maintaining the document’s professional look.

Practical Usage of Various Paper Sizes

Selecting the Right Paper for the Task

Choosing the correct paper size for printing is key to professionalism and clarity. Start by thinking about the document’s purpose. Use Letter size for most US office prints, like reports and memos. Pick Legal size when you have longer texts, such as contracts. For big graphics or posters, Tabloid or A3 sizes work best.

Always look at your printer’s abilities too. Check if it can handle the size you need, especially for bigger papers. Some printers need special trays for sizes like Tabloid or A3. Remember, the right tray and paper handling will prevent printer jams and keep your printer working well.

Don’t forget to scale your document for different paper sizes. Adjust your digital document to fit the paper size you have. This way, your prints will come out looking right.

paper

Specialized Non-Standard Paper Sizes

There are also non-standard sizes for specific needs. Half-Letter is great for smaller brochures. Executive size suits personal stationery. Government Letter size is often chosen for official forms.

For high-quality images or large prints, go for bigger paper sizes like Super B or even larger. These sizes fit detailed artwork and posters well.

Making use of the right paper size shows attention to detail. It makes sure your documents print correctly and look their best.

Conclusion: Making Informed Paper Choices for Professional Results

Choosing the right regular printer paper size is vital for polished prints. Letter, Legal, and Tabloid are must-knows in North America. A4 is key globally. Knowing these helps you print with confidence and maintain your image. So, always match the document size and printer abilities before printing. For special jobs, pick non-standard sizes like Half-Letter or Executive. Going big? Use Super B for crisp images. Select wisely for success.

Toybox 3D Printer Review: A Game-Changer in Home Printing

Introduction

The Toybox 3D Printer has garnered attention in the rapidly evolving world of 3D printing. With its sleek design and user-friendly interface, Toybox is competing with traditional 3D printers which often cater to professionals or tech-savvy enthusiasts. Families, schools, and hobbyists are increasingly drawn to its appeal and functionality. This review will break down the various aspects of the Toybox 3D Printer. We will explore its design, usability, features, and performance.

Design and Build Quality

Aesthetics and Compact Size

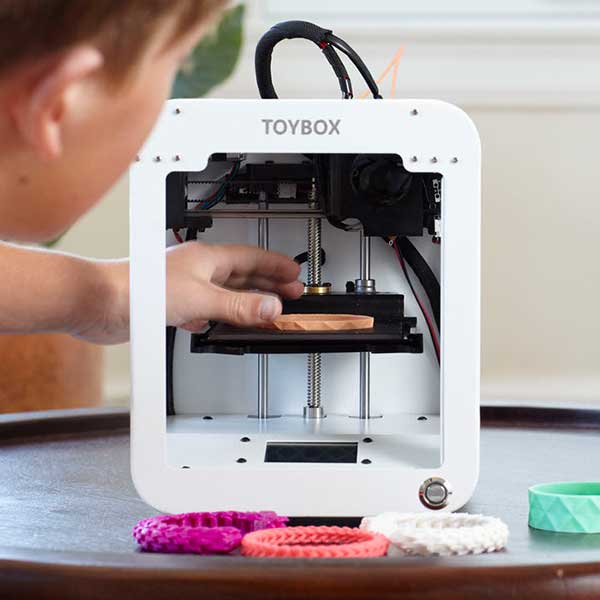
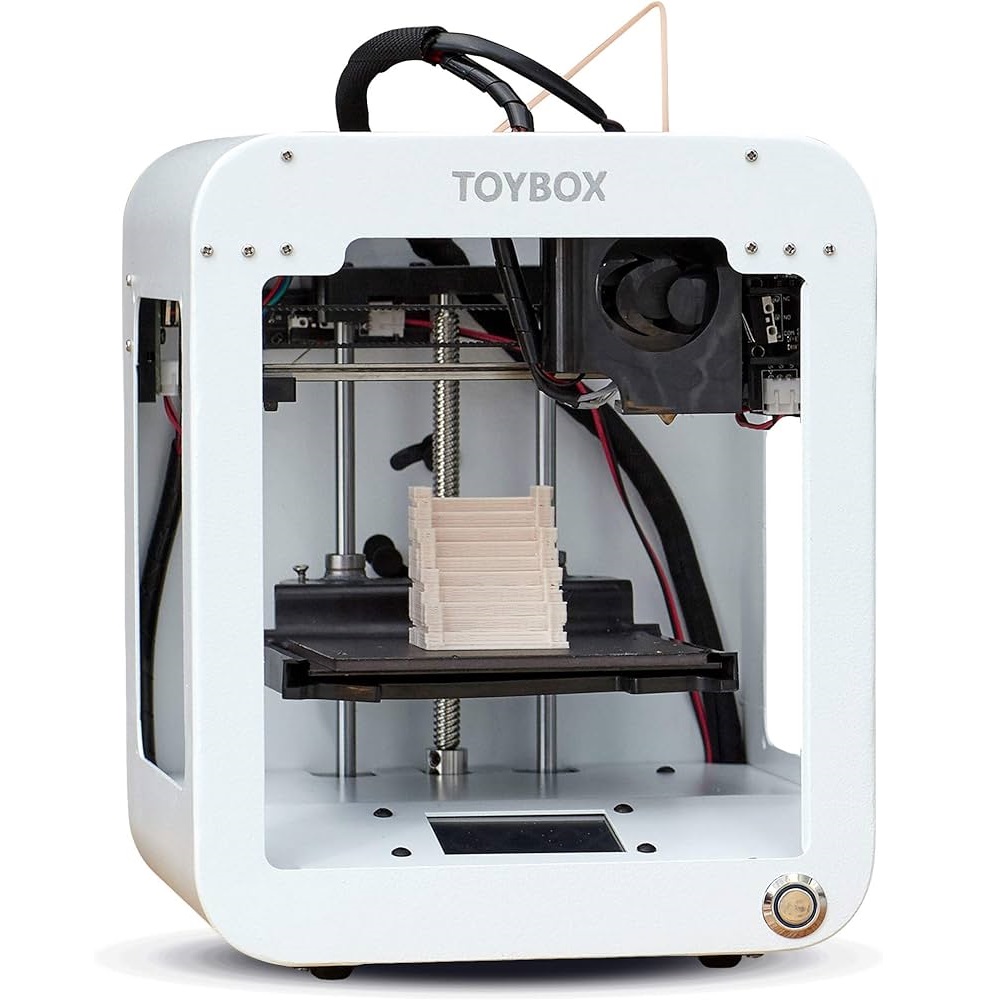
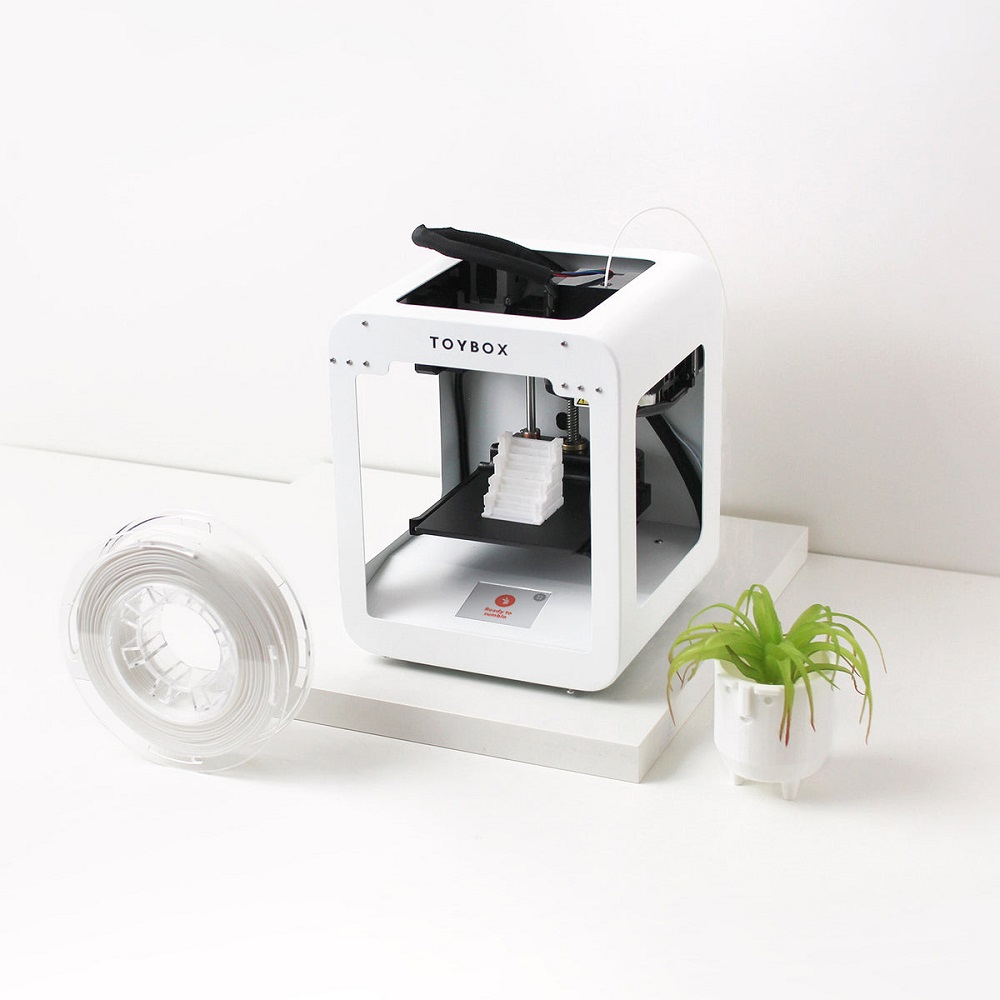
The first thing people notice about the Toybox 3D Printer is its design. The Toybox sports a colorful, playful look that makes it a perfect fit for a family or a classroom. It comes in vibrant colors such as blue, pink, and green. This playful aesthetic makes it less intimidating for beginners. The compact size allows easy placement on any desk, making it an ideal choice for home users.

Many traditional 3D printers are bulky. They often require a dedicated space. In contrast, Toybox easily fits into any small area. This compact design allows kids and adults alike to access it without needing extensive setup. The lightweight structure also makes it easy to move around. You can easily reposition it if needed.

3d printer

Durable Materials

The materials used to build the Toybox 3D Printer also deserve attention. The outer shell is made of sturdy plastic. This ensures durability while keeping the printer lightweight. This is a crucial feature for families with kids. A robust build minimizes the risk of damage from curious hands.

The printing bed is designed to ensure easy adhesion of materials. This helps prevent prints from warping or detaching during the printing process. Such attention to detail in the build quality provides confidence that this printer can withstand regular use. Users can feel secure knowing they have a reliable device.

Ease of Use

User-Friendly Interface

One of the most remarkable features of the Toybox 3D Printer is its user-friendly interface. Beginners often struggle with complicated software and controls. However, Toybox simplifies the entire process. You operate it through an intuitive touchscreen display. This makes navigation easy for users of all ages.

The interface guides users step by step. First-time users can quickly learn how to start printing. Everything you need is available within just a few taps. You can access settings, monitor prints, and even choose designs all from the touch screen.

Hassle-Free Setup

Setting up the Toybox 3D Printer is quick and straightforward. You unpack it, plug it in, and turn it on. The printer provides prompts on the screen to guide you through the initial setup. There are no complicated installations or configurations to worry about.

Toybox prides itself on making 3D printing accessible to everyone. Families can quickly get it started without needing a tech expert in the house. Children, with some adult guidance, can easily grasp the setup process. This ease of use eliminates common barriers faced by beginners in the 3D printing world.

Printing Features

Large Library of Designs

Another standout feature of the Toybox 3D Printer is its extensive library of pre-made designs. Toybox offers a platform that users can access via an app. This app hosts thousands of designs available for download. Users can browse categories like toys, home décor, gadgets, and more.

The vast library allows users to find inspiration easily. If you want to print a toy for a birthday or a unique decoration for a party, you’re covered. This variety encourages creativity. Families can work together to select designs, ensuring everyone feels included.

Customization Options

The Toybox 3D Printer also supports customization. Users can take an existing design and modify it to suit their preferences. This feature allows for a personal touch. Kids can learn about design principles while also exercising their creativity. They can create something unique that reflects their personality or needs.

Toybox also enables a community-based experience. Users can share their designs and print files with others. This expands the creative possibilities exponentially. A community of creation emerges, with sharing and collaboration at its heart. This enhances the entire experience of using the Toybox Printer.

Printing Performance

Print Quality

When it comes to performance, the Toybox 3D Printer does not disappoint. The print quality is impressive for its price range. It can produce intricate designs and detailed models that often surpass expectations. Many users report that the prints come out smooth and well-defined.

The Toybox uses a unique internal technology to ensure consistent output. This minimizes the risk of errors during the printing process. Problems like under-extrusion or layer misalignment are uncommon with this printer. Newcomers can focus on enjoying the process, rather than constantly troubleshooting issues.

Speed and Efficiency

In addition to quality, speed is crucial in 3D printing. The Toybox 3D Printer is relatively fast compared to its competitors. It can produce a standard print in a reasonable time. Users won’t have to wait hours for a simple item.

This efficiency is especially valuable for educational settings. Teachers can use the printer to create lesson materials quickly. Students can see their designs brought to life in a timely manner. This immediate gratification enhances the learning experience.

toybox 3d printer

Maintenance and Support

Minimal Maintenance Needs

One significant advantage of the Toybox 3D Printer is its low maintenance requirements. Many 3D printers need regular upkeep to function optimally. However, Toybox reduces this burden. Most users find that they can go weeks or even months without facing significant issues.

The design minimizes the need for frequent cleaning or replacements. Unlike some traditional printers, Toybox doesn’t require complicated recalibrations. This makes it an ideal choice for families and schools. Users can focus on printing rather than constant maintenance.

Excellent Customer Support

If users encounter issues, Toybox provides robust customer support. The company offers a responsive help center that can assist with a variety of questions. From setup to troubleshooting, assistance is readily available.

Additionally, Toybox has an active online community. Users can ask questions and share experiences, fostering a strong network of support. Such resources are invaluable for beginners. They can enhance learning and ensure users get the most out of their Toybox experience.

Conclusion

A Perfect Fit for Families and Beginners

In summary, the Toybox 3D Printer is a commendable choice for families and beginners. The thoughtful design, ease of use, and robust features make it stand out in a crowded market. Its playful appearance takes away some of the intimidation often associated with 3D printing.

The extensive library of designs, coupled with customization options, encourages creativity. This printer allows families to engage together in a productive and fun activity. Creativity can flourish within the walls of their own home.

toybox 3d printer

A Bright Future for Toybox

As 3D printing technology evolves, the Toybox 3D Printer remains a relevant contender. Its user-centric approach positions it well for a bright future. The combination of quality, efficiency, and support ensures that parents, educators, and children alike can reap the benefits.

Choosing the Toybox 3D Printer is an investment in creativity and innovation. It’s not just about printing; it’s about exploring, learning, and enjoying the journey. Whether you’re a beginner or looking for a family-friendly option, the Toybox is worth considering. With its remarkable features and capabilities, it’s sure to inspire the next generation of creators.

In today’s digital age, having access to a printer that empowers creativity and education is essential. The Toybox 3D Printer checks all the boxes and more. Your adventure in 3D printing can begin with the simple push of a button and a little imagination.

Troubleshooting Your HP Printer: Why It Won’t Print

Having an HP printer that won’t print can be incredibly frustrating. Whether you rely on it for work documents, school projects, or important photos, a malfunctioning printer can throw a wrench in your plans. Before jumping to conclusions, it is important to understand the common issues associated with HP printers and how to resolve them. This article will walk you through various troubleshooting steps, possible causes for your printer troubles, and additional tips to ensure your HP printer functions optimally.

Common Printer Issues

Connection Problems

If your HP printer won’t print, one major reason could be a connection issue. Printers can connect to your computer through various methods, including USB, Wi-Fi, or Bluetooth. Each connection type has its own set of challenges. For USB connections, ensure that the cable is securely plugged into both the printer and the computer. Try different USB ports in case the current one is malfunctioning.

For Wi-Fi connections, check if both your printer and computer are connected to the same network. Sometimes, the printer may inadvertently connect to a guest network or a different one altogether. If your printer has a control panel, look for a wireless settings option to confirm the connection. You can also check your router’s settings to ensure the printer is connected properly.

hp printer

If your printer uses Bluetooth, ensure that Bluetooth is enabled on both devices. Navigate to the settings menu on your computer and confirm that your device is recognizing the printer. If not, you may need to re-pair the devices.

Ink or Toner Issues

Another common reason your HP printer may not print is related to ink or toner. Always check the ink or toner levels before troubleshooting further. Most HP printers have a feature that displays ink levels directly on the control panel. If levels are low, replace the cartridges as needed. Sometimes, installed cartridges may be incompatible, even if they physically fit. Ensure that you have the correct cartridges for your specific printer model.

Clogged nozzles can also be a problem, especially for inkjet printers. If the ink cartridges have been inactive for too long, the nozzles could dry out. Perform a nozzle check or a cleaning cycle via the printer’s maintenance options. This process can unclog the nozzles and restore print functionality. Be aware that running a cleaning cycle uses ink, so if you suspect clogged nozzles, act quickly.

Printer Queue Problems

A printer queue can often cause distractions and issues when printing. Sometimes, documents can get stuck in the queue, leading the printer to assume it is busy. To resolve this, go to your printer settings on your computer. Check the print queue for any stalled jobs and delete them if necessary. Once cleared, attempt to print again.

It’s also beneficial to reboot both your computer and printer after clearing the queue. This helps reset any temporary issues that could be preventing the printer from functioning properly. After a restart, try printing a test page to see if the issue persists.

Software and Driver Issues

Outdated Drivers

Often, printer issues can trace back to software problems, particularly outdated drivers. Drivers help your operating system communicate with your printer. An outdated or corrupt driver can lead to printing failures. Visit the official HP website to download the latest drivers for your specific printer model.

After installation, restart your computer to implement the changes. Test print to determine if the issue is resolved. If the problem persists, consider uninstalling the printer software completely and then reinstalling it. This can help rectify any software glitches that may be affecting performance.

Operating System Compatibility

Ensure that your OS is compatible with your HP printer. Updates to your operating system can sometimes lead to compatibility issues. If you’ve recently updated your OS and began experiencing printing problems, check to see if HP has released any software updates. Alternatively, you may need to roll back your OS update if it is causing crippling printer issues.

Sometimes, downgrading software can be risky. Be cautious and back up your data before making any significant changes to your system. In the event of reinstalling drivers, make sure to secure any important documents.

Incorrect Printer Settings

Incorrect printer settings can lead to a myriad of issues. Ensure your HP printer is selected as the default printer on your computer. If multiple printers are installed, it’s easy to select the wrong one. In addition, check the print settings to verify that paper size, orientation, and quality are suitable for your document. Mismatched settings can cause printing errors.

Access your printer properties via the control panel. Under the “Printers & Scanners” section, select your HP printer and review the settings. Make adjustments as needed and save the changes. Afterward, try printing again to see if the problem is resolved.

Hardware Issues

Paper Jams

Paper jams are a frequent issue that can prevent any printing action. If your printer has a paper jam, it will often display an error message. Inspect the printer for any jams, whether in the input tray or within the internal mechanisms. Remove any jammed paper carefully, ensuring that no torn pieces are left inside.

After clearing the jam, restart the printer. Also, ensure you’re using the right type and size of paper recommended for your printer. Sometimes, using thicker paper or paper that’s too small can cause jams. Check your user manual for specific guidelines on paper types and sizes.

Mechanical Malfunctions

Mechanical issues can also interfere with your printer’s ability to function. This can include issues with the print head, rollers, or internal gears. Listen for unusual noises when you attempt to print. These can be telltale signs of mechanical problems. If you suspect a significant issue, consult with HP support or a qualified technician.

It’s essential to handle any mechanical adjustments with care. If you’re unsure how to address a mechanical issue, it’s often better to defer to a professional. DIY repairs can result in further damage if not performed correctly.

Power Supply Issues

If your printer won’t power on, the issue might lie with the power supply. First, ensure that the power cord is securely connected. If you have another power outlet available, test that to rule out outlet problems. Look at the printer’s power indicator. If it’s not illuminated, the issue could also be the power button itself.

If you’ve tested multiple outlets and the printer still fails to power on, it may require professional attention. Sometimes, issues with internal batteries or transformers can lead to power problems. Always take proper measures to secure your printer before attempting any repairs.

hp printer

Advanced Troubleshooting Steps

Factory Reset

When all else fails, a factory reset may be necessary. This will restore all settings to their original condition. Navigate to the printer’s settings menu and look for an option for a factory reset. Keep in mind that this action will erase your customized settings, so consider this a last resort.

Before performing a factory reset, document your current settings if they are valuable. After completing the reset, set up your printer again, ensuring all connections and settings align with your needs.

HP Smart App

The HP Smart App can simplify various printing tasks and assist with troubleshooting. This app helps manage your printer settings and can often diagnose issues automatically. Download it from your device’s app store and follow the setup instructions.

Using the HP Smart App, you can check ink levels, perform maintenance tasks, and even receive notifications about issues. The app’s troubleshooting feature can guide you through resolving issues step-by-step.

Consult the HP Support Community

The HP Support Community is an invaluable resource for troubleshooting printer problems. Here, users share their experiences and solutions for common issues. Take time to explore discussions related to your specific printer model. You may find step-by-step guides or tips tailored to your particular situation.

Besides reading through existing posts, you can ask your own questions. The community often has seasoned experts who can provide insights or proven solutions. Sometimes, a quick search can save hours of troubleshooting.

Seek Professional Assistance

If you’re still unable to resolve your printer issues after extensive troubleshooting, it may be time to call in the professionals. HP offers customer support services, and local technicians may also handle repairs. Before seeking professional help, gather all relevant information about your printer, including the model number and recent symptoms. This data can assist technicians in diagnosing the problem.

Be cautious about using third-party service providers, as they may not have the expertise necessary for HP products. Using unauthorized services can also void your warranty. Always check the terms of your warranty before seeking repairs.

Maintaining Your HP Printer

Regular Maintenance

To prevent issues in the future, regular maintenance is key. Dust and debris can accumulate within your printer over time, potentially leading to problems. Keep the exterior clean and open the printer to gently vacuum or wipe out any accumulated dust.

It’s also essential to use high-quality paper and ink. Low-quality materials can lead to poor print quality and increase the risk of jams. Regularly check your ink and toner levels, replacing them as needed before they run empty.
hp printer

Update Software Regularly

Keep your printer’s drivers and firmware up to date. Setting a reminder to check for updates every few months can help ensure optimal performance. Automate this process whenever possible by allowing updates to install automatically.
Ensure your operating system is also up to date. As manufacturers continually release updates to improve performance and security, staying current can help prevent complications and issues.

Educate Yourself

Understanding your HP printer will enable you to navigate issues more effectively. Read the user manual thoroughly and familiarize yourself with its features. It’s also necessary to watch tutorial videos online. Many resources are available to help you understand specific functions or troubleshooting tips.

The more you know about your printer’s specifications, settings, and maintenance procedures, the less likely you will face printing issues in the future. Knowledge can empower you to deal with small concerns before they escalate into more complex problems.

Conclusion

In conclusion, troubleshooting an HP printer that won’t print requires a systematic approach. Understand the common issues and check connectivity, ink levels, and printer settings first. Update your drivers regularly and ensure compatibility with your operating system. Mechanical and hardware issues may also arise, and being observant will help identify them quickly.

If you exhaust all troubleshooting methods, don’t hesitate to reach out to HP’s support services or consult the HP Support Community. Regular maintenance and education about your printer can significantly reduce future issues. By following these steps, you can improve your printer’s performance and ensure it remains a reliable tool for your needs.

Understanding WPS PIN for HP Printers

Introduction

Connecting your HP printer to a wireless network can seem daunting. Fortunately, the Wi-Fi Protected Setup (WPS) makes this process straightforward. WPS simplifies the connection between devices on a wireless network, enabling secure communication. The WPS PIN method is one of the ways to connect your HP printer to Wi-Fi. This article dives deep into the WPS PIN method, explaining its significance, functionality, and how to use it.

hp printer

What is WPS?

WPS, or Wi-Fi Protected Setup, is a network security standard. It was created to make wireless networks easier to connect. WPS uses a PIN or a push-button method. You can connect devices like printers, routers, and computers quickly. This is particularly useful in homes or offices where many devices are connected.

When using WPS, you avoid typing long passwords. This simplifies the process. WPS also encrypts the data exchanged between the devices. This means that your data is safer during transmission. Devices that support WPS can communicate easily.

How WPS Works

WPS functions robustly under two primary methods: the Push Button Connect and the WPS PIN method. The Push Button Connect requires you to press a button on the router and the device you want to connect, such as your HP printer. This method is quick and user-friendly.

On the other hand, the WPS PIN method requires entering a unique PIN. This PIN is typically found either on the printer’s LCD screen or in the printer’s network settings. You input this PIN on your router’s setup page to establish a connection. This method is just as secure and effective, but requires a little more interaction.

Why Use WPS with HP Printers?

Using WPS with your HP printer can drastically improve convenience. Many users struggle with manually entering long Wi-Fi passwords. The WPS PIN eliminates this hassle and offers a quicker method to establish a connection.

Additionally, WPS connections maintain a high security level. They utilize WPA or WPA2 security standards. This ensures your printer remains secure on your network. This is especially crucial if you print sensitive documents or handle confidential material.

Connecting with WPS also minimizes connectivity issues. Traditional methods sometimes lead to failed connections due to incorrect passwords. WPS simplifies this process, thereby reducing the potential for user error.

hp printer

Benefits of Using WPS with HP Printers

  1. Ease of Use: WPS makes connecting devices easy for anyone, regardless of tech-savviness. This is particularly beneficial for non-technical users.
  2. Speed: Setting up your printer over WPS is quick. Most connections can be established within minutes.
  3. Security: WPS connections use strong encryption methods. This ensures that your network remains secure.
  4. Compatibility: Most modern HP printers are compatible with WPS. This makes it accessible for a wide range of users.

Step-by-Step Guide to Using WPS PIN with HP Printers

Connecting your HP printer using the WPS PIN method is a simple process. Follow this step-by-step guide to avoid common pitfalls.

Step 1: Locate the WPS PIN

First, find the WPS PIN for your HP printer. You usually can find it on its control panel. Look under the “Network” or “Wireless” settings. Some printers will display the PIN for you, while others may require you to print a network configuration page.

Step 2: Access Your Router’s Settings

Next, open a web browser on your computer. Type your router’s IP address into the address bar. Most routers have the IP address printed on the back or in the manual.

After entering the IP address, sign in to your router’s configuration page. This usually requires a username and password. If you’ve never changed these, they are often set to default values provided in the router’s manual.

Step 3: Navigate to WPS Settings

Once logged in, you need to locate the WPS settings. This may vary by router model, so look for tabs labeled “Wireless” or “WPS”. When you find the WPS settings, choose the option to connect a device. This will allow you to enter the WPS PIN.

Step 4: Enter the WPS PIN

Now, enter the WPS PIN from your HP printer into the router’s settings page. Double-check to ensure you typed it accurately. After inputting the PIN, save the settings. Your router will begin the process of connecting to your HP printer.

Step 5: Verification

After a few moments, your HP printer should connect to the wireless network. To verify this, print a network configuration sheet from your printer. This will show whether it’s successfully connected to the Wi-Fi.

In case of failures, double-check your PIN entry. You may also need to restart the router and printer before trying again.

Troubleshooting WPS PIN Connection Issues

While the WPS PIN method is straightforward, issues can sometimes arise. Knowing how to troubleshoot these problems can save you time and frustration.

Issue 1: Incorrect WPS PIN

One common issue is entering the WPS PIN incorrectly. Always verify that you have the right PIN. If your printer displays a new PIN upon each attempt, ensure you use the latest one.

Issue 2: Printer Not Detecting the Network

Sometimes, the printer may not detect the network. This can occur if the router is turned off or if you are too far away from it. Check the router status first. Ensure your printer is within range of the router’s Wi-Fi signal.

hp printer

Issue 3: Router Compatibility

Not all routers may support WPS. If you encounter a connection issue, check your router’s specifications. If WPS is not supported, you may need to connect the printer using another method, like entering the Wi-Fi password manually.

Issue 4: Firmware Updates

Outdated firmware can also cause connection problems. Keeping your printer’s firmware up to date is vital. Check the HP website for any updates. Follow the instructions provided for updating your printer’s software.

Conclusion: The Ease of Connecting with WPS PIN

The WPS PIN method is an efficient and secure way to connect your HP printer to a wireless network. With the WPS system, you avoid long passwords. You also enjoy a high level of security during the connection process.

Whether you are in a home office or a business setting, WPS makes life easier. Following clear, step-by-step instructions helps you avoid common mistakes. This method can save time and effort, allowing you to focus on your printing needs.

As technology advances, more devices will likely adopt WPS compatibility. This ensures seamless connectivity in an ever-expanding digital landscape. Embracing this technology now can set you up for a smoother digital experience in the future.

Frequently Asked Questions (FAQ) About WPS PIN for HP Printers

What happens if my HP printer does not support WPS?

If your printer doesn’t support WPS, you can still connect it manually. Use the printer’s control panel to input your Wi-Fi network’s name and password.

Is WPS secure?

Yes, WPS is designed to be secure. It uses WPA and WPA2 encryption standards, which protect your data.

Can I use WPS to connect multiple devices?

Yes, WPS can connect multiple devices. However, each connection may require a separate process.

What if my WPS connection keeps failing?

If your WPS connection fails repeatedly, check your router’s settings. You may need to restart both the printer and the router. Make sure the WPS feature is enabled on your router.

In conclusion, understanding and utilizing the WPS PIN for your HP printer can simplify your connectivity process. With high security and user-friendliness, it stands out as a great solution for modern printers.

How to Add a Printer to Your iPad: A Comprehensive Guide

Adding a printer to your iPad can enhance your productivity. Whether you’re printing documents, photos, or presentations, it helps streamline your workflow. This article provides clear, step-by-step instructions on how to connect and use a printer with your iPad. We will also discuss different printing options and troubleshoot common issues.

Understanding AirPrint

What is AirPrint?

AirPrint is an Apple feature that allows iPad users to print wirelessly to AirPrint-enabled printers. This technology simplifies printing. There’s no need for additional software. Most modern printers support AirPrint, making it accessible and easy. Users just need to be connected to the same Wi-Fi network as the printer.

This technology was introduced in 2010. Since then, it has gained popularity among iOS users. It allows for quick and efficient printing with minimal setup. You can print documents directly from your iPad in just a few taps. It also supports high-quality prints, which is essential for both home and office environments.

printer to ipad

Benefits of AirPrint

Using AirPrint has several advantages. First, it eliminates the need for physical cables. You can print from anywhere within your Wi-Fi range. This freedom makes it ideal for mobile work environments.

Second, AirPrint supports a variety of file types, including PDFs and images. This flexibility is advantageous for diverse printing needs. Users can print whatever they need without worrying about file compatibility.

In addition to convenience, AirPrint provides high-quality prints. It supports color printing and often delivers sharp text and vibrant images. This quality makes it suitable for both personal and professional use.

Lastly, setup is simple and straightforward. Usually, you just need to select the printer from the print options menu. The lack of complicated drivers or configurations saves time. This ease of use is a significant selling point for many users.

Preparing Your Printer

Checking Compatibility

Before connecting your printer to your iPad, make sure it supports AirPrint. Most newer models have this feature, but older printers may not. To check compatibility, consult your printer’s manual or look for an AirPrint logo. You can also search the manufacturer’s website. Not every printer is AirPrint-enabled, so this step saves time and frustration.

If your printer is not AirPrint-compatible, don’t worry. You still have alternatives. You can use third-party apps or print via a computer. However, using AirPrint is the most convenient option.

Setting Up the Printer

Once you’ve confirmed compatibility, the next step is setting up the printer. Ensure the printer is connected to the same Wi-Fi network as your iPad. A stable internet connection is essential for reliable printing. If you’re unsure about your printer’s setup, refer to the user manual. It often provides detailed instructions on connecting to Wi-Fi.

After connecting the printer to Wi-Fi, print a test page from the printer. This ensures that the printer is functioning properly. If the test page prints without issues, you are ready to connect your iPad. Following these initial setup steps can prevent problems later on.

Connecting Your iPad to the Printer

Accessing Print Options

With your printer ready, the next step is connecting your iPad. Open the app from which you want to print. This could be Notes, Photos, or another app that supports printing. To find the print option, look for the share icon, which typically resembles a box with an arrow pointing upward.

After tapping the share icon, scroll down until you see the “Print” option. Tap on this, and the printing menu will appear. The interface is user-friendly, making it easy to understand even for beginners.

printer to ipad

Selecting Your Printer

Once you’re in the print menu, you’ll see an option to select a printer. Tap on it, and your iPad will start searching for nearby printers. If your AirPrint-compatible printer is on the same network, it should appear in the list of available printers. Select your printer by tapping its name.

If your printer doesn’t appear, make sure it’s turned on and connected to the Wi-Fi network. Auto-discovery works best when the printer is actively connected. If you still have issues, restart both your iPad and the printer. Sometimes, a fresh start resolves connectivity problems.

Customizing Print Settings

After selecting your printer, you can customize your print settings. You will see options to choose the number of copies, color settings, and paper size. Adjust these settings according to your needs. If you’re printing documents, you might want black and white for clarity. However, for photos, you’ll likely want to select color printing.

Always take a moment to review these options. Proper settings can enhance the quality of your print. They can also prevent misunderstandings later. For example, printing double-sided can save paper. It’s crucial to be mindful of these small details.

Printing from Your iPad

Initiating the Print Job

Once you’ve customized your settings, it’s time to print. Click the “Print” button, usually located at the top right corner of the print menu. The iPad will process the print job and send it to your printer. You should receive a confirmation on your iPad once the document has been sent.

It’s helpful to monitor the printer during this time. If print jobs are stacking up, you may want to cancel the current job or adjust your settings. Keeping everything organized ensures a smooth printing experience.

Reviewing the Print Queue

Sometimes, print jobs can get lost or delayed. If you’re experiencing delays, check the print queue on your iPad. This option is available in the Printer Options section. You can see the status of your print jobs there. It’ll show you if any jobs are pending or stuck.

If you notice complications, you have several options. You can cancel the job and try again. Doing this can resolve common issues with printing. If problems persist, restarting the printer or the iPad often helps.

Troubleshooting Printing Issues

Despite the convenience of AirPrint, users may encounter issues. If your printer is not responding, first ensure both devices are on the same Wi-Fi network. Check if the printer is connected to power and has enough ink and paper.

If everything seems fine but the printer still doesn’t respond, try resetting the network connection. Sometimes, network interruptions can disrupt printing. Restarting the printer can also reset its internal settings. This action may resolve related connectivity issues.

Alternative Printing Methods

Third-Party Printing Apps

If your printer is not AirPrint-compatible, you can consider third-party apps. Several reliable apps are available on the App Store that provides printing solutions. These apps often bridge the gap between your iPad and printer. They may require additional setup but can effectively enable printing from your device.

Some popular options include Printer Pro and PrintCentral. These apps usually support various printer brands. After downloading, follow the prompts to connect your printer. Typically, you’ll need to set up a connection over Wi-Fi or Bluetooth. This process can be a bit more complex than AirPrint but is often worth it.

printer to ipad

USB Printing Options

Another alternative is USB printing. However, this method requires additional hardware. You would need a USB adapter compatible with your iPad. This connection is generally more stable but limits mobility. It’s ideal for printing larger jobs that require reliability.

To use USB printing, connect your printer and iPad using the USB adapter. Then, you may need to adjust settings on the printer or iPad. Look for an option to enable USB printing within your printer’s settings.

Using a Computer as a Go-Between

If all else fails, you can also print via a computer. This method requires you to send documents from your iPad to your computer and then print from there. You can use cloud services like Dropbox, Google Drive, or email to transfer files.

While this method works, it’s often less convenient than AirPrint. It also takes more time. Most users prefer to find an AirPrint solution or other direct methods.

Conclusion

Adding a printer to your iPad is a straightforward process. Whether you use AirPrint or one of the alternative methods, printing becomes easy. The convenience of wireless connectivity ensures that you can print from anywhere.

Be sure to keep your printer updated for the best performance. Regularly check the settings on both your iPad and printer to avoid any issues. If you experience problems, use the troubleshooting techniques discussed earlier. Always ensure your devices are compatible and connected to the same network.

In summary, the ability to print from an iPad enhances overall productivity. It offers flexibility and efficiency. Whether at home or in the office, quick access to printing resources is crucial. With this guide, you should feel confident in adding a printer to your iPad and can enjoy the seamless printing experience moving forward.

« Older posts Newer posts »