Common Causes of HP Printer Issues
When facing an issue where your HP printer won’t print, identifying the root cause is crucial. Here are common triggers:
- Outdated or Missing Printer Drivers: Just like any other software, printers need up-to-date drivers to function properly. An outdated driver can lead to communication issues between your computer and printer.
- Faulty Connections: Sometimes the problem is as simple as a loose cable. Whether it’s the power cable or the connection to your computer, make sure everything is securely in place.
- Incorrect Configuration: Your printer may face issues if the settings on your computer aren’t configured correctly for the device.
- Hardware Malfunctions: From time to time, the printer itself may encounter a hardware issue, such as a problem with the ink cartridge or internal mechanics.
Each of these causes has its own set of remedies which we will explore further in the sections below. Whether it’s updating drivers, checking connections, or cleaning hardware, addressing these common causes can restore your HP printer’s functionality.
Checking Printer Status and Resolving Connectivity Problems
When your HP printer won’t print, it’s crucial to start by checking its status. Is the printer turned on and properly connected to both power and your computer? A simple oversight here is a common issue. Ensure that all cords are secure and not damaged. If everything is plugged in but the printer is offline, try turning it on again or rebooting it.
Next, resolve any connectivity problems. This might mean checking both hardware connections and software settings. For USB-connected printers, confirm the cable is not only plugged into both the printer and the computer but also that it’s in good condition. For wireless printers, ensure the network connection is active and stable. You might need to reconnect to the network or move closer to your router.
Also, confirming proper configuration within your computer’s settings is key. Navigate to your ‘Devices and Printers’ settings in the Windows Control Panel. Here, you can check if your HP printer is set as the default printer. If not, right-click on the printer icon and choose ‘Set as default printer.’ This action often solves the issue of the HP printer not responding.
By tackling these checks systematically, you can often resolve basic connectivity and status issues without advanced troubleshooting.
Updating or Reinstalling HP Printer Drivers
Keeping your HP printer drivers up-to-date is crucial to resolving printing issues. Outdated or corrupted drivers often cause the ‘HP printer won’t print’ problem. Here are steps to update or reinstall your drivers effectively.
Updating HP Printer Drivers
- Access Device Manager: Start by clicking on the ‘Start’ menu, typing ‘Device Manager’, and opening it.
- Locate Print Queues: In Device Manager, expand the ‘Print queues’ section. Right-click on your HP printer.
- Check for Updates: Choose ‘Update driver’ from the options. Select ‘Search automatically for updated driver software’. Follow the on-screen instructions.
Updating periodically ensures your printer communicates properly with your computer.
Reinstalling HP Printer Drivers
Sometimes updating isn’t enough. Reinstalling the driver might be necessary.
- Open Device Manager: Like updating, start in Device Manager.
- Uninstall the Printer Driver: Right-click on the HP printer under ‘Print queues’. Choose ‘Uninstall device’. Follow the prompts to remove the driver.
- Reinstall the Printer Driver: After uninstallation, click ‘Scan for hardware changes’. Your computer will detect the printer and attempt to reinstall the driver automatically.
Reinstalling the driver can resolve deeper issues that simple updates cannot fix. This process resets the printing system, often clearing persistent errors.
Setting the HP Printer as the Default Printer
Setting your HP printer as the default can fix printing issues. Here are easy steps to do this:
- Open Control Panel: Click on the ‘Start’ menu, and select ‘Control Panel’.
- Navigate to Printers: Click on ‘Devices and Printers’ or ‘View devices and printers’.
- Select Your Printer: Find your HP printer in the list of devices.
- Set as Default: Right-click on your HP printer and choose ‘Set as default printer’.
After setting your HP printer as the default device, try to print a test page. If the HP printer won’t print, the problem may not be with printer default settings. In such cases, consider checking other settings or seeking further solutions mentioned in this blog. Remember, setting the default printer is a key step for consistent printer operations.
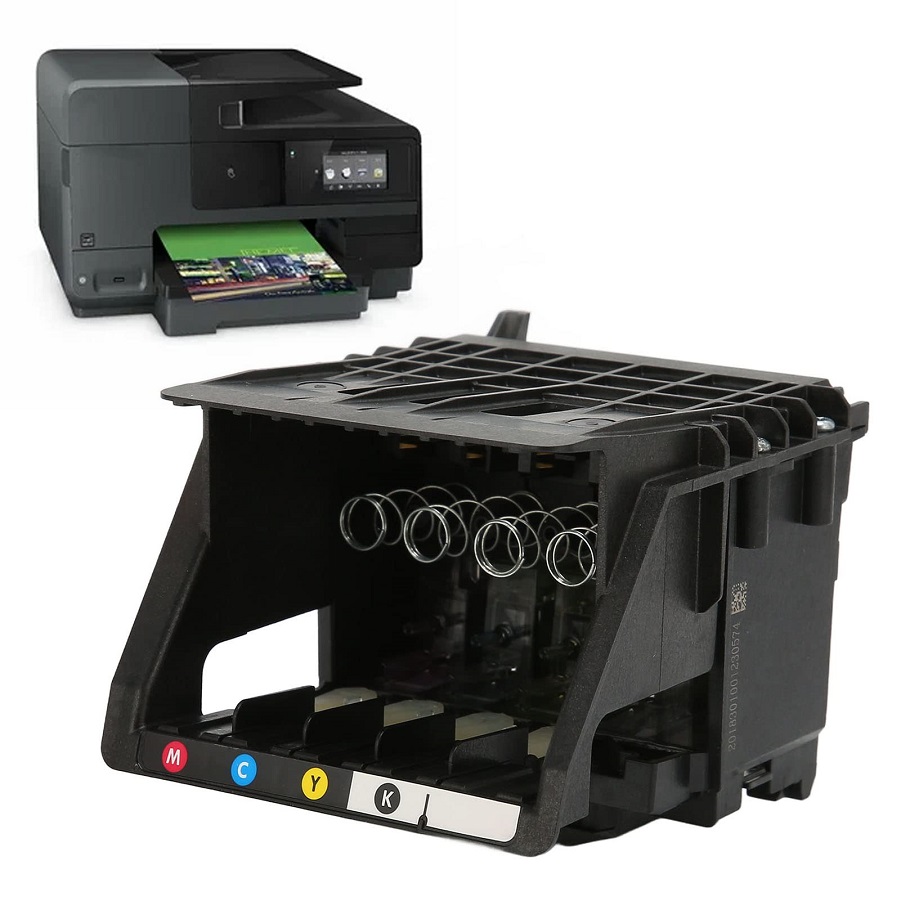
Ensuring Proper Ink Levels and Cartridge Function
Adequate ink levels are pivotal for optimal printer performance. Here are essential steps to ensure your HP printer’s ink cartridges function correctly.
Check Ink Levels
Regularly monitor your HP printer’s ink levels. This can prevent unexpected ‘out of ink’ issues during printing tasks. To check ink levels, you can use the HP Printer Assistant software available on your computer, or access the ink levels display via the printer’s control panel.
Inspect Cartridge Installation
Ensure that ink cartridges are correctly installed. An improperly seated cartridge can cause HP printer won’t print issues. Remove and reinsert the cartridges to make sure they are well-placed.
Use Quality Ink
Always opt for high-quality or recommended ink cartridges for your HP printer. Low-quality ink can lead to poor print quality and may even damage your printer.
Replace Empty Cartridges
Replace any ink cartridges that are low or empty. Running a printer with empty cartridges can cause air to enter the ink system, which might lead to printing problems.
By keeping up with these simple steps, you can ensure that ink levels and cartridge functions are not the cause of your HP printer won’t print issues.
Cleaning and Maintaining Ink Cartridges and Print Heads
Proper maintenance of ink cartridges and print heads is essential for optimal printer performance. Here are some critical steps you can follow to ensure your HP printer functions smoothly.
Cleaning Ink Cartridges
Clogged or dirty ink cartridges can lead to poor printing quality. To clean them:
- Turn off the Printer: Ensure the printer is off before you start.
- Remove the Cartridges: Carefully take out the ink cartridges from their slots.
- Clean Gently: Use a soft, lint-free cloth slightly dampened with water to wipe the cartridges. Focus on the metal contacts.
- Reinstall Cartridges: Once they are dry, place them back in their respective slots.
- Run a Cleaning Cycle: Use your printer’s software to run a cleaning cycle. This helps to clear any blockages in the print head.
Maintaining Print Heads
Keeping the print heads clean is vital to avoid blockages and ensure sharp prints.
- Access the Printer Menu: On your printer’s control panel, navigate to the setup or maintenance menu.
- Select to Clean Printheads: Find the option to clean print heads and select it.
- Let the Printer Do the Work: The printer will start the cleaning process. It might take a few minutes.
- Perform a Test Print: After cleaning, print a test page to check if the print quality has improved.
Regular maintenance helps prevent issues where the HP printer won’t print properly. It also extends the life of your ink cartridges and print heads, saving you time and money in the long run.
Troubleshooting Tips for Specific Error Messages
Navigating through error messages is key in troubleshooting HP printer issues. Here are tips for some common error messages:
‘Printer Offline’ Error
This message means the printer is not communicating with your computer. First, ensure the printer is on and connected to your network or via USB. Restart both your printer and computer. If the problem persists, check your printer’s network settings or USB connection.
‘Paper Jam’ Error
Paper jams are common but easily fixable. Turn off your printer and gently remove any stuck paper. Check if the paper tray is correctly aligned and if the paper is suitable for your printer. After clearing the jam, restart your printer and try printing again.
‘Low Ink Levels’ Warning
This warning indicates that your ink is depleting. Check ink levels using the HP Printer Assistant or the printer’s control panel. If levels are low, replace the cartridges with high-quality or recommended ink. Avoid third-party inks as they can cause further issues.
‘Cannot Recognize Cartridge’
This error can occur with new or refilled cartridges. Remove the cartridge and reset it to ensure it is properly installed. Clean the cartridge contacts with a lint-free cloth. If the error continues, replace the cartridge with an original HP cartridge.
These troubleshooting steps should help clear up most common error messages and get your HP printer back in action. If issues persist, consider seeking further assistance or contacting HP support.
Final Steps: Contacting HP Support
When you’ve tried all the solutions and your HP printer still won’t print, it’s time to seek help from the experts. Contacting HP support is the last resort to fix the issue. Here’s what you should do:
- Gather Your Printer Information: Before you call or chat with HP support, have your printer model and serial number ready. This information will help them understand your issue better.
- Use the HP Support Website: Visit the HP website and navigate to the support section. Here, you can find FAQs and resources that might address your problem.
- Start a Support Ticket: Choose to either chat with a support representative or submit a ticket. Be clear about the issues you’ve experienced and the steps you’ve already taken to resolve them.
- Call HP Support: If you prefer speaking to someone, call the HP support phone number. Phone calls may allow for more detailed conversations about complex issues.
- Remote Assistance Option: Sometimes, HP can remotely access your computer to diagnose the problem. Be ready to grant permission if necessary.
- Have Patience: Support centers can be busy. Be prepared to wait, but know that dedicated professionals are there to help you get back to printing.
By following these steps, HP support should be able to guide you through any remaining troubleshooting. Remember, they’re there to help ensure your HP printer works as it should.