Here you can learn about a variety of electronic equipment and office items to help you work and study better. What are you waiting for? Come and take a look!

Tag: camera problem

What Does the Blue Light on a Ring Camera Mean?

ring camera Introduction:

Ring cameras have become popular security devices for both residential and commercial purposes. These cameras offer various features to enhance security and provide peace of mind. One common feature of Ring cameras is the presence of a blue light. In this comprehensive guide, we will explore the meaning behind the blue light on a Ring camera. By understanding the significance of this indicator, users can better understand the camera’s status and operation.

 Overview of Ring Cameras

Ring Security System:

Ring is a company that specializes in smart home security products, including cameras, doorbells, and security systems.
Ring cameras are designed to monitor and record activities in and around a property.

Features and Functions:

Ring cameras offer features such as motion detection, live streaming, two-way audio, and cloud storage.
These cameras can be controlled and accessed through a smartphone or computer.

Understanding the Blue Light on a Ring Camera

Power and Connectivity:

The blue light on a Ring camera indicates that the camera is powered on and connected to the network.
It provides a visual confirmation that the camera is operational and ready to capture and transmit video footage.

Wi-Fi Connection:

The blue light can also indicate that the Ring camera is connected to a Wi-Fi network.
This connection is necessary for live streaming, remote access, and cloud storage functionality.

Signal Strength:

The intensity or behavior of the blue light can provide information about the signal strength of the camera’s Wi-Fi connection.
A solid blue light usually indicates a strong and stable connection, while a pulsating or flashing blue light may suggest a weaker or unstable connection.

Troubleshooting the Blue Light on a Ring Camera

No Blue Light:

If the blue light on a Ring camera is not illuminated, it may indicate a power or connectivity issue.
Check the power source, cables, and connections to ensure the camera is receiving power and properly connected to the network.

Solid Blue Light:

A solid blue light usually signifies a stable connection. However, if the camera is not functioning as expected, it may be necessary to troubleshoot other potential issues.
Restarting the camera, checking network settings, or contacting customer support can help resolve any performance or functionality problems.

Flashing or Pulsating Blue Light:

A flashing or pulsating blue light on a Ring camera indicates a weaker or unstable Wi-Fi connection.
To improve the signal strength, consider moving the camera closer to the Wi-Fi router, using a Wi-Fi extender, or adjusting the camera’s positioning for better reception.

Enhancing Ring Camera Performance

Wi-Fi Signal Strength:

Maintaining a strong Wi-Fi signal is crucial for optimal performance of Ring cameras.
Ensure that the camera is within range of the router and minimize obstructions that may interfere with the wireless signal.

Device Placement:

Proper placement of the camera is essential for capturing clear and comprehensive footage.
Consider the camera’s field of view, angle, and height to maximize its effectiveness.

Firmware and App Updates:

Regularly check for firmware updates for your Ring camera to ensure it has the latest features and security patches.
Update the Ring app on your smartphone or computer to the latest version for compatibility and improved performance.

ring camera Conclusion:

The blue light on a Ring camera serves as an important indicator of the camera’s status and connectivity. Understanding the meaning behind this blue light can help users ensure their cameras are functioning properly and connected to the network. Troubleshooting any issues related to the blue light can improve the camera’s performance and enhance its functionality. By following the tips outlined in this comprehensive guide, users can optimize their Ring camera setup and enjoy the benefits of enhanced security and peace of mind.


Why Is My Zoom Camera Not Working: A Comprehensive Guide

cameraIntroduction:

Zoom has become an essential tool for virtual meetings, online classes, and connecting with loved ones. However, encountering issues with your Zoom camera can be frustrating, especially when you need it for important video calls. In this comprehensive guide, we will explore common reasons why your Zoom camera may not be working and provide troubleshooting tips to help you resolve the issue. By understanding the potential causes and implementing the necessary steps, you can get your Zoom camera back up and running smoothly.

Several potential consequences or drawbacks:

When the zoom camera on a device is not working, it can have several potential consequences or drawbacks:

Limited functionality:

The primary drawback of a non-functioning zoom camera is the loss of its intended functionality. Zoom cameras are designed to provide users with the ability to capture close-up or distant objects with clarity and detail. Without a working zoom camera, users may not be able to take advantage of this feature, limiting their photographic capabilities.

Reduced versatility:

The zoom camera offers the flexibility to adapt to different shooting scenarios and capture a variety of subjects. Whether it’s zooming in on a distant landscape or zooming out to capture a wide-angle view, a non-working zoom camera restricts the versatility and range of photographic possibilities.

Lower image quality:

A malfunctioning zoom camera can lead to compromised image quality. Issues such as blurry images, distorted zoomed-in shots, or lack of focus can arise, reducing the clarity and sharpness of the captured photographs or videos.

Inconvenience and frustration:

Not being able to rely on the zoom camera when needed can be frustrating, especially if capturing distant or detailed subjects is an essential part of one’s photography needs. It may require users to find alternative solutions or workarounds to achieve the desired results, which can be time-consuming or inconvenient.

Repair or replacement costs:

If the zoom camera is not working due to a hardware malfunction, it may require repair or even replacement. Depending on the device and warranty coverage, this can result in additional costs and inconvenience for the user.

It’s important to troubleshoot and address any issues with a non-working zoom camera to restore its functionality. This may involve software updates, adjusting settings, or seeking professional assistance if it is a hardware problem.

Hardware Issues

Camera Not Detected:

Ensure that your camera is properly connected to your computer or device.
Check the physical connection and make sure the camera is securely plugged in.

Camera Compatibility:

Verify that your camera is compatible with the Zoom software.
Some older or less common cameras may not be recognized by Zoom.

Software Settings and Permissions

Camera Privacy Settings:

Check the camera privacy settings on your device.
Make sure that the camera is allowed to be accessed by the Zoom application.

Zoom Camera Settings:

Open the Zoom application and go to the settings menu.
Confirm that the camera is enabled and selected as the default camera for Zoom.

Operating System Updates

Check for Operating System Updates:

Ensure that your computer or device has the latest operating system updates installed.
Outdated software can sometimes cause compatibility issues with the camera.

Restart Your Computer or Device:

Restarting your computer or device can help reset any temporary issues that may be affecting the camera.

Camera-Specific Troubleshooting

Camera Drivers:

Update the camera drivers on your computer.
Visit the manufacturer’s website and download the latest drivers for your camera model.

Camera Firmware Updates:

Check if there are any firmware updates available for your camera.
Updating the camera firmware can resolve compatibility issues and improve performance.

Video Conferencing Software Settings

Zoom Camera Settings:

Go to Zoom settings and check if the camera is enabled.
Ensure that the correct camera is selected from the available options.

Test Your Camera:

Use the Zoom camera test feature or an external camera testing tool to verify if the camera is working correctly.
If the camera is still not functioning, try using a different video conferencing platform to determine if the issue is specific to Zoom.

Troubleshooting on Mobile Devices

App Permissions:

On mobile devices, check the Zoom app permissions for camera access.
Make sure that the camera permission is enabled for the Zoom app.

Restart the Mobile Device:

Restarting your mobile device can help resolve temporary software glitches that may be affecting the camera.

cameraConclusion:

Encountering issues with your Zoom camera can be frustrating, but by following the troubleshooting tips outlined in this comprehensive guide, you can address the problem effectively. Whether it’s a hardware issue, software setting, or compatibility problem, identifying the cause is the first step towards resolving the camera malfunction. By checking your hardware connections, adjusting software settings, updating drivers and firmware, and ensuring the correct permissions, you can restore the functionality of your Zoom camera. Remember to consult the manufacturer’s guidelines and seek technical support if needed. With a working camera, you can fully participate in virtual meetings, online classes, and stay connected with others through Zoom.


Ring Camera Won’t Connect to WiFi: Troubleshooting Guide

cameraIntroduction:

Ring cameras offer peace of mind and security, allowing homeowners to monitor their property remotely. However, encountering connectivity issues where your Ring camera won’t connect to WiFi can be frustrating. A reliable WiFi connection is crucial for the proper functioning of your Ring camera. In this comprehensive article, we will provide a troubleshooting guide to help you resolve connectivity issues and get your Ring camera back online. From checking your WiFi signal strength to resetting your camera and router, we will guide you through the steps to ensure a seamless connection.

Disadvantages of Ring cameras:

While Ring cameras offer many benefits and features, they also have some potential drawbacks. Here are a few common criticisms or disadvantages of Ring cameras:

Privacy Concerns:

Ring cameras may raise privacy concerns due to their ability to capture video and audio footage of the surrounding area. There have been instances where unauthorized access to Ring cameras or data breaches have occurred, potentially compromising individuals’ privacy.

Dependence on WiFi:

Ring cameras heavily rely on a WiFi connection to function properly. If the WiFi network is unreliable or experiences outages, the camera’s performance and functionality may be affected, leading to gaps in surveillance or delayed alerts.

Subscription Costs:

While basic features like live streaming and motion detection are available for free, some advanced features and storage options require a subscription plan, such as Ring Protect. This ongoing cost may be seen as a disadvantage for those on a tight budget.

Limited Field of View:

The field of view for Ring cameras varies depending on the specific model. Some cameras may have a narrower field of view, which could limit the coverage area and require multiple cameras for comprehensive surveillance of larger spaces.

Installation Challenges:

While Ring cameras are designed for easy installation, some users may encounter challenges when setting up the cameras, such as finding suitable mounting locations or troubleshooting connectivity issues.

It’s important to consider these drawbacks alongside the benefits when evaluating whether Ring cameras are the right choice for your home security needs.

camera

Several consequences and potential hazards:

When a Ring camera won’t connect to WiFi, it can have several consequences and potential hazards. Here are some possible risks:

Limited Surveillance:

If the Ring camera cannot connect to WiFi, it cannot transmit video or audio feeds to the owner’s device or the cloud. This hampers the camera’s ability to provide real-time surveillance and monitoring, compromising home security.

Incomplete Event Recording:

Ring cameras are designed to record and store video footage of events, such as motion detection or doorbell activity. If the camera is not connected to WiFi, it may not be able to record or store these events, leading to gaps in the recorded footage.

Limited Remote Access:

The inability to connect to WiFi restricts remote access and control of the Ring camera. Users may not be able to access the camera’s live feed, adjust settings, or receive notifications through the Ring app or other connected devices.

Loss of Smart Home Integration:

Ring cameras can integrate with other smart home devices, allowing users to create automated routines and enhance home security. When not connected to WiFi, the camera may not be able to interact with other devices, reducing the effectiveness of the smart home ecosystem.

Delayed or Ineffective Alerts:

If the Ring camera is unable to connect to WiFi, it may not be able to send timely alerts or notifications to the owner’s devices. This can result in delayed awareness of potential security threats or events happening around the property.

Reduced Device Functionality:

Some features of the Ring camera, such as two-way audio communication or cloud storage, may rely on WiFi connectivity. The lack of WiFi connection can limit or disable these functions, reducing the overall functionality and usability of the device.

It is crucial to troubleshoot and address connectivity issues promptly to ensure the Ring camera operates effectively and maintains optimal home security capabilities.

camera

Check WiFi Signal Strength:

Ensure Proper Placement: Make sure your Ring camera is within range of your WiFi router. Avoid obstructions such as walls or large objects that may weaken the WiFi signal.

Test Signal Strength: Use your smartphone or a WiFi analyzer app to check the signal strength in the area where the camera is located. A weak signal may indicate the need for a WiFi extender or a more powerful router.

Restart Your Camera:

Power Cycle: Disconnect the power source from your Ring camera by unplugging it or removing the battery. Leave it unplugged for about 30 seconds, then reconnect the power source.

Reset Button: If power cycling doesn’t work, locate the reset button on your Ring camera and press it for about 15 seconds. This will reset the camera to its factory settings, allowing you to set it up again.

Restart Your Router:

Power Cycle: Disconnect the power source from your WiFi router by unplugging it. Leave it unplugged for about 30 seconds, then reconnect the power source.

Factory Reset: If power cycling doesn’t work, you may need to perform a factory reset on your router. Refer to the manufacturer’s instructions for the specific steps to do this.

Check WiFi Network:

Verify Network Name and Password: Ensure that the network name (SSID) and password you are entering for your WiFi network are correct. Typos or incorrect information can prevent your Ring camera from connecting.

Network Compatibility: Check that your WiFi network supports the required specifications for your Ring camera. For example, some Ring cameras only support either 2.4GHz or 5GHz WiFi bands, so verify compatibility with your router.

Ring Camera Won’t Connect to WiFi: Troubleshooting Guide插图3

Adjust Network Settings:

Channel Interference: If you are experiencing WiFi interference, changing the channel on your router’s settings may improve the connection. Consult your router’s manual for instructions on how to change the channel.

Bandwidth Allocation: Ensure that your router is not limiting bandwidth for your Ring camera. Adjust the settings to allocate sufficient bandwidth for your camera to connect and transmit data.

Update Firmware:

Camera Firmware: Ensure that your Ring camera is running the latest firmware version. Check the Ring app or the Ring website for firmware updates and instructions on how to install them.

Router Firmware: Similarly, make sure your WiFi router is running the latest firmware version. Check the manufacturer’s website or the router’s administration panel for firmware updates and installation instructions.

Contact Ring Support:

Troubleshooting Resources: Visit the Ring website or consult the Ring app for additional troubleshooting resources specific to your camera model. Ring provides comprehensive support and guides to help resolve connectivity issues.

Customer Support: If you have exhausted all troubleshooting steps and your Ring camera still won’t connect to WiFi, reach out to Ring’s customer support for further assistance. They can provide personalized guidance and solutions to your specific issue.

Ring Camera Won’t Connect to WiFi: Troubleshooting Guide插图4

Conclusion:

When your Ring camera won’t connect to WiFi, following a systematic troubleshooting process can help you identify and resolve the issue. By checking the WiFi signal strength, restarting your camera and router, verifying network settings, and updating firmware, you can troubleshoot connectivity problems effectively. Remember to consult the Ring website, app, or customer support for additional resources and assistance. With a stable WiFi connection, your Ring camera will be able to provide the security and peace of mind that it is designed for.

Why Aren’t My Videos Playing in My Camera Roll?

CameraIntroduction of Videos Playing in My Camera Roll:

Having videos that won’t play in your camera roll can be frustrating, especially when you want to relive and share those precious memories. There can be various reasons why videos are not playing as expected. In this comprehensive article, we will explore common issues and provide troubleshooting steps to help you resolve the problem and get your videos playing smoothly in your camera roll.

Insufficient Storage Space:

Check Available Storage:

Ensure that you have enough free space on your device to accommodate the size of the video files.

Clear Storage Space:

Delete unnecessary files, apps, or old videos to free up storage space on your device.

Camera

Video Format Incompatibility:

Check Video Formats:

Verify that the video file format is supported by your device’s operating system and media player.

Convert Video Format:

If the video file is in an unsupported format, consider converting it to a compatible format using third-party software or online converters.

Corrupted or Damaged Video Files:

Test on Other Devices:

Try playing the videos on different devices to determine if the issue is specific to your device or if the files themselves are corrupted.

Repair or Recover:

If the videos are indeed corrupted, use video repair software or services to recover and repair the damaged files.

Outdated Operating System or Media Player:

Update Operating System:

Ensure that your device’s operating system is up to date, as newer versions often include bug fixes and improvements for media playback.

Update Media Player:

Update or reinstall the media player app or software you are using to play the videos to the latest version.

Slow Network Connection or Streaming Issues:

Check Network Connection: If you are trying to stream videos from cloud storage or online platforms, ensure that you have a stable and fast internet connection.

Download and Play: If streaming is causing issues, try downloading the videos to your device and playing them locally.

Camera

Insufficient RAM or Processing Power:

Close Background Apps: Close unnecessary apps running in the background to free up device resources, such as RAM and processing power.

Restart Device: Restart your device to clear temporary files and refresh system resources, which may help improve video playback.

Media Player App or Codec Issues:

Try Alternative Apps: Install and try different media player apps to determine if the issue is specific to the current app you are using.

Install Codecs: If the video file requires specific codecs, install them on your device to enable proper playback.

Hardware or Device Issues:

Check Device Compatibility: Verify that your device meets the minimum hardware requirements for playing videos, such as supported video resolutions and codecs.

Contact Technical Support: If none of the troubleshooting steps resolve the issue, reach out to the device manufacturer or technical support for further assistance.

Back Up Your Videos:

Regularly Backup: It is essential to back up your videos to avoid permanent loss in case of device failures or data corruption.

Use Cloud Storage: Store your videos in cloud storage platforms or external hard drives to ensure they are safe and accessible from different devices.

Prevention for the Future:

Regularly Update Software: Keep your device’s operating system, media player apps, and other software up to date to benefit from bug fixes and improvements.

Check Video Formats: Before capturing or downloading videos, ensure that they are in compatible formats for your device to minimize playback issues.

Why Aren’t My Videos Playing in My Camera Roll?插图3

If you accidentally deleted videos from your camera film:

If you accidentally deleted videos from your camera film, here are a few steps you can take to try and recover them:

Stop Using the Camera or Memory Card:

As soon as you realize that the videos have been deleted, stop using the camera or memory card immediately. Continuing to use the camera or saving new files could potentially overwrite the deleted videos, making them unrecoverable.

Check the Camera’s Trash or Recycle Bin:

Some cameras have a trash or recycle bin feature where deleted files are temporarily stored. Check if your camera has this feature and if the deleted videos are still present in the trash. If they are, you can recover them by restoring them from the trash.

Use Data Recovery Software:

There are various data recovery software available online that can help recover deleted files from camera memory cards. Install a reputable data recovery program on your computer and connect the memory card to it. Follow the instructions provided by the software to scan for and recover the deleted videos. Remember to select the appropriate file types (in this case, video) during the scanning process.

Seek Professional Help:

If the above steps are unsuccessful or if you don’t feel comfortable using data recovery software, you may consider seeking professional help. There are data recovery services that specialize in recovering lost or deleted files from various devices, including camera memory cards. They have the expertise and tools to perform more advanced recovery methods.

Prevent Future Accidents:

To prevent similar accidents in the future, it is recommended to regularly back up your files. This can be done by transferring the videos to a computer or external storage device. Additionally, consider being cautious when deleting files and double-checking before confirming any deletion.

Remember that the success of recovering deleted videos depends on various factors, such as the type of camera, the amount of time elapsed since deletion, and the extent of card usage. It is important to act quickly and follow the steps above to increase the chances of recovering your precious videos.

Why Aren’t My Videos Playing in My Camera Roll?插图4

Conclusion:

When videos are not playing in your camera roll, it can be frustrating. By following the troubleshooting steps outlined in this guide, you can identify and address the underlying issues that may be preventing your videos from playing correctly. Whether it’s a storage space problem, video format incompatibility, corrupted files, or device-related issues, there are steps you can take to resolve the problem and get your videos playing smoothly again. Remember to back up your videos regularly to prevent data loss and take preventative measures to minimize future playback issues.


ADT Doorbell Camera Not Working: Troubleshooting and Solutions

adt doorbell camera Introduction:

If your ADT doorbell camera is not working, it can be frustrating and concerning as it compromises the security of your home. However, there are several troubleshooting steps you can take to identify and resolve the issue. In this comprehensive article, we will explore common problems with ADT doorbell cameras and provide simple solutions to help you get your camera up and running again.

adt doorbell camera

Disadvantages associated with a malfunctioning ADT doorbell camera:

When an ADT doorbell camera is not working, it can pose several potential risks and drawbacks. Here are some of the disadvantages and potential hazards associated with a malfunctioning ADT doorbell camera:

Compromised Home Security:

The primary purpose of a doorbell camera is to enhance home security by providing real-time monitoring and surveillance of your property’s entrance. When the camera is not working, it leaves a gap in your home security system. This can put your home at higher risk of break-ins, theft, or unauthorized access, as you won’t have the ability to monitor or record any suspicious activities at your front door.

Loss of Visual Evidence:

A functional doorbell camera can capture important visual evidence in case of any security incidents or disputes. This evidence can be crucial for identifying criminals, providing information to law enforcement, or resolving any conflicts related to package deliveries or property damage. When the camera is not working, you lose the ability to gather this vital visual evidence, potentially hampering investigations or legal proceedings.

Deterrent Effect:

A visible doorbell camera can act as a deterrent to potential intruders or burglars. The presence of a functioning camera can make them think twice before attempting any illegal activities. However, if the camera is not working, it loses its deterrent effect, as criminals may perceive a lower risk of being caught or identified.

Limited Monitoring and Surveillance:

Doorbell cameras often provide features like live streaming, motion detection alerts, and two-way audio communication. These features allow you to monitor visitors, communicate with delivery personnel, or even deter suspicious individuals remotely. When the camera is not working, you lose access to these monitoring and surveillance capabilities, limiting your ability to interact or respond to events at your front door.

Inconvenience and Frustration:

A malfunctioning doorbell camera can cause frustration and inconvenience for homeowners. This may involve spending time troubleshooting the issue, contacting customer support, or waiting for repairs. It can disrupt your daily routines, particularly if you rely on the camera for security or remote monitoring purposes.

In summary, a non-functioning ADT doorbell camera can compromise home security, result in the loss of visual evidence, diminish the deterrent effect, limit monitoring capabilities, and cause inconvenience for homeowners. It is important to address any issues promptly by contacting ADT or their technical support to ensure the camera is repaired or replaced to maintain effective home security measures.

Power Issues:

Check Power Source:

Ensure that the doorbell camera is properly connected to a power source, such as wiring or batteries, and that the power source is functioning correctly.

Reset Power Connection:

If the camera is connected to wiring, try resetting the power by turning off the circuit breaker for a few minutes before turning it back on.

adt doorbell camera

Internet Connectivity:

Verify Wi-Fi Connection:

Make sure your doorbell camera is connected to a stable Wi-Fi network. Check the Wi-Fi settings on the camera and ensure it is connected to the correct network.

Restart Wi-Fi Router:

If there are connectivity issues, try restarting your Wi-Fi router to establish a fresh connection.

Camera Positioning and Range:

Check Signal Strength:

Ensure that your doorbell camera is within the recommended range of your Wi-Fi router to maintain a reliable signal strength.

Adjust Camera Position:

If the camera is not capturing a clear view, adjust its position to ensure it is focused on the desired area and has an unobstructed view.

Firmware Updates:

Check for Updates:

Regularly check for firmware updates for your ADT doorbell camera through the manufacturer’s website or the ADT app.

Install Updates:

If updates are available, follow the instructions provided to install the latest firmware version for your camera. Firmware updates often include bug fixes and performance improvements.

Mobile App and Settings:

Verify App Connectivity:

Ensure that your mobile device is connected to the internet and that the ADT app is up to date.

Reinstall the App:

If the app is not functioning properly, uninstall it from your device and reinstall it from the appropriate app store.

Low Battery or Power Issues:

Check Battery Level:

f your ADT doorbell camera operates on batteries, verify that the battery level is sufficient. Replace the batteries if necessary.

Power Cycle the Camera:

If the camera has an internal power source, try power cycling it by removing the power source for a few seconds before reconnecting it.

Contact ADT Support:

Consult Technical Support:

If you have tried the troubleshooting steps and your ADT doorbell camera is still not working, contact ADT technical support for further assistance.

Provide Details:

When contacting support, provide specific details about the issue, any troubleshooting steps you have taken, and any error messages or indicators displayed on the camera or app.

ADT Doorbell Camera Not Working: Troubleshooting and Solutions插图3

Warranty and Repair:

Check Warranty Coverage:

Review the warranty information for your ADT doorbell camera to determine if repairs or replacements are covered.

Professional Repair Service:

If your camera is still under warranty, contact ADT to arrange for professional repair or replacement.

Temporary Alternatives:

Use Alternative Security Measures: While troubleshooting or waiting for repairs, consider implementing temporary alternative security measures, such as additional indoor or outdoor cameras, to ensure the safety of your home.

ADT Doorbell Camera Not Working: Troubleshooting and Solutions插图4

Conclusion:

Facing issues with your ADT doorbell camera not working can be frustrating, but by following these simple troubleshooting steps, you can often identify and resolve the problem. From checking power sources and internet connectivity to firmware updates and app settings, these solutions can help you regain the functionality of your ADT doorbell camera.

If the issue persists, contacting ADT support and exploring warranty and repair options is recommended. Remember, temporary alternative security measures can be implemented to maintain the safety of your home while troubleshooting or waiting for repairs. Enjoy the peace of mind that comes with a fully operational ADT doorbell camera once again.


How to Turn on Camera on Mac: Step-by-Step Guide

camera on macIntroduction:

Turning on the camera on your Mac allows you to engage in video calls, take pictures, and record videos. However, if you’re unfamiliar with the process, finding the camera settings and enabling it can be challenging. In this comprehensive article, we will provide a step-by-step guide on how to turn on the camera on your Mac, ensuring you can fully utilize this essential feature.

camera on mac

The camera on a Mac computer serves several purposes:

The camera on a Mac computer serves several purposes. Here are some of its key functions:

Video Conferencing:

The camera allows you to participate in video conferences and virtual meetings. It enables face-to-face communication with others, whether it’s for business, education, or personal purposes. Applications like FaceTime, Skype, Zoom, and Microsoft Teams utilize the camera to facilitate video calls.

Photography and Content Creation:

The built-in camera on a Mac computer can be used for capturing photos and videos. It allows you to take selfies, record videos, or create content for social media platforms, vlogs, or video editing projects. You can access the camera through various applications like Photo Booth or third-party software.

Security and Surveillance:

Some Mac computers have a camera that can serve as a security feature. Applications like FaceTime, iSight, or security software can utilize the camera to monitor your surroundings, providing an additional layer of security and allowing you to keep an eye on your surroundings remotely.

Facial Recognition:

The camera on a Mac computer can be used for facial recognition purposes. It can identify and authenticate users, allowing for features such as unlocking the computer using facial recognition or accessing certain applications or files based on specific user permissions.

Augmented Reality (AR):

The camera can also facilitate augmented reality experiences on a Mac computer. AR applications utilize the camera to overlay virtual objects or information onto the real-world environment, enhancing gaming, entertainment, or educational experiences.

It’s worth noting that the specific functionalities and capabilities of the camera may vary depending on the Mac model and its specifications. Additionally, to ensure privacy and security, it’s important to be mindful of camera usage and take necessary precautions to protect your privacy, such as covering the camera when not in use or adjusting privacy settings as needed.

Accessing Camera Settings:

Click on the Apple Menu:

Located in the top-left corner of the screen, click on the Apple icon to access the drop-down menu.

Select “System Preferences”:

From the drop-down menu, choose “System Preferences” to open the settings page.

Locating the Camera Settings:

Click on the “Security & Privacy” Icon:

Within the System Preferences window, locate and click on the “Security & Privacy” icon.

Open the “Privacy” Tab:

In the Security & Privacy window, navigate to the “Privacy” tab.

camera on mac

Enabling Camera Access:

Select the “Camera” Option:

Within the Privacy tab, locate and select the “Camera” option from the left-hand panel.

Allow Camera Access:

Check the box next to the application(s) that you want to grant access to the camera. Ensure that the applications you want to use the camera with are selected.

Testing Camera Functionality:

Open a Camera-Enabled Application:

Launch an application that utilizes the camera, such as FaceTime, Photo Booth, or Zoom.

Check Camera Functionality:

Verify that the camera is working by observing the video feed or taking a test photo within the application.

Troubleshooting Tips:

Restart the Computer:

If the camera is not working after enabling it, try restarting the computer to refresh the system.

Update macOS and Applications:

Ensure that your macOS and camera-enabled applications are up to date, as outdated software can sometimes cause compatibility issues.

Check Camera Connections:

If you are using an external camera, ensure that it is properly connected to your Mac and powered on, as loose connections can affect functionality.

Reset the System Management Controller (SMC):

In some cases, resetting the SMC can resolve camera-related issues. Refer to Apple’s official support page for instructions on how to reset the SMC based on your specific Mac model.

Privacy Considerations:

Protecting Your Privacy:

It is important to be cautious when granting camera access to applications. Only allow access to trusted applications and be mindful of potential privacy risks.

Disabling Camera Access:

If you no longer want an application to have camera access, you can revisit the Security & Privacy settings and uncheck the box next to the respective application.

Connecting External Cameras:

USB or Thunderbolt Cameras:

If you are using an external camera, connect it to your Mac using the appropriate USB or Thunderbolt port. The camera should be detected automatically.

Bluetooth or Wi-Fi Cameras:

For cameras that connect wirelessly, refer to the manufacturer’s instructions to ensure proper setup and connection to your Mac.

Additional Resources:

Apple Support:

Visit the Apple Support website for further assistance with camera-related issues or to explore FAQs and troubleshooting guides.

Application-Specific Support:

Consult the support resources provided by the camera-enabled applications you are using for additional guidance.

How to Turn on Camera on Mac: Step-by-Step Guide插图3

Camera on your Mac computer is not functioning or is physically damaged:

If the camera on your Mac computer is not functioning or is physically damaged, here are a few steps you can take:

Restart Your Computer:

Sometimes, a simple restart can help resolve temporary software glitches. Restart your Mac and check if the camera starts working again.

Check Camera Access:

Ensure that the camera is not being blocked or restricted by any software settings or security preferences. Go to System Preferences > Security & Privacy > Privacy, and make sure that the camera is enabled for the applications you’re using. If necessary, grant camera access to the specific applications that require it.

Update macOS and Applications:

Keeping your macOS and applications up to date can help resolve compatibility issues and improve overall system performance. Check for and install any available updates for your operating system and applications, as these updates may include bug fixes or improvements related to camera functionality.

Reset SMC and PRAM/NVRAM:

Resetting the System Management Controller (SMC) and Parameter RAM (PRAM) or Non-Volatile RAM (NVRAM) can help address certain hardware-related issues. Instructions for resetting SMC and PRAM/NVRAM can be found on Apple’s support website, specific to your Mac model.

Test with Different Applications:

Try using different applications that require camera access to determine if the issue is specific to a particular app or a broader camera problem. For example, test the camera with FaceTime, Photo Booth, or a third-party video conferencing application.

Contact Apple Support:

If the camera issue persists and none of the above steps resolve the problem, it may be necessary to seek professional assistance. Contact Apple Support or visit an Apple Authorized Service Provider to have your Mac inspected and repaired by certified technicians.

Remember, it’s essential to ensure that the camera issue is not due to physical damage, such as a faulty camera module or a loose connection. Professional assistance may be required to diagnose and repair hardware-related problems.

How to Turn on Camera on Mac: Step-by-Step Guide插图4

Conclusion:

Turning on the camera on your Mac is a straightforward process once you know where to find the settings. By accessing the System Preferences and adjusting the camera settings under the Security & Privacy tab, you can grant camera access to the desired applications.

Follow the step-by-step guide provided in this article to enable your Mac’s camera and begin utilizing its functionalities for video calls, photography, and more. Should you encounter any issues, refer to the troubleshooting tips and consult official support resources to resolve any camera-related problems. Enjoy the convenience and versatility of your Mac’s camera for a variety of multimedia purposes.


Arlo Camera Reset: Troubleshooting and Restoring Functionality

 cameraIntroduction:

Resetting an Arlo camera can often resolve various issues and restore its functionality. Whether you are experiencing connectivity problems, camera malfunctions, or need to troubleshoot specific issues, resetting your Arlo camera can be a useful solution. In this comprehensive article, we will explore the steps and considerations for arlo camera reset, providing guidance on troubleshooting common problems and restoring optimal performance.

Several benefits:

Resetting a camera can provide several benefits. Here are some advantages of performing a camera reset:

Troubleshooting:

A camera reset is often used as a troubleshooting step to resolve various technical issues. It can help address connectivity problems, frozen screens, unresponsive buttons, or other software-related glitches. By resetting the camera, you can clear temporary errors and restore the camera to its default settings, potentially resolving the issue.

Restoring Default Settings:

Over time, you may customize the camera’s settings according to your preferences. However, these adjustments can sometimes lead to unintended consequences or undesired outcomes. Resetting the camera allows you to revert all settings back to their default state, providing a fresh start and potentially improving camera performance or resolving conflicts.

Network Changes:

If you have changed your Wi-Fi network name or password, or if you have replaced the camera’s base station, resetting the camera is necessary to establish a new connection. Resetting clears the existing network settings and allows you to reconfigure the camera to connect to the new network or base station.

Preparing for Sale or Transfer:

If you plan to sell or transfer ownership of the camera, resetting it to factory settings is crucial. This ensures that all personal data, settings, and configurations associated with your account are removed, protecting your privacy and preventing unauthorized access to your camera.

Routine Maintenance:

Some photographers and camera enthusiasts perform periodic resets as part of their maintenance routine. Resetting can help refresh the camera’s internal software, potentially improving stability and performance over time.

It’s important to note that while resetting a camera can be beneficial, it should be done with caution. Before resetting, ensure that you have backup copies of any important settings, configurations, or data that you may need to restore later. Additionally, consult the camera’s user manual or the manufacturer’s support resources for specific guidelines on how to perform a reset for your particular camera model.

 camera

Why Reset an Arlo Camera:

Connectivity Issues:

Resetting an Arlo camera can help resolve connectivity problems, ensuring a stable and reliable connection to the Arlo base station or the Arlo app.

Camera Malfunctions:

Resetting can fix camera malfunctions such as freezing, unresponsiveness, or erratic behavior, restoring normal operation.

Troubleshooting Specific Issues:

Resetting an Arlo camera may be necessary when troubleshooting issues such as failed firmware updates or configuration changes.

Types of Arlo Cameras:

Arlo Pro:

The Arlo Pro camera offers high-definition video recording, two-way audio, and advanced motion detection features.

Arlo Ultra:

The Arlo Ultra camera provides 4K video recording, enhanced night vision, and a built-in spotlight for greater visibility.

Soft Reset vs. Factory Reset:

Soft Reset:

A soft reset powers the camera off and on, resolving minor issues without erasing any camera settings or configurations.

Factory Reset:

A factory reset restores the camera to its original factory settings, erasing all configurations and requiring the camera to be set up again.

 camera

Soft Reset Procedure:

Power Off the Camera:

Locate the power button on the camera or disconnect the power source to turn it off.

Wait for a Few Seconds:

Allow the camera to remain powered off for a brief period.

Power On the Camera:

Press the power button or reconnect the power source to turn the camera back on.

Check Functionality:

After the soft reset, observe if the camera is functioning properly.

Factory Reset Procedure:

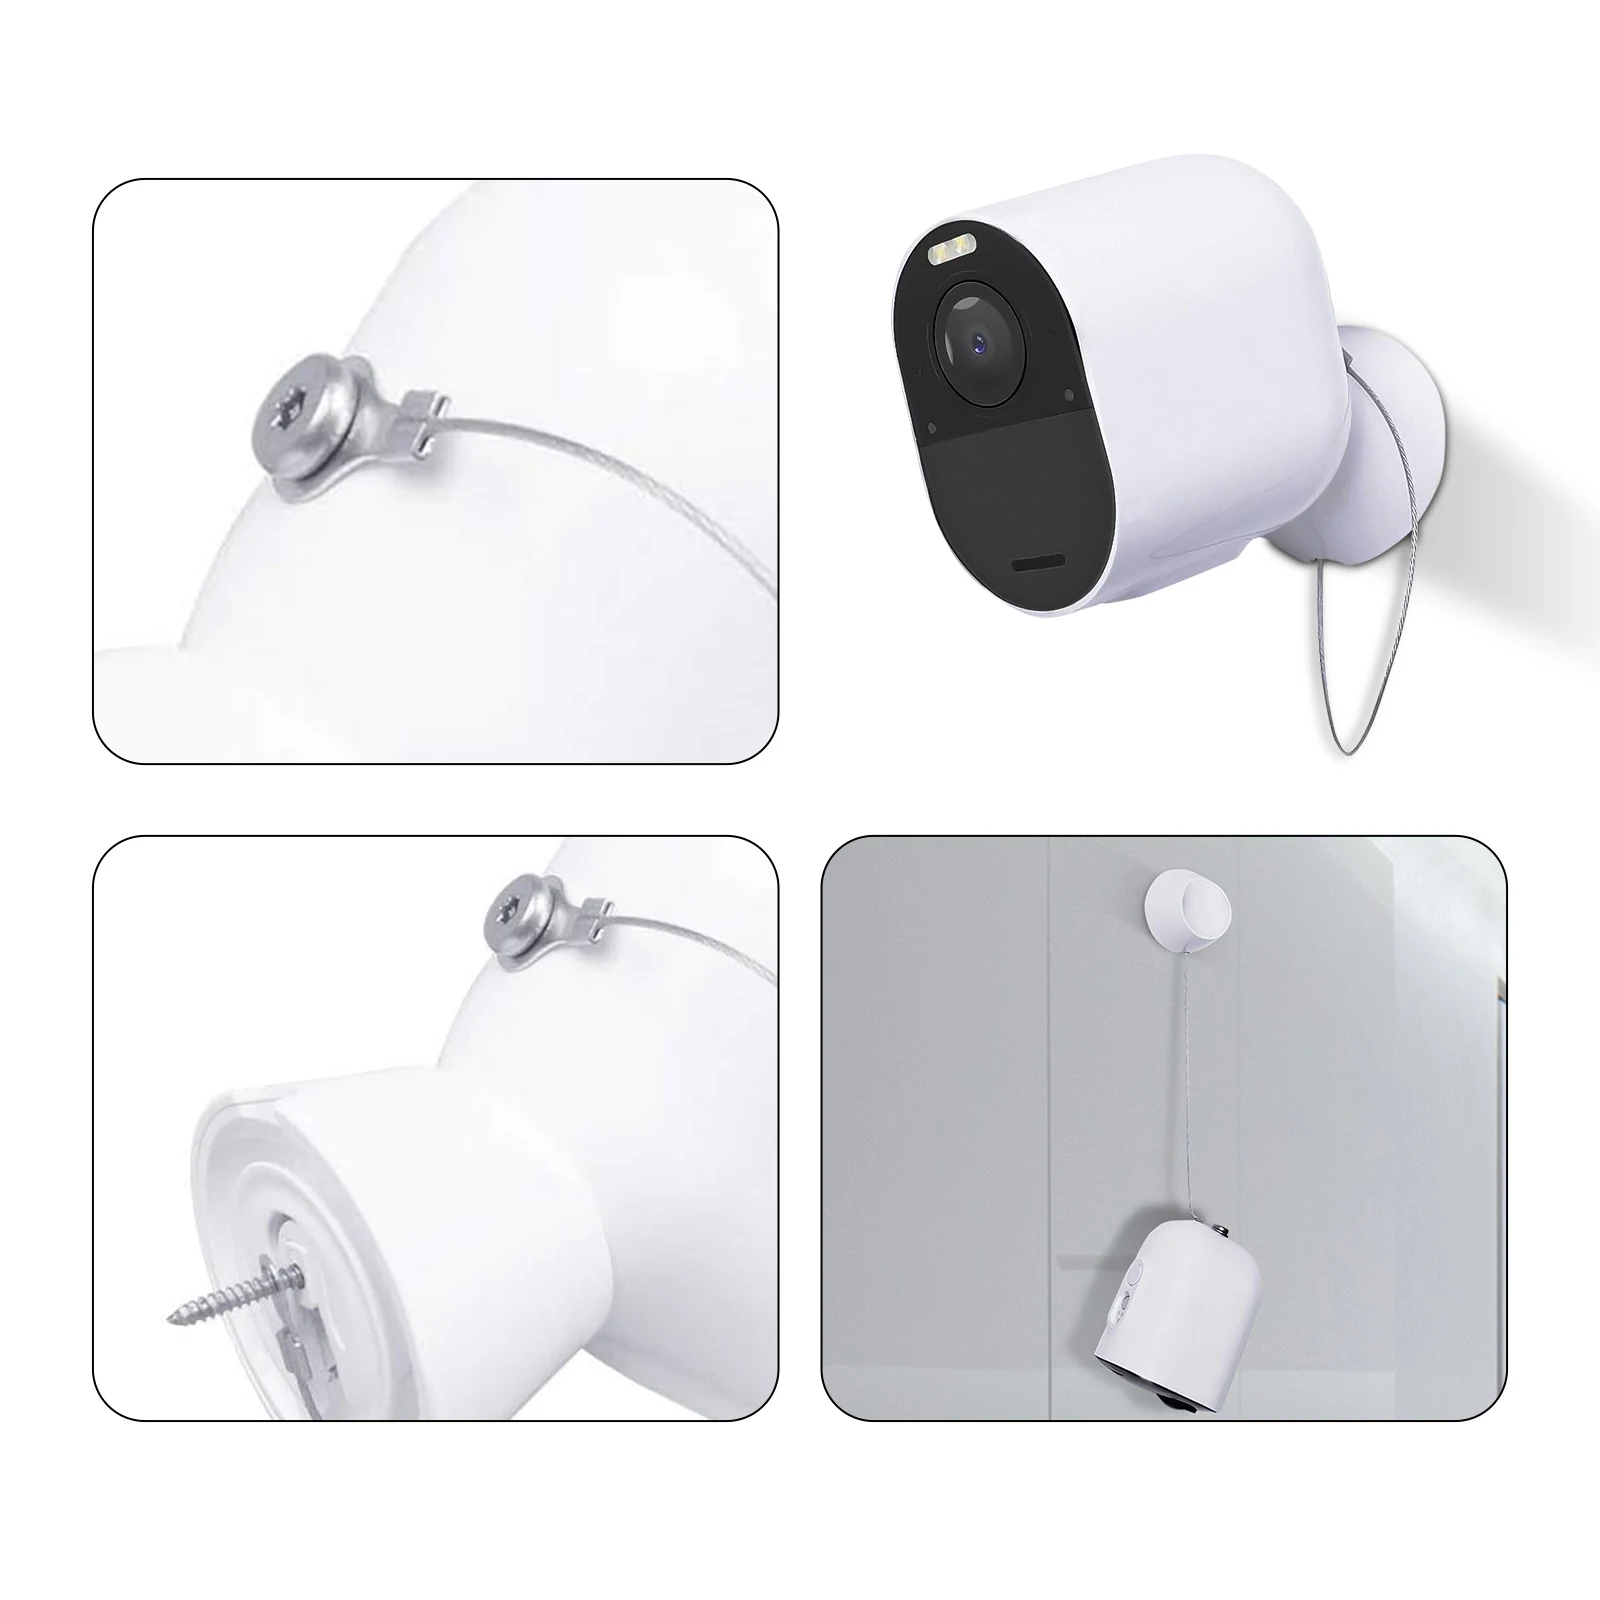
Locate the Reset Button:

Find the reset button on the camera. It is usually a small hole or recessed button that requires a pin or paperclip to press.

Press and Hold the Reset Button:

Using a pin or paperclip, press and hold the reset button for about 10 seconds until the camera’s LED lights flash.

Release the Reset Button:

After the LED lights flash, release the reset button.

Wait for the Camera to Reset:

The camera will restart and go through the reset process, erasing all settings and configurations.

Set Up the Camera:

Follow the Arlo app or web portal instructions to set up the camera again, including connecting it to the Arlo base station or app.

Troubleshooting Tips:

Check Power Supply:

Ensure that the camera is receiving adequate power, either through a power adapter or batteries.

Verify Internet Connectivity:

Make sure the camera is within range of a stable Wi-Fi connection and that the network is functioning properly.

Update Firmware:

Ensure that the camera’s firmware is up to date by checking for the latest version in the Arlo app or web portal.

Review Camera Placement:

Check if the camera is properly positioned, avoiding obstructions that may interfere with its field of view or signal reception.

Arlo Support and Resources:

Arlo Community:

Visit the Arlo Community website to seek assistance, find troubleshooting tips, and connect with other Arlo users.

Arlo Support Center:

The Arlo Support Center provides comprehensive resources, including FAQs, user guides, and troubleshooting articles.

Contact Arlo Support:

If necessary, reach out to Arlo customer support for further assistance with specific issues.

Considerations and Precautions:

Data Loss:

Perform a factory reset only if necessary, as it erases all configurations and settings, requiring you to set up the camera again.

Backup Configurations:

Before initiating a factory reset, consider backing up camera configurations and settings if they are of significant importance.

Arlo Camera Reset: Troubleshooting and Restoring Functionality插图3

If you encounter an error while attempting a camera reset:

If you encounter an error while attempting a camera reset, there are a few steps you can take to address the issue. Here’s what you can do:

Verify Reset Instructions:

Double-check the reset instructions provided by the camera manufacturer. Ensure that you are following the correct steps and using the right tools (such as a pin or paperclip) to press the reset button.

Retry the Reset:

If you encountered an error during the first attempt, try resetting the camera again. Make sure to press and hold the reset button for the recommended duration, typically around 10 seconds, and release it when the LED lights indicate a successful reset.

Power Cycle the Camera:

If the reset process still fails, try power cycling the camera. Disconnect the power source or remove the batteries, wait for a few minutes, and then reconnect the power or reinsert the batteries. This may help resolve any temporary issues and prepare the camera for a reset.

Check for Firmware Updates:

Ensure that the camera’s firmware is up to date. Check the manufacturer’s website or the camera’s official app for any available firmware updates. Updating the firmware may address any known issues or bugs that could be interfering with the reset process.

Contact Customer Support:

If you are still unable to reset the camera or encounter persistent errors, reach out to the camera manufacturer’s customer support. They can provide specific troubleshooting steps or guide you through the reset process over the phone or through online support channels. Be sure to provide them with detailed information about the error you are experiencing.

Remember, each camera model may have specific reset procedures and troubleshooting steps, so it’s important to consult the manufacturer’s documentation or contact their support team for accurate and tailored assistance.

Arlo Camera Reset: Troubleshooting and Restoring Functionality插图4

Conclusion of arlo camera reset:

Resetting an Arlo camera can be an effective troubleshooting method, resolving connectivity issues, camera malfunctions, and specific problems that may arise. Whether through a soft reset or factory reset, the process can restore the camera’s functionality and optimize its performance. By following the appropriate reset procedure and considering troubleshooting tips, you can quickly resolve common Arlo camera issues. Embrace the steps and considerations outlined in this article to successfully reset your Arlo camera and restore its functionality, providing you with reliable home security and peace of mind.