3D printing is a revolutionary technology that allows anyone to create three-dimensional objects from a digital file. This process is known as additive manufacturing, which means that it builds objects layer by layer. If you’re new to 3D printing, this guide will help you understand the basics and teach you how to use a 3D printer.

Understanding 3D Printing
What is 3D Printing?
3D printing brings your ideas to life. It begins with creating a design on a computer. This design is then transformed into a physical object. Imagine making a toy, a tool, or even art. You can create almost anything using a 3D printer. The machine reads your digital file and prints it in layers. This process uses materials like plastic, metal, or resin.
Many industries use 3D printing. Engineers and designers rely on it for prototypes. Medical professionals use it for custom implants. Artists appreciate its creative possibilities. You can also use it at home for hobbies or DIY projects. The technology has become accessible and affordable, making it a favorite among enthusiasts.
Types of 3D Printers
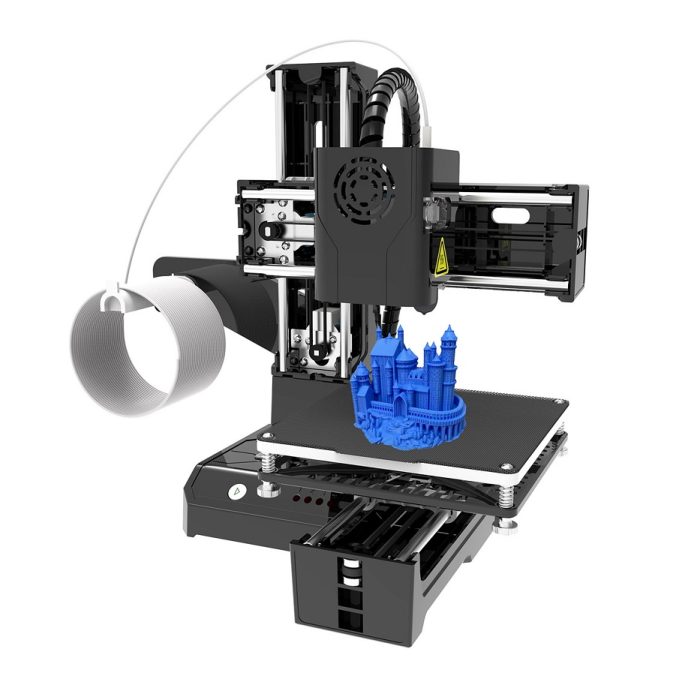
Different types of 3D printers exist, each with unique features. The most common type is the Fused Deposition Modeling (FDM) printer. It melts plastic filament and deposits it layer by layer. This type is user-friendly and affordable. It’s a great choice for beginners.
Another popular type is Stereolithography (SLA). SLA printers use lasers to cure resin into a solid object. This method creates high-resolution prints. It’s ideal for detailed work, like jewelry or small figurines. However, SLA printers and materials can be more expensive than FDM.
Selective Laser Sintering (SLS) is another option. SLS uses a laser to fuse powdered material into solid forms. This method is great for complex designs but usually requires more investment. Each type of printer has its pros and cons, so choose one that fits your needs.
Safety Considerations
Using a 3D printer requires attention to safety. Always read the user manual before starting. This will help you understand the machine and its components. Some parts may get hot during printing, so avoid touching them. Use gloves if necessary.
Ensure proper ventilation in your workspace. Some materials release fumes during printing. A well-ventilated area helps to minimize exposure. If you’re using resin printers, be cautious. Resin can irritate the skin, so wearing gloves is a good idea.
Finally, keep your workspace tidy. Tools, materials, and spare parts should be organized. This helps to avoid accidents during the printing process. By following these safety guidelines, you can enjoy 3D printing without unnecessary risks.
Getting Started with 3D Printing
Choosing a 3D Printer
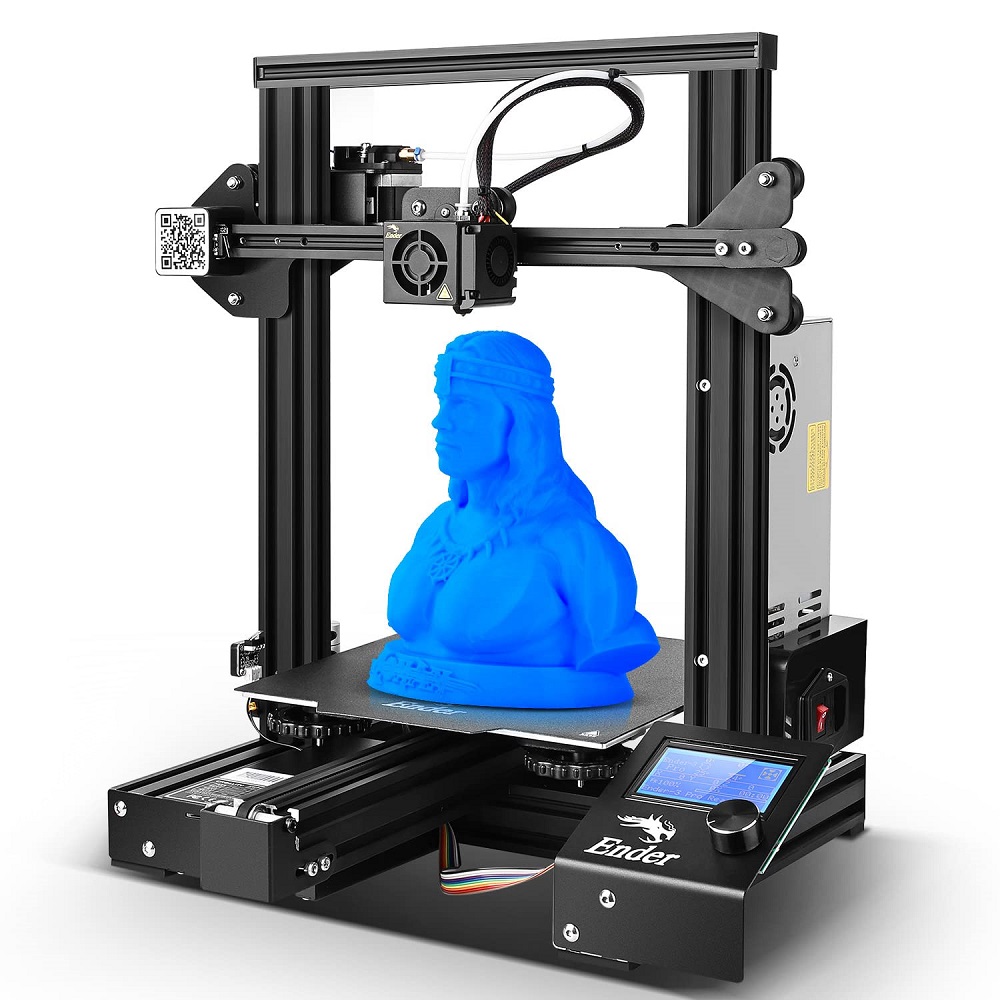
When starting with 3D printing, selecting the right printer is crucial. Consider your budget and the types of projects you want to create. As mentioned, FDM printers are ideal for beginners. They are affordable, easy to use, and widely available. Look for models that have good reviews for reliability and customer support.
If you aim for intricate designs, consider an SLA printer. However, keep in mind the costs involved. These printers are generally more expensive than FDM models. Additionally, they require specific resins, which can also add to your expenses.
Before purchasing, research the features of each printer. Look for print size, speed, and quality specifications. Make sure the printer aligns with your goals. Once you find a suitable model, you can start your 3D printing journey.
Selecting Filament or Resin
After choosing a printer, the next step is selecting the right filament or resin. For FDM printers, popular filament types include PLA, ABS, and PETG. PLA is easy to use and biodegradable. It’s an excellent choice for beginners. ABS is more durable but can warp. PETG balances durability and ease.
If you choose an SLA printer, you will need resin. Standard resin works for most prints, but specialty resins are available for specific applications. Flexible resin, for example, produces bendable objects. Always ensure you use the recommended materials for your printer to achieve the best results.
Preparing Your Workspace
A well-prepared workspace enhances your 3D printing experience. Choose a flat, stable surface for your printer. Make sure you have enough room around it for ventilation. Keep tools nearby, such as a spatula for removing prints and a pair of scissors for filament trimming.
Adding some organization will make things easier. Have containers for spare parts, filaments, and print failures. This helps to keep everything in the same place and reduce clutter.
You might also want to install software on your computer. Most printers come with their slicing software, which converts your 3D model into a printable file. Familiarize yourself with this software. It is crucial for effectively using the printer.
Designing Your First Model
Using 3D Modeling Software
Before you print anything, you need a 3D model. Many software options are available for designing models. Tinkercad is a great starting point—it’s free and user-friendly. You can create simple designs and modify existing ones.
Fusion 360 is another option. It is more advanced and offers professional-grade designs. If you feel comfortable, this may be a good choice. FreeCAD is an open-source alternative that also offers many features. Explore different software options and find one that suits your comfort level.
Finding Pre-made Models
If designing is too challenging, don’t worry. Many websites offer pre-made 3D models. Thingiverse and MyMiniFactory are two popular platforms. You can find models of toys, tools, and more. Browse through their libraries to find something interesting.
When using pre-made models, check the licensing. Some models are free to print, while others may have restrictions. Always respect the creator’s wishes. Download the file once you find a model that excites you.
Modifying Models
You might want to change a model before printing. Many software programs allow you to alter existing designs. You can scale, rotate, or combine different elements. This is a great way to customize your prints and learn how design software works.
If you downloaded a model, importing it into your software is usually straightforward. Look for tutorials that guide you in modifying designs, if you’re unsure how to proceed. This step will help you build confidence as a 3D creator.
Slicing Your Model
Understanding Slicing Software
Once you have a model, you need to slice it. Slicing software turns your 3D model into instructions the printer understands. It determines how the printer will create the object, layer by layer. Many 3D printers come with their own sliced software, like Cura or PrusaSlicer.
Get comfortable with the slicing software. Familiarize yourself with settings like layer height, print speed, and infill density. Each setting affects the final product. For your first print, use default settings until you learn more.
Configuring Settings
You will need to adjust several settings before slicing. Start with layer height. A smaller height creates detailed prints but takes longer. Larger heights print quicker, but details may be lost. Start with a medium layer height, around 0.2mm, for your first project.
Next, consider print speed. A slower speed can improve accuracy but will take more time. A common starting speed is around 50mm per second. As you gain experience, you can experiment with settings to optimize your prints.
Infill density controls how solid the object is. For your first print, use a density of about 20%. This provides a good balance between strength and material use. You can always adjust this in future projects depending on your needs.
Starting the Slicing Process
Now that you’ve configured settings, you can begin slicing. Hit the slice button in your software. The software will now prepare the G-code file, which contains instructions for the printer. Once completed, save the G-code file to your computer or directly to an SD card, depending on your printer model.
Review the sliced model using the preview feature. Most software allows you to see the layers and paths the printer will take. This step is crucial to ensure everything is configured correctly. If you spot any issues, go back and adjust your settings before slicing again.
Printing Your First Model
Setting Up the Printer
Now it’s time to print your first model. First, ensure your printer is correctly set up. Check the printer bed—you want it level and clean. A well-leveled bed ensures your print adheres correctly. Many printers have automatic leveling features, while others require manual adjustment.
Next, load your filament into the printer. Follow the manufacturer’s instructions for loading, as this process can vary. Be patient; the filament must feed correctly into the nozzle.
Sending the File to the Printer
With your model sliced and printer prepared, send the G-code file to the printer. If you are using an SD card, insert it into the printer. Use the printer’s interface to select the file. If your printer connects to your computer, you may need to follow different steps. Consult your printer’s manual if you’re unsure.
Once you choose the correct file, you can start the printing process. Press the print button, and watch as the printer begins to create your object layer by layer. This part is exciting!
Monitoring the Print
While your printer works, keep an eye on it. Ensure the filament feeds smoothly and that the print adheres to the bed. Be aware of unusual noises or smells. These could indicate problems. Intervening early can save you time and materials.
During the print, you may also learn about troubleshooting issues. If the print begins to fail, pause or cancel it. This is part of the learning curve. Evaluate what went wrong and how you can improve for your next print.
Post-Printing Process
Removing the Print
When the printing is complete, it’s time to remove your model. First, let it cool. This helps to prevent warping or damage. If the print adheres tightly to the bed, you might need a spatula to gently pry it off.
Use caution to avoid breaking your print. Some printers may include a flexible print bed, which can help to remove designs more easily. Be gentle during this process—patience is key here.
Cleaning Up
After removing the print, check your printer. Clean any excess filament from the nozzle. This prevents clogging for future prints. Additionally, inspect the print bed for any residue and clean it as needed.
If you’ve used resin, ensure you follow proper disposal methods. Resin can be hazardous, so handle it with care. Many recommend using a designated container for used resin and following local safety regulations for disposal.
Finishing Touches
Once you have your model, you can add finishing touches. Depending on the material, you can sand your print for a smoother finish or paint it for added color. Experiment with different techniques to enhance the final product. This step allows you to personalize your pieces further.
Celebrate your first 3D print! This accomplishment marks the beginning of your journey. Use it to motivate yourself for future projects. Each print teaches you something new, whether through trial or error.
Advanced Techniques in 3D Printing
Experimenting with Advanced Settings
Once you are comfortable with basic printing, consider experimenting with advanced settings. Play with different layer heights or infill percentages to see how they affect your prints. Smaller layer heights offer more detail, while larger heights can improve speed.
Try different print speeds as well. Slower speeds can enhance accuracy, but some projects may benefit from faster speeds. Experiment to find the right balance for your specific projects.
You can also explore support structures. These help with overhangs or intricate designs. Your slicing software will have options for generating supports. Take the time to learn how to use them effectively.
Exploring Different Materials
As you gain confidence, explore various materials. Beyond the common PLA and ABS, there are unique options like flexible filaments, composites, and even nylon. Flexible filaments can produce bendable items, while composites may offer wood-like finishes.
Research the characteristics of each material. Some require higher temperatures, while others might need specific printing conditions. Understanding these nuances will allow you to create diverse products.
Collaborative Projects
Consider working on collaborative projects for an enriching experience. Join local maker spaces or online communities focused on 3D design. You can share ideas, learn from others, and work on joint projects. Collaborating helps you broaden your skills and knowledge.
Additionally, many online forums and social media groups allow you to connect with fellow enthusiasts. Share your projects and get feedback. This can provide valuable insights into areas for improvement.
Troubleshooting Common Issues
Print Failures
As you print more, you might experience failures. This could be a result of improper bed leveling, temperature issues, or filament quality. Assess these elements whenever a print fails.
Start by checking your print bed. Make sure it’s level and free of debris. Next, verify that your temperature settings are appropriate for the chosen filament. Each type has a recommended range; sticking within it can help prevent issues.
If you’re dealing with filament problems, like brittleness or clogging, consider changing brands. Some brands produce higher-quality filaments than others.
Layer Separation
Layer separation is another common issue where layers do not bond properly. This can occur if the print temperature is too low or the print speed is too high. Try increasing the temperature slightly or reducing the print speed.
If layers are separating often, you might also consider increasing the infill density. This helps provide strength to the print. Observe your results with each adjustment until you achieve stable prints.
Stringing
Stringing occurs when fine threads of filament form between parts of your print. This usually happens due to excess material being extruded while the printer is moving. To reduce stringing, adjust your retraction settings in your slicing software.
Increasing retraction distance or speed can help eliminate these unwanted strings. Keep testing different settings until you find a suitable configuration. This problem can often be solved with patience and experimentation.
Conclusion
Reflecting on the Journey
3D printing opens a world of possibilities. From simple objects to intricate designs, everything can be created with patience and practice. Enjoy the process of learning and exploring. Each print teaches you more about your printer, materials, and techniques.
Think about the projects you want to tackle next. Whether it’s designing tools or making gifts, there’s always something new to create. Use online resources to find inspiration and learn more.
Continuing Your Education
Stay curious and continue to learn. Resources abound online, from tutorials to forums where you can ask questions. Join a community of 3D printing enthusiasts to share triumphs and troubleshoot common issues. This collective knowledge will enrich your experience.
By dedicating time to 3D printing, you will create not just objects but skills. Embrace the journey, learn from mistakes, and enjoy the endless creativity that 3D printing offers.
Leave a Reply