Here you can learn about a variety of electronic equipment and office items to help you work and study better. What are you waiting for? Come and take a look!

Month: December 2024 (Page 1 of 3)

What Size Is Normal Printer Paper? Differences Between Types

Introduction to Printer Paper Sizes

Navigating the world of printer paper sizes might seem daunting at first. Different jobs and devices often require various paper dimensions. Understanding these sizes can enhance document presentation and ensure smoother operation of printing tasks.

Printer paper sizes are not uniform globally. In the U.S., the most commonly used sizes include Letter, Legal, and Tabloid. However, internationally, sizes like A4, A3, and A5 are more prevalent. This discrepancy often leads to confusion, especially in professional settings involving international correspondence.

Being familiar with both domestic and international paper sizes is essential. This knowledge helps in selecting the appropriate paper and avoiding printing errors, such as misalignments or content being cut off. Whether you are preparing a simple office report or a complex legal document, understanding the right paper size can make a significant difference.
HP Printer Driver

Standard Paper Sizes in the U.S.

In the United States, three paper sizes are the pillars of daily printing. These sizes fit our printers, copiers, and professional demands.

Understanding Letter, Legal, and Tabloid Sizes

Letter Size (8.5 x 11 inches): This size is the workhorse for everyday office printing. It’s perfect for reports, memos, and emails. Its dimensions are standardized for most folders and binders.

Legal Size (8.5 x 14 inches): Legal size is longer, made for documents that need more space. Contracts and legal forms use this size. It fits well in specialized legal folders.

Tabloid Size (11 x 17 inches): Also known as Ledger, tabloid is key for big prints. This size suits newspapers, posters, and large spreadsheets. Tabloid is essential for publishing and advertising needs.

When you print, choose the size that matches your document’s purpose. Letter size is normal printer paper for daily tasks. Legal size is for documents that need more length. Tabloid is for large-scale projects. Knowing these sizes helps avoid print issues and ensures your work looks professional.

Often Used International Paper Sizes

While the U.S. relies on Letter, Legal, and Tabloid sizes, international paper sizes are standardized around the A-series. The ISO (International Organization for Standardization) governs these sizes, which ensures consistency across different countries and industries. The A4 size is particularly noteworthy as it serves as the global equivalent to the U.S. Letter size.

A4 Paper: The Global Standard

A4 Size (210 x 297 mm or 8.3 x 11.7 inches): This is the standard size for many office printers worldwide. It’s similar to the U.S. Letter size but slightly taller and narrower. A4 is the preferred choice for documents, letters, and standard forms outside North America. When you’re dealing with international colleagues or offices, using A4 size ensures ease of document handling and compatibility.
Printer paper usage

Additional ISO Sizes: A3, A5, and More

For diverse printing needs, additional ISO sizes come into play. Below are common options:

A3 Size (297 x 420 mm or 11.7 x 16.5 inches): A3 is double the size of A4 and is useful for big designs or spreadsheets. It’s great for presentations and posters.

A5 Size (148 x 210 mm or 5.8 x 8.3 inches): Half the size of A4, A5 is perfect for booklets and flyers. Its smaller size makes it ideal for handouts.

Other sizes in the ISO series include A2, A1, and A0, intended for larger-format print work, as well as B-series sizes, which are alternatives to the A-series, offering more variations in size for different applications.

In summary, the use of these ISO sizes caters to a variety of printing demands. From office documents to marketing materials, knowing these sizes enhances printing efficiency and ensures smooth international communications.

Historical Perspective on Paper Size Standards

Understanding why different regions use various paper sizes requires tracing back their origins.

The Origin of the U.S. Paper Sizes

U.S. paper sizes have a unique history. When selecting what size is normal printer paper, knowing this history helps. Letter size, 8.5 x 11 inches, has been in use for centuries. Its size was almost changed in the 1930s, but finally solidified in the 1980s. The Legal and Tabloid sizes followed, catering to specific needs in law and media. These sizes became standard due to their practicality and wide adoption.

ISO Standards Development

The ISO 216 standard, prevalent outside North America, arose from a need for consistency. Initiated in 1975, this method utilized a mathematical basis for sizing. This allowed for easy scaling between sizes. For instance, A4 is the most used, fitting documents similarly to U.S. Letter size. These standards are vital for global business, ensuring accurate and professional document exchange.
Printer

Practical Tips for Printing on Different Sizes

Adjusting printer settings and choosing the right paper is vital for printing. Here are some practical tips to guide you through printing on different paper sizes effectively.

Adjusting Printer Settings for A4 Documents

A4 documents pose specific challenges when printed in regions that use Letter size. Here’s how to adjust your settings:

  1. Check the document dimensions in your printing software.
  2. Set your printing scale to 94% if your original document uses A4 size. This change ensures the entire document prints on Letter size paper without edges being cut off.
  3. Confirm that borders in the print preview match the expected outcomes. This step avoids cut-offs on the top and bottom.
  4. Save these settings as a preset for all future A4 document printings to streamline your process.

Choosing the Right Paper for Your Needs

Selecting the appropriate paper size depends on your document’s purpose and printer capacity. Here’s what to consider:

  1. Identify the document type. Use legal paper for longer contracts and letter size for daily tasks.
  2. Check your printer’s compatibility. Does it support tabloid size for large prints?
  3. Consider the final presentation. Large graphics often require tabloid or A3 size.
  4. Always have various paper sizes ready, particularly if working internationally. This preparation avoids last-minute hassles.

Understanding how to manipulate printer settings and select the right paper size ensures high-quality prints and efficient document handling. These tips aim to enhance your printing experience.

Importance of Paper Size in Business Communication

Ensuring your documents maintain professionalism when sent internationally is critical. Mismatched paper sizes can affect a document’s layout, causing important content to be cut off or presented poorly. Such an oversight can seem unprofessional. Knowing and using the correct paper sizes can avoid these pitfalls, enhancing the consistency and readability of your business communications.

Ensuring Document Professionalism Internationally

It’s essential to comply with the expected paper size standards when sending documents abroad. This compliance shows respect for the recipient’s local customs and promotes a professional image of your business. To ensure documents appear professional:

  1. Identify the Destination: Different countries have different paper size standards. Know if the recipient uses ISO or ANSI standard sizes.
  2. Use Correct Paper Size: For U.S. internal communications, use Letter size. For international, use A4 or other ISO standard sizes.
  3. Adjust Settings: Change print settings to match paper size. Rescale documents to fit if sizes differ.
  4. Communicate with Recipients: If sending documents to be printed, provide instructions on scaling to prevent format issues.

By taking these simple steps, you aid in preserving the original layout and design of your documents, ensuring they are received as intended. This fosters trust and reliability, keystones in maintaining international business relations.

Advancements and Future Trends in Printer Paper Use

As technology advances, so do the trends in printer paper use. Looking forward, we can expect significant changes that align with both eco-friendly initiatives and the digital transformation of workplaces.

Eco-friendly Practices and Digital Transformation

In response to environmental concerns, eco-friendly practices in printer paper use are on the rise. Here are key trends to watch:

  • Recycled Paper: More businesses are choosing recycled paper to minimize impact on forests and reduce waste.
  • Sustainable Sourcing: Paper manufacturers are increasingly committed to sustainable practices. They use responsibly sourced materials and follow standards like FSC (Forest Stewardship Council).
  • Digital Documents: The shift to digital documents is growing to cut down on physical paper use. This reduces waste and storage needs.
  • Cloud Storage: More companies are storing documents in the cloud. This means less printing and more secure, accessible data.
  • E-Signatures: The use of digital signatures is becoming more common. This eliminates the need for printing documents just for a signature.
  • Print-on-demand: As opposed to printing in bulk, offices use print-on-demand. This reduces unnecessary printing and paper use.

The digital transformation complements eco-friendly paper trends. Here’s how:

  • Electronic Workflows: Offices are adopting electronic workflows. This streamlines processes, allowing for quick edits and approvals without printing.
  • Paperless Meetings: Meetings are going paperless with digital presentations and documents shared electronically.
  • Mobile Connectivity: With more mobile-connected printers, people print only when necessary. This reduces the overall paper use.
  • Smarter Printers: Advanced printers can now send alerts to reduce unnecessary prints. They can also handle multiple paper sizes efficiently, reducing the need for physical document storage.

In sum, these advancements encourage responsible printer paper use. They also pave the way for a more digital, efficient, and eco-conscious future in paper consumption and document management.
Why Does My HP Printer Say Offline? Common Causes Explained

Common Causes for HP Printer Offline Status

Understanding the reasons behind your HP printer’s offline status is the first step towards resolving the issue. Here are some common causes about the question “why does my hp printer say offline”:

  • USB Connectivity Issues: If your HP printer is connected via USB, it’s crucial to ensure that the cable is securely plugged into both the printer and the computer. A loose connection or a faulty USB port could prompt an offline status.
  • Network Connection Problems: For wireless HP printers, network connectivity issues can arise. Ensuring that your printer and router are properly connected and on the same network is essential.
  • Software Glitches: Outdated or corrupt printer drivers can cause communication errors between the printer and the computer, leading to an offline message.
  • Hardware Malfunctions: Sometimes the printer itself might have internal hardware issues, such as paper jams or problems with the ink or toner cartridges, which can affect its status.
  • Settings and Configuration: Incorrect printer settings or configurations on your computer can mistakenly set your printer to appear offline.
  • Energy Saving Modes: Printers in energy-saving modes may not wake up promptly, appearing offline to the connected device.

Addressing these causes can help you transition your HP printer from offline to online, allowing for smooth printing operations.

hp printer machine

Initial Troubleshooting: Physical Connections and Restart

When your HP printer displays an offline status, start with the basics. First, inspect the USB connections. Ensure the cable connects firmly to the printer and your computer. If the printer connects via USB and you suspect a loose or damaged cable, replace it and recheck the connection. Sometimes, switching to a different USB port on your computer might help.

Next, consider a simple restart. Turn off your printer, wait a few seconds, and power it back on. This can refresh the printer’s system and clear minor errors. For printers in energy-saving mode, a restart can wake them up and restore their online status.

Lastly, if the issue persists, try a different USB cable or look for damage to the cable. Keep an eye out for status lights on the printer that indicate connectivity issues. If a hardware malfunction, such as a damaged port, is at play, you may need to seek professional help or contact HP support.

These initial steps are often enough to solve connectivity problems, especially if they stem from physical connection issues or the printer not properly exiting sleep mode.

Advanced Troubleshooting: Software and Drivers Check

If your HP printer is still offline after initial checks, focus on software issues. First, ensure that your printer software is updated. Check the manufacturer’s website for the latest driver version. Install it on your computer. Sometimes, outdated or corrupted drivers lead to communication problems between your printer and computer.

Next, review the printer settings on your computer. Follow these steps: Go to the control panel on your PC. Navigate to ‘Devices and Printers’. Right-click on your HP printer and select ‘Printer properties’. Under the ‘Security’ tab, check if all permissions are set to ‘Allow’. Incorrect settings might restrict printer operations.

If these steps don’t resolve the offline issue, consider uninstalling and reinstalling your printer software. To do this: Remove the printer from your computer through ‘Devices and Printers’. Then, reinstall using the ‘Add a printer’ feature. Make sure to download the latest software from HP’s official site.

Lastly, keep your operating system updated. Sometimes, system updates can disrupt printer functionality if not kept current. Regular updates ensure compatibility and might solve hidden issues causing the offline status.

hp 8610 printer

Network Solutions for Wireless and Wired HP Printers

When your HP printer says offline, network issues may be to blame. Here’s how to tackle them for both wireless and wired printers.

Wireless HP Printers

  1. Check Network Connections: Ensure your printer and router are on and connected to the same network.
  2. Restart Devices: Turn off your printer and router. Wait a minute before turning them back on.
  3. Check for Interferences: Other devices might disrupt your Wi-Fi signal. Move your printer closer to the router or away from interference.
  4. Print a Network Configuration Page: This can help you verify the printer’s network settings.
  5. Update Router Firmware: Outdated firmware can cause network problems. Check for updates on your router.

Wired HP Printers

  1. Inspect Ethernet Cables: Make sure the cable is securely connected to both printer and router.
  2. Check Router Ports: Sometimes certain ports on the router may malfunction. Try a different port.
  3. Test Cable on Different Device: Use your Ethernet cable with another device to ensure it works.

General Network Fixes

  1. Printer IP Address: Confirm the IP address hasn’t changed. A new IP can make the printer seem offline.
  2. Disable VPN Connections: VPNs can change the network path and make your printer appear offline.
  3. Firewall Settings: Sometimes, the firewall blocks the printer. Check your settings and make exceptions for your printer if necessary.

After following these steps, try printing again to see if your HP printer is back online. If the printer remains offline, further investigation with HP support or a professional technician might be needed. Keep your printer’s firmware and drivers up to date to prevent future issues.

Clearing Print Jobs and Setting Printer to ‘Online’ Manually

Sometimes, unresolved print jobs might keep your HP printer offline. Here’s how to clear them and switch your printer to ‘online’ mode manually.

  1. Open the Print Queue: Click on ‘Start’, go to ‘Devices and Printers’, right-click your HP printer icon, and select ‘See what’s printing’.
  2. Cancel Print Jobs: In the print queue, cancel all pending jobs by right-clicking each and choosing ‘Cancel’.
  3. Set Printer to Online: Once the queue is clear, close the print queue window, right-click the HP printer icon again, and select ‘Use Printer Online’ from the dropdown menu.

After clearing the print jobs and manually setting the printer to ‘online’, your HP printer should start receiving print commands. If these steps don’t resolve the issue, a deeper software or hardware problem might be at play.

HP printer

Reinstalling HP Printer Drivers and Packages

Reinstalling the HP printer drivers can fix offline issues. Follow these steps for a fresh install. Uninstall the current printer drivers. Go to ‘Devices and Printers’ in your computer’s control panel. Right-click your printer and choose ‘Remove device’. Visit the HP website and download the newest drivers for your model. Run the installer and follow prompts to install the drivers. After installing, restart your computer and printer. This should help set your printer status to online.

If issues persist, you may need to remove printer packages too. Here’s how:

Use the ‘printui /s /t2’ command in the Command Prompt. This requires admin rights. This opens the ‘Print Server Properties’ window. Remove the printer driver and package. Reinstall the printer using ‘Add a Printer’ in the ‘Devices and Printers’ menu. Always make sure you’re logged in as an administrator when doing this.

Remember, using the most current software is key to resolving printer offline errors. Regular updates keep your printer running smoothly with your system. If the printer still shows as offline, it’s time to contact HP support or seek professional help. Don’t forget preventive maintenance to avoid future offline issues.

Using Manufacturer Support and Online Management Tools

When your HP printer is offline, using manufacturer support can be incredibly helpful. Start by visiting the HP support website. Here, you can find troubleshooting guides specific to your model. These guides often resolve common issues. If needed, you can also chat live with HP support agents. They provide step-by-step assistance in real-time.

Many printers, including HP models, offer online management tools. These tools monitor your printer’s status and health. They can send alerts before issues occur, such as low ink warnings. Set up these tools through your printer’s software installation. They help keep your printer running smoothly.

If troubleshooting and online tools don’t resolve the problem, consider professional help. Sometimes, complex issues require an expert’s touch. Check if your printer is under warranty. If it is, you might get free repair services from HP. Always check your printer’s manual or online resources for more help.

In conclusion, use HP’s online management tools and support services to solve printer offline issues. They help you streamline printer management, preventing frequent offline status. If these steps fail, reach out for professional help or use warranty services if available.

Preventative Measures and Regular Maintenance Tips

To maintain your HP printer’s efficiency and avoid offline issues, follow these tips regularly.

  1. Update Regularly: Keep your printer software and drivers up to date. Check the HP website for updates.
  2. Regular Cleaning: Dust and debris can cause paper jams. Clean your printer’s interior gently every month.
  3. Check Connections: Regularly ensure all cables and network connections are secure. Replace any damaged cables.
  4. Monitor Ink Levels: Low ink can cause printing errors. Replace ink cartridges before they are completely empty.
  5. Avoid Overloading: Do not overload the printer tray. Stick to the paper capacity guidelines.
  6. Use Quality Supplies: Always use good quality paper and genuine HP cartridges to prevent issues.
  7. Scheduled Restarts: Periodically turn your printer off then on. This can clear minor errors.

Implementing these steps can help keep your HP printer running smoothly and reduce offline problems.

Create Christmas Cards with HP OfficeJet 200 Mobile Printer

Key Features of the HP OfficeJet 200 Mobile Printer

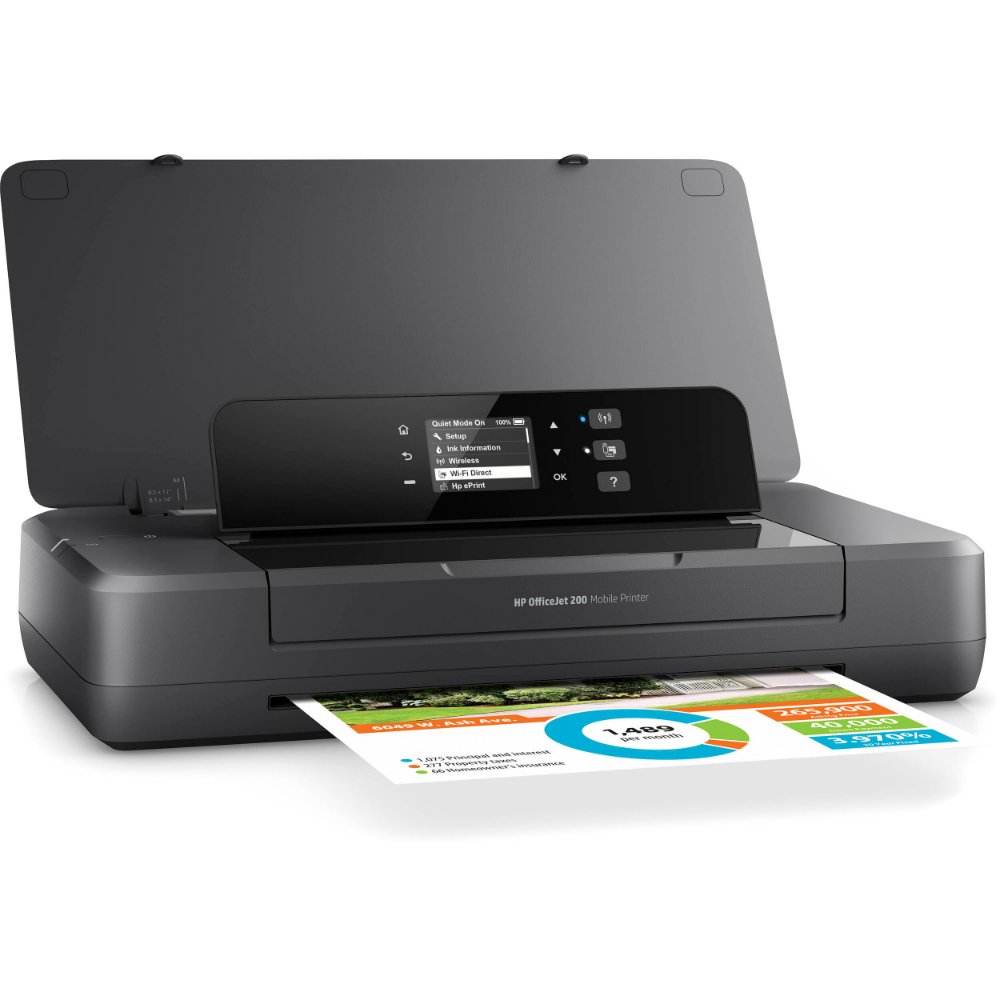
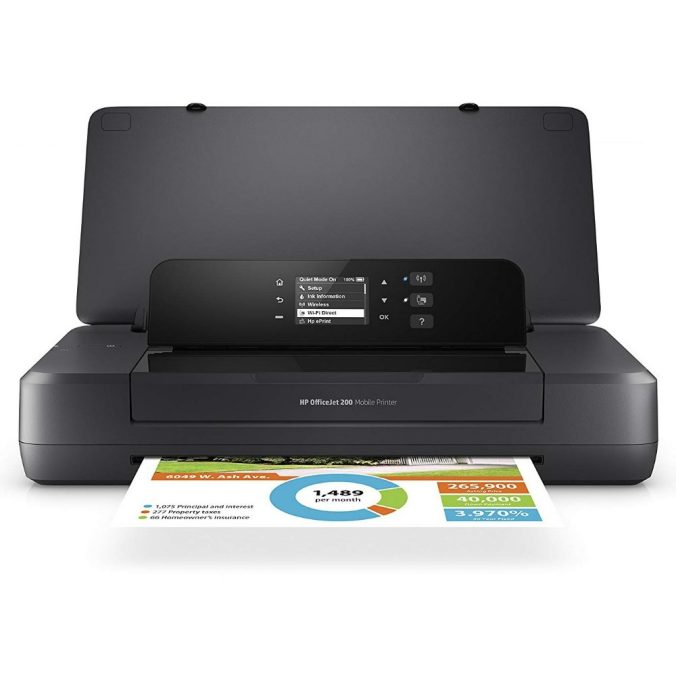
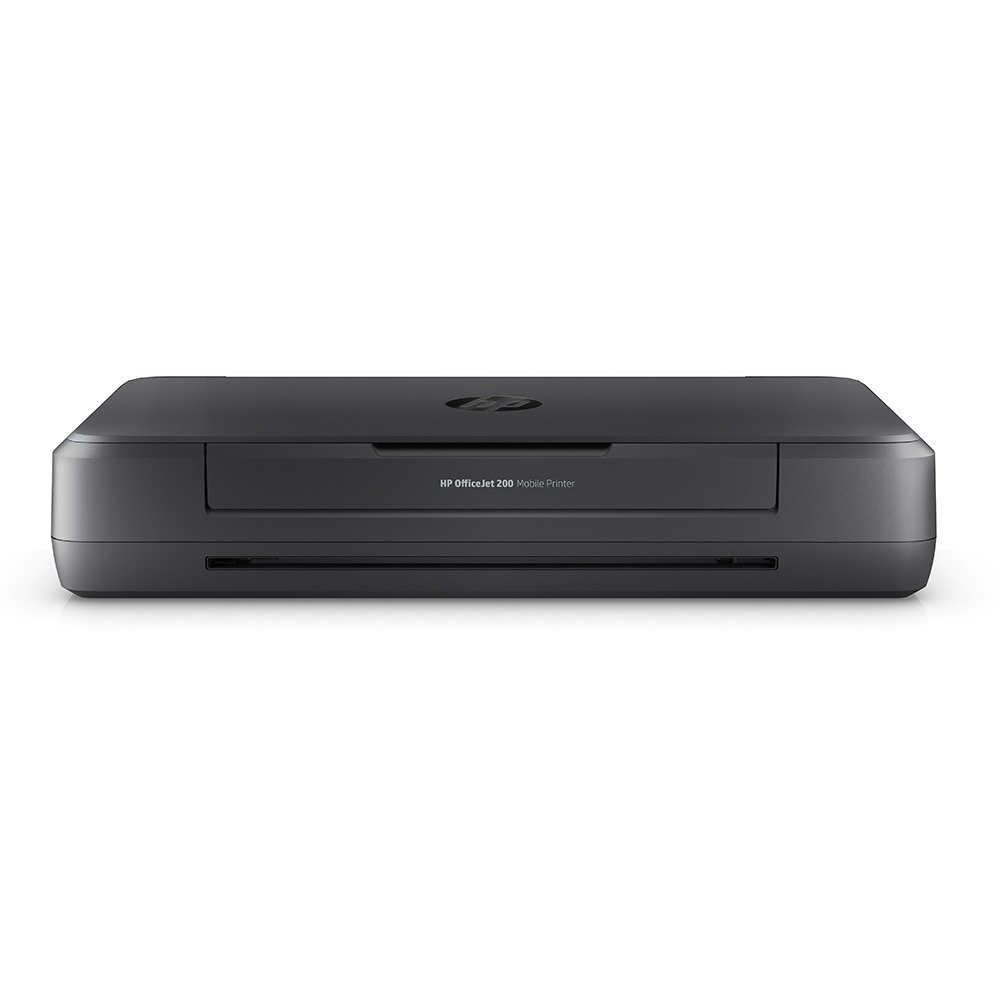
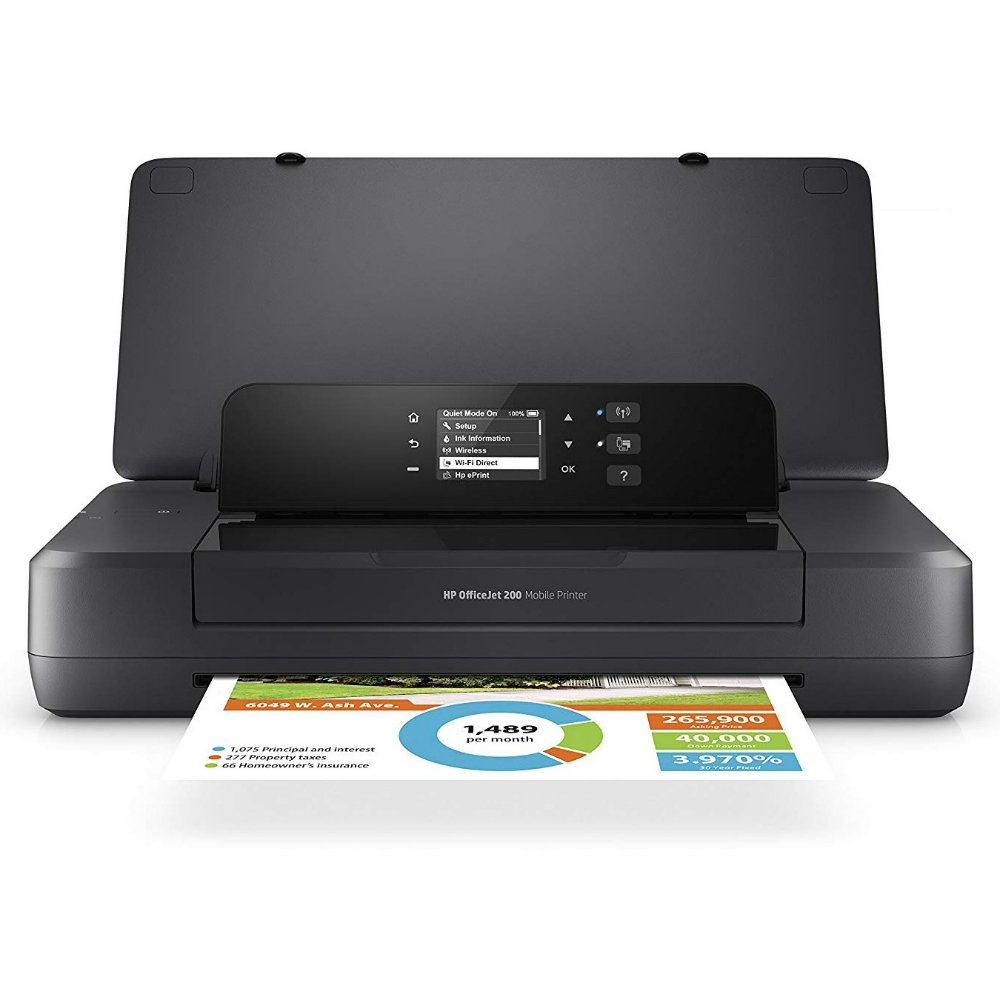
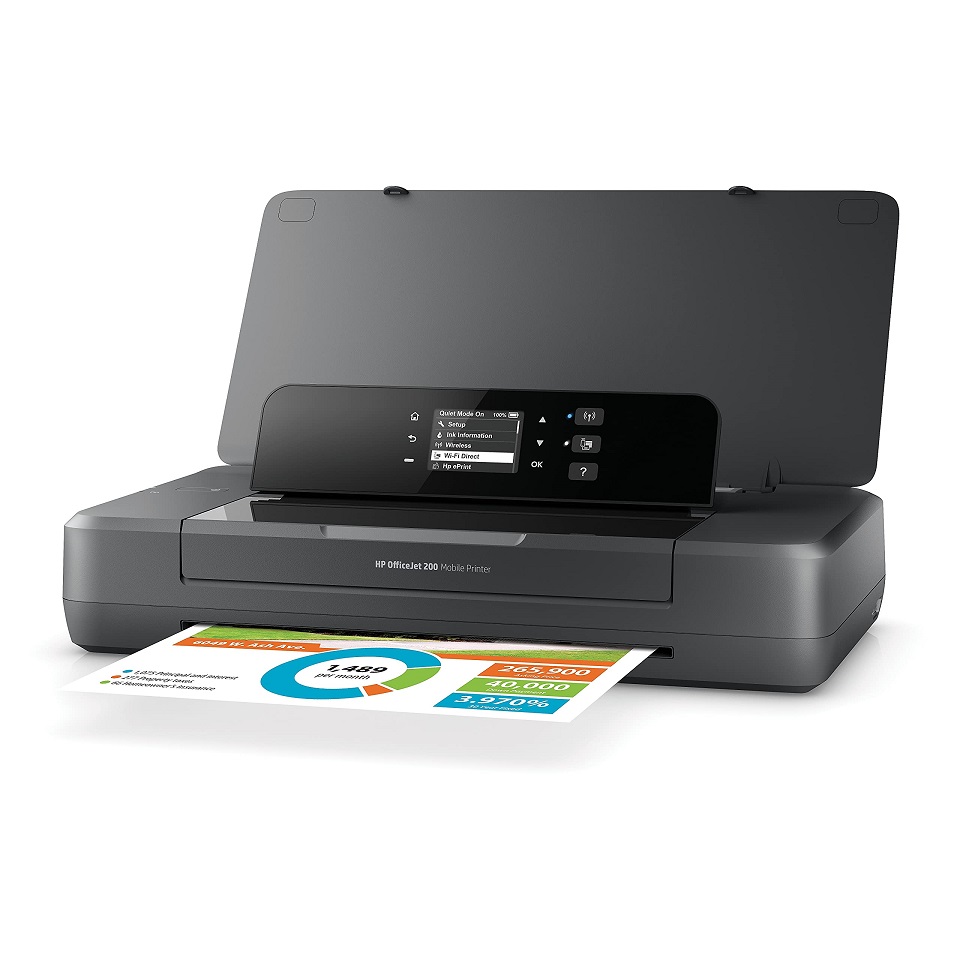
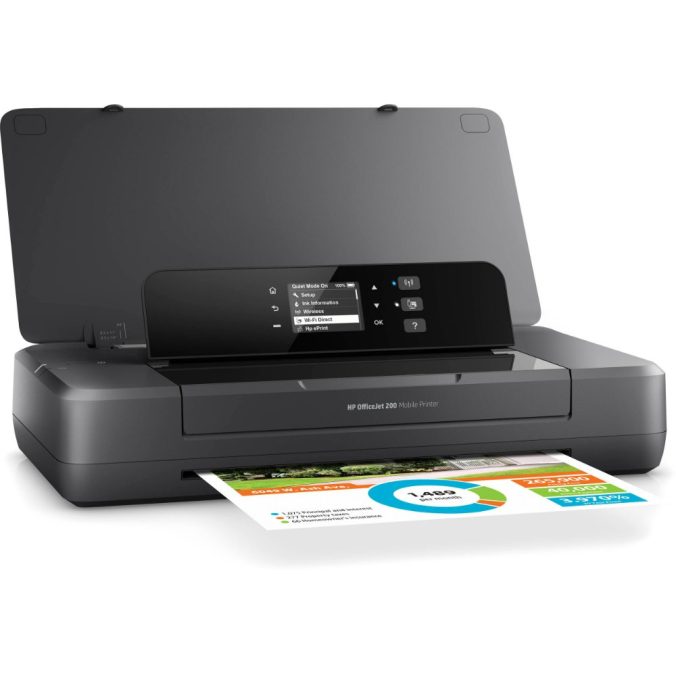
The HP OfficeJet 200 Mobile Printer stands out for its compact size and robust functionality. This printer is designed to meet the needs of professionals on-the-go. It is lightweight, making it easy to transport in a backpack or briefcase. Despite its small size, it doesn’t compromise on print quality or speed. The printer supports multiple paper sizes and types, enhancing its versatility. It also features wireless printing capabilities, allowing users to print directly from their mobile devices without needing a wired connection. One of the key features of the HP OfficeJet 200 is its long-lasting battery life. This makes it possible to print tasks even when there’s no power outlet nearby. Additionally, it’s equipped with a quiet mode, which reduces noise during operation—ideal for discrete printing in quiet environments such as libraries or offices.

Setting Up Your HP OfficeJet 200 for the First Time

Setting up your HP OfficeJet 200 mobile printer is a simple process. Before you start, ensure you have all the necessary items: the printer itself, the battery, charger, and ink cartridges. Here’s a step-by-step guide to help you get started:

  1. Unbox the Printer: Carefully remove the printer from its box and take off the protective packaging.
  2. Install the Battery: Open the battery compartment and insert the battery. Make sure it clicks into place.
  3. Charge the Printer: Connect the printer to a power source using the charger provided. Allow it to charge until the indicator shows a full battery.
  4. Insert Ink Cartridges: Lift the ink cartridge door, insert the ink cartridges, and close the door firmly.
  5. Power On: Press the power button. The printer should turn on, and the display panel will light up.
  6. Install Printer Software: On your computer or mobile device, install the HP printing software. You can find this on the HP website or on a CD that came with the printer.
  7. Connect to Wi-Fi: Follow the on-screen instructions to connect the printer to your Wi-Fi network. This will enable wireless printing.
  8. Print a Test Page: Once connected, try printing a test page to confirm everything is working correctly.

Remember to keep the HP OfficeJet 200 mobile printer’s manual handy during setup in case you need to refer to it. With these steps, your printer is now ready to provide you with high-quality prints wherever you are.

HP printer

The Versatility of HP OfficeJet 200 Mobile Printing

The HP OfficeJet 200 Mobile Printer shines in versatile printing. Its ability to handle different paper sizes and types makes it an all-rounder for various printing tasks. Whether you’re printing business documents, brochures, or photos, this printer adapts effortlessly. The wireless printing feature is a game-changer for professionals always on the move. It lets you print from smartphones, tablets, or laptops without fuss. You don’t need cables or to be in an office. Just connect to the printer via Wi-Fi and hit print. This printer supports various mobile printing standards. These include Apple AirPrint?, Google Cloud Print?, and the HP ePrint app. Creating Christmas cards with the HP OfficeJet 200 Mobile Printer not only allows for exceptional print quality but also gives you the freedom to express your creativity and personalize your messages.

In addition, the HP OfficeJet 200’s quiet mode is a boon for shared spaces. You can print without causing disturbances, maintaining a calm work environment. For those who value efficient and quiet operation, this feature is a significant plus.

Connecting Your Devices with the HP OfficeJet 200

Connecting your various devices with the HP OfficeJet 200 mobile printer is straightforward. This section will guide you through the simple steps to ensure a seamless connection, whether you’re using a smartphone, tablet, or laptop.

First, ensure your HP OfficeJet 200 is powered on and connected to your Wi-Fi network. Check that the printer’s wireless feature is active. You can usually find this setting on the printer’s display panel.

For users of smartphones and tablets, start by opening the Wi-Fi settings on your device. Look for the printer’s network, which typically appears as ‘HP-Print-xx-OfficeJet 200.’ Connect to this network, and you’re ready to print directly from your device.

Laptop users should verify that the HP printer’s driver software is installed on their computers. Once the software is installed, add the HP OfficeJet 200 as a printer in your computer’s settings. Ensure your computer is also connected to the same Wi-Fi network as the printer for hassle-free printing.

The HP OfficeJet 200 supports popular mobile printing apps like Apple AirPrint? for iOS devices and Google Cloud Print? for Android. If you prefer using applications, download the HP ePrint app. It provides a user-friendly interface for printing documents and images directly from your mobile apps.

By connecting your devices to your HP OfficeJet 200 mobile printer, you leverage its full potential, making printing convenient no matter where your work takes you.

HP OfficeJet 200 mobile printer

Print Quality and Speed: What to Expect from the HP OfficeJet 200

Expect crisp, professional prints with the HP OfficeJet 200 mobile printer. With high-resolution output, documents and images appear sharp and clear. This quality is consistent across various paper types and sizes.

Print speed is also a highlight. Quick printing means less waiting for documents. In ideal conditions, you can print up to 10 pages per minute (ppm) in black and white. For color prints, the speed is approximately 7 ppm. These rates are impressive for a printer designed for mobility.

The HP OfficeJet 200 delivers without access to a power source. This is due to its long-lasting battery, ensuring productivity isn’t halted. Another speed factor is the printer’s easy setup and wireless printing capabilities. Being able to print from different devices without cables saves time.

In sum, for a compact and portable printer, the HP OfficeJet 200 doesn’t skimp on speed or quality. It’s a reliable choice for anyone needing efficient printing on the go.

Portable Power: Battery Life and Charging Options for the HP OfficeJet 200

The HP OfficeJet 200 mobile printer exemplifies portable printing with its impressive battery life. You can rely on its battery to last through meetings, client visits, or fieldwork. Expect a long working period before it needs a recharge. This endurance makes it perfect for those with on-the-go lifestyles.

Let’s delve into the battery life and charging options:

  • Robust Battery Life: The HP OfficeJet 200 is equipped with a powerful battery. It allows printing of hundreds of pages on a single charge.
  • Quick Recharge: When the battery is low, you can quickly recharge. It takes only a few hours to reach full capacity.
  • Print While Charging: Even when connected to a power source, printing is uninterrupted. This ensures productivity is never compromised.
  • Energy Efficiency: The printer is designed to conserve energy. This feature extends battery life during usage.
  • Travel-Friendly Charging: With the included charger, you can power up almost anywhere. If you travel, an optional car adapter is available for on-the-road charging.

With the HP OfficeJet 200 mobile printer, staying powered up is one less thing to worry about. Its durable battery and versatile charging options uphold your work momentum anytime, anywhere. Keep your prints coming and your business moving forward with ease.

hp officejet 200 mobile printer

HP OfficeJet 200 Maintenance and Troubleshooting Tips

To keep your HP OfficeJet 200 mobile printer in top shape, follow these maintenance and troubleshooting tips. These will help you deal with common issues and extend the life of your printer.

  • Regular Cleaning: Wipe the printer’s exterior with a soft cloth. Clean dust and debris from the paper feed and ink cartridge areas.
  • Update Software: Ensure the printer’s firmware and software are up-to-date. Visit the HP website for the latest updates.
  • Check Ink Levels: Monitor your ink levels regularly. Replace cartridges when they run low to avoid poor print quality.
  • Use Recommended Paper: Always use the paper types recommended by HP. This reduces paper jams and ensures quality prints.
  • Battery Care: Keep the battery charged and avoid leaving it depleted for long periods.

If you run into problems, here are some quick solutions:

  • Paper Jams: Gently remove stuck paper from the feed. Check for small bits of paper that may remain.
  • Print Quality Issues: If prints are streaky or unclear, check the ink cartridges. Run the printer’s cleaning cycle if needed.
  • Connectivity Problems: When devices won’t connect, restart your printer and device. Check your Wi-Fi connection and network settings.

By regularly maintaining your HP OfficeJet 200 and knowing how to troubleshoot, you ensure reliable performance and high-quality printing on the go.

christmas

Comparing the HP OfficeJet 200 to Other Mobile Printers

When considering a mobile printer, comparing features is crucial. Here’s how the HP OfficeJet 200 stacks up against others:

  • Size and Portability: The HP OfficeJet 200 stands out for its compact design. It is easy to carry, fitting into briefcases or backpacks.
  • Print Speed and Quality: This printer offers fast printing speeds up to 10 ppm in black and 7 ppm in color. The print quality is sharp and professional, making it competitive with other mobile printers.
  • Battery Life: One of the biggest advantages of the HP OfficeJet 200 is its long battery life. It allows printing of hundreds of pages on a single charge, surpassing many competitors.
  • Versatility: The HP OfficeJet 200 supports various paper sizes and types. It also features wireless printing options like Apple AirPrint?, Google Cloud Print?, and HP ePrint.
  • Ease of Setup: Setting up the HP OfficeJet 200 is straightforward. The steps include charging, installing ink, and connecting to Wi-Fi. This simplicity is matched by few other mobile printers.

In conclusion, the HP OfficeJet 200 mobile printer holds its own in the competitive market. Its features of mobility, high-quality printing, and ease of use make it a top choice.

Merry Christmas! May your holiday be filled with joy and laughter!

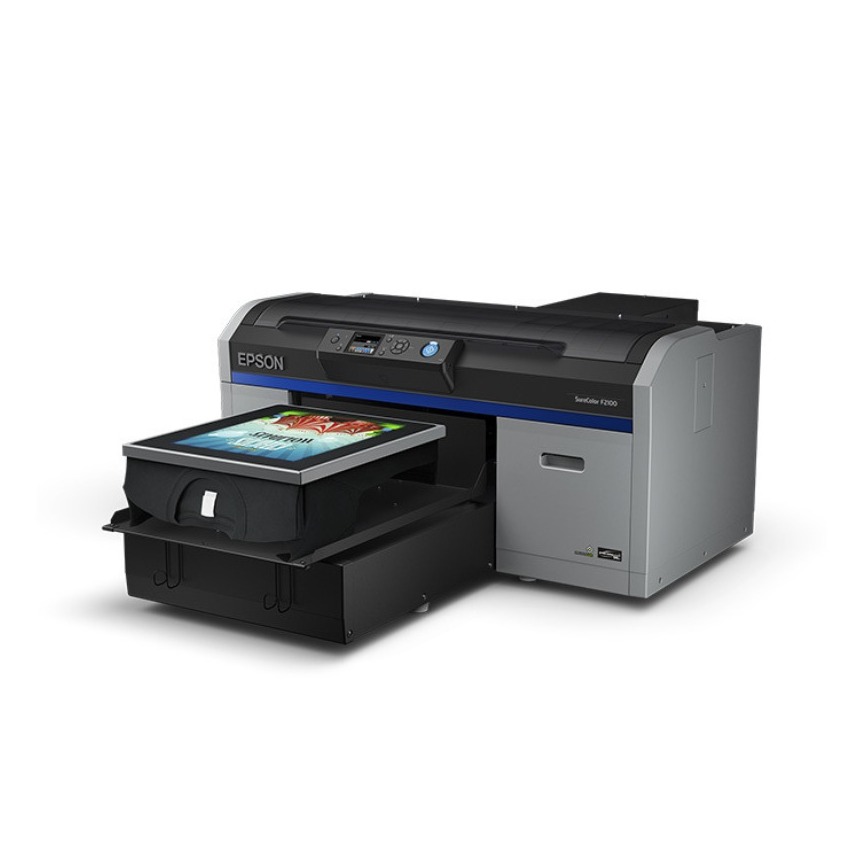
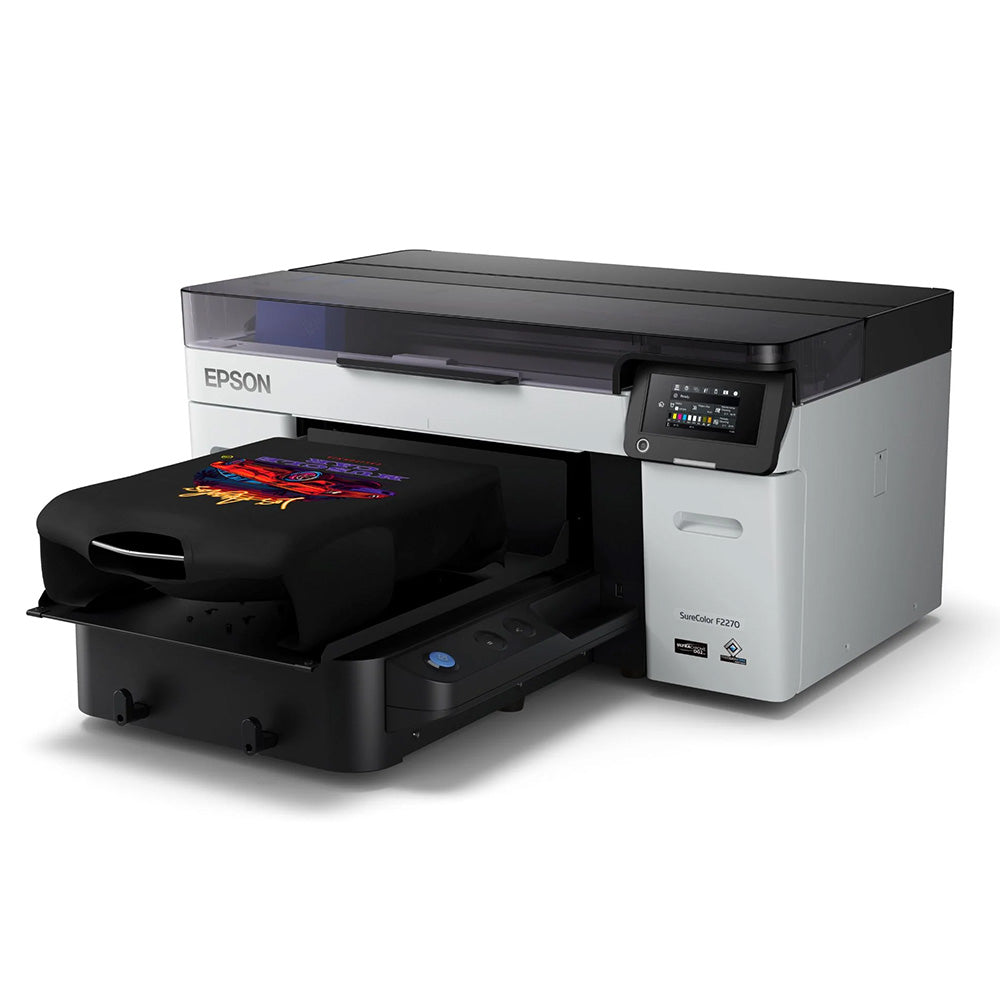
Epson F2100 DTG Printer: A Review of Features and Performance

Setting Up Your Epson F2100 DTG Printer

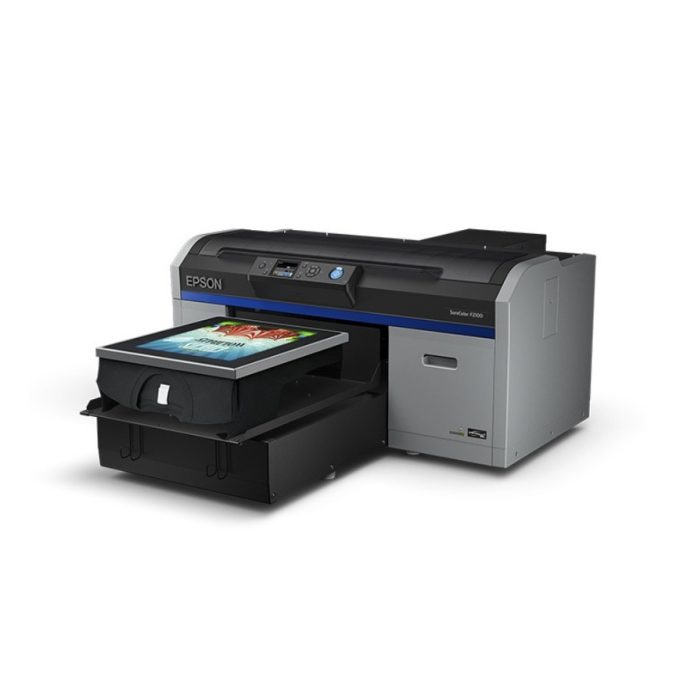
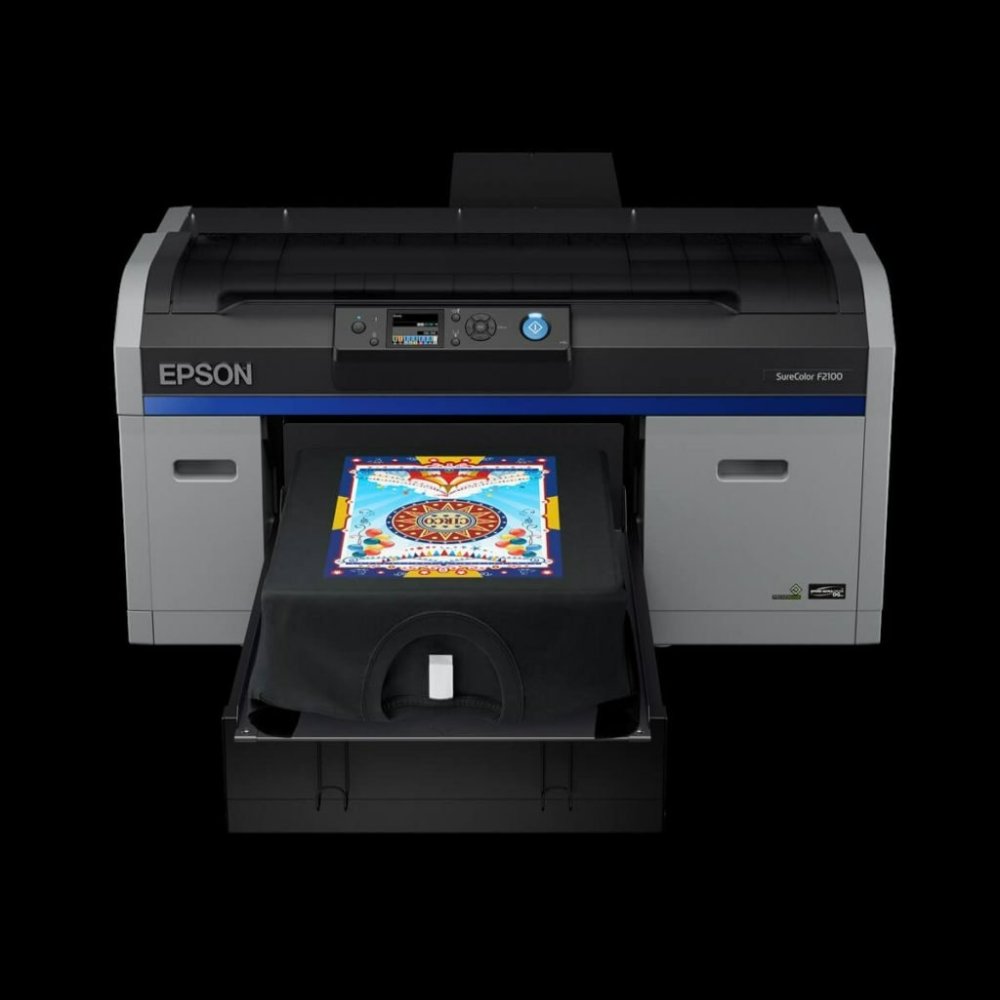
Setting up your Epson F2100 DTG printer is the first step towards mastering its capabilities. Proper setup ensures smoother operations and optimal printing results.

Unboxing and Initial Setup

Start by carefully unboxing your Epson F2100 DTG printer. Check all the components are present as per the manual. Place the printer on a stable, flat surface near a power source. Ensure the work area is clean and dust-free to avoid any contamination.

Installing the Software and Drivers

Install the necessary software and drivers that come with the Epson F2100 DTG printer. Follow the instructions provided to ensure correct installation. This software will enable you to manage printing tasks and customize settings according to your needs.

Loading Garments and Preparing for Printing

Ensure the garments are clean and wrinkle-free before loading them into the printer. Use the platen appropriately sized for your garment. Align the garment correctly to avoid any misprints or distortions. Pre-treat the garments if required, depending on the fabric type and color.

Epson f2100

Understanding the Interface and Software

Once your Epson F2100 DTG printer is set up, you’ll need to familiarize yourself with the interface and software. Mastering these elements is key to harnessing the full capabilities of your printer.

Navigating the Control Panel

The control panel of the Epson F2100 is your command center. Here, you can access and adjust various settings. Use the panel to monitor ink levels, maintenance alerts, and print status. Practice navigating through the menus to find what you need quickly. This makes it easier to respond to any issues that arise during the printing process.

Utilizing the Garment Creator Software

The Garment Creator software that comes with your Epson F2100 DTG printer is powerful. It enables you to create and customize designs specifically for DTG printing. Learn to import your images and graphics, set color profiles, and arrange your layout. The software also lets you adjust ink density and white underbase, essential for vivid prints. By exploring these features, you can ensure your prints come out perfect every time.

Pre-treatment Processes for Optimal Results

Perfect prints start with proper pre-treatment of your garments. This stage is crucial for vibrant and long-lasting results when using your Epson F2100 DTG printer.

Selecting the Right Pre-treatment Liquid

Choosing the right pre-treatment liquid is essential. Options vary based on fabric type and color. For cotton, use a standard pre-treat. For blends, look for a formula that works with multiple fabrics. Always test on a small area before full application.

Applying Pre-treatment Evenly

An even pre-treatment layer is key for a consistent print. Use a pre-treatment machine or hand spray method. Ensure coverage is uniform across the print area. Avoid excess liquid, which can cause issues like ink bleed.

Pre-treatment Tips for Dark and Light Garments

For dark garments, a heavier pre-treatment application may be required. This ensures white ink pops against the dark background. For light garments, use less pre-treat to prevent a ‘box’ effect around the printed area. Adjust your approach based on garment color for optimal print quality.

DTG Printer

The Printing Process Explained

The proper execution of the printing process is central to optimal results with the Epson F2100 DTG printer. Each step from platen selection to maintenance plays a vital role.

Selecting Proper Platen and Placement

Choosing the right platen for your garment size and type ensures proper printing alignment. The Epson F2100 DTG printer offers various platen sizes to support different garment types. Ensure the garment lies flat and the area to be printed is centered on the platen. This step is crucial to prevent the designs from distorting.

Adjusting Print Settings for Different Fabrics

Different fabrics require specific print settings for the best results. The Epson F2100 allows adjustments in print resolution and ink density. For denser fabrics like denim, increase ink density for richer colors. For lighter fabrics, decrease it to prevent bleed-through. Always test print on a similar fabric scrap before final printing to gauge setting adjustments.

Maintenance Routine to Prevent Clogs and Jams

Regular maintenance of the Epson F2100 DTG printer prevents clogs and jams, ensuring consistent print quality. Implement a daily cleaning routine focusing on the printhead and capping station. Use recommended cleaning solutions and techniques from the Epson user manual. Additionally, make sure to keep the printer’s firmware updated to ensure optimal functionality and troubleshoot any emergent issues promptly.

Troubleshooting Common Issues

When using the Epson F2100 DTG printer, encountering issues is a normal part of the process. By learning how to troubleshoot common problems, you can ensure a swift return to high-quality printing. Let’s dive into the ways to tackle typical challenges.

Diagnosing and Resolving Error Messages

Error messages on the Epson F2100 can range from low ink warnings to printhead troubles. When an error pops up, consult the manual. It has a list of codes and steps for fixes. Perform regular maintenance to avoid these errors. If they persist, it might be time to call in a technician.

Epson f2100

Managing Color Consistency and Quality

Color issues can arise from software settings or ink levels. For consistent colors, always use genuine Epson inks. Calibrate your printer regularly and check the Garment Creator software settings. Test prints are also crucial for matching colors correctly. If you face persistent color problems, revisiting the color profiles may be necessary.

Overcoming Garment Fabric Challenges

Different fabrics can react differently during printing. For tough fabrics like polyester, tweak the printer settings for better adhesion. Pre-treat garments properly to ensure quality prints. If you find specific fabrics are challenging, explore forums or manufacturer guides for advice. Sometimes, a slight adjustment in technique makes all the difference.

Optimizing Printing Workflow

To achieve efficiency with your Epson F2100 DTG printer, optimizing the printing workflow is essential. Proper workflow optimization leads to increased productivity, reduced waste, and a smoother overall printing experience.

Efficiently Aligning Orders for Print

Organize your print jobs in a way that maximizes printer usage. Group similar orders together to reduce setup time between jobs. Align orders based on design complexity and garment type. This minimizes adjustments for print settings and platens, allowing for quicker transitions and better time management.
Balancing Speed and Quality

Find the sweet spot between speed and quality. High-quality prints sell, but slow production rates lead to backlogs. Use the Epson F2100 DTG printer’s settings to adjust print resolution for each job. Choose higher resolutions for detailed designs and a lower one for simpler graphics. Balance is crucial to meet deadlines without compromising on the visual appeal of your prints.

Streamlining the Post-Printing Process

Develop a post-printing process that is as smooth as the printing itself. Set up a system to handle drying, curing, and folding efficiently. Use heat presses or tunnel dryers to cure ink according to manufacturer guidelines. Organize a folding and packaging station to immediately prepare garments for delivery after they’re printed and cured. This reduces handling time and keeps orders flowing smoothly through your production line.

Advanced Techniques and Tips

Achieving mastery over the Epson F2100 DTG printer involves exploring advanced techniques and tips. This section will delve into methods to enhance print quality and expand creative possibilities.

Exploring Different Color Modes and Profiles

Understanding color modes and profiles is crucial for high-quality prints. The Epson F2100 DTG printer provides various settings. Switch between CMYK and RGB depending on the design needs. Use color profiles to match the printer output with your design software. It ensures that colors on screen translate accurately onto fabrics.

Creative Use of White Ink and Overlays

White ink can make designs stand out, especially on dark garments. Experiment with overlays, which involve printing a white underbase. Then, add colored inks on top for a vibrant effect. Test different levels of white ink density for the best results. Learn to balance the white underbase to not overpower the final colors.

Leveraging the Printer for Mixed Media Designs

Expand your offerings with mixed media designs. Combine DTG printing with other embellishments like embroidery or sequins. The Epson F2100 allows for versatility in design application. Remember to align other media with your printed designs carefully. This approach can create unique, high-value products that attract customers.

Maintaining Your Printer for Longevity

To ensure your Epson F2100 DTG printer operates efficiently for years, maintain it well. Regular cleaning and timely replacement of consumables are key.

Routine Cleaning Schedules

Set up daily, weekly, and monthly cleaning routines for your Epson F2100 DTG printer. Start each day with a quick wipe of the printer’s surface to remove dust. Clean the printhead to avoid ink clogs. End the week by checking all moving parts and lubricate if necessary. Each month, do a thorough clean. Check the entire system for any ink residue or debris.

When to Replace Consumables

Know when to replace key consumables like ink cartridges, maintenance tanks, and dampers. Replace ink cartridges before they run dry to prevent air from entering the system. Change maintenance tanks when the printer signals. Swap out dampers as per the manual’s recommendation to ensure smooth ink flow.

Support Resources and When to Seek Help

Utilize the support resources Epson provides for the F2100 DTG printer. This includes online manuals, FAQs, and customer service hotlines. If you encounter a problem you can’t fix, seek technical support. Don’t hesitate to call a professional when necessary. It’s better to get expert help than to risk damaging your printer.

Add Printer to Android: Troubleshooting Common Setup Issues

Introduction to Printing from Android Devices

Printing from an Android device has become increasingly common. As mobile technology progresses, the ability to print documents and photos directly from smartphones and tablets offers tremendous convenience. This guide will help you understand how to add printer to Android, ensuring you can start printing with minimal hassle.

Printing from Android involves several steps, including choosing the right printer and setting up the connection. Compatibility between your device and the printer is crucial. There are different types of printers that work with Android, such as USB-connected printers, Wi-Fi-enabled printers, and Bluetooth printers. Each type requires specific steps to connect successfully.

Before diving into the technical aspects, it is important to know why you might want to print from Android. Whether it’s for printing out an e-ticket, a photograph, or a document from your email, knowing how to connect your Android device to a printer is beneficial. By learning these steps, you can make printing as easy as a few taps on your screen.

black Epson printer

Types of Printers Compatible with Android

Choosing the right printer to add to your Android device is crucial. There are three main types that are compatible with Android devices. Each type functions differently and fits specific needs.

USB-connected Printers

USB-connected printers are straightforward to use. You simply connect the printer to your Android device using a USB cable. Before initiating, make sure your printer and Android phone support USB connections. This type is ideal for quick and direct printing tasks.

Wi-Fi-enabled Printers

Wi-Fi-enabled printers offer the convenience of wireless printing. You need to connect your Android device and the printer to the same Wi-Fi network. This setup lets you print from anywhere within the network range. It’s perfect for home or office settings with multiple users.

Bluetooth Printers

Bluetooth printers are another wireless option. Pair your Android device directly with the printer via Bluetooth. Ensure both the devices have Bluetooth turned on and are discoverable. This type is suitable for small-scale or personal printing needs.

Each type of printer has its own setup requirements, which will be explored in following sections. Understanding these categories will help you add the right printer to your Android.

Preparing Your Android Device for Printer Connection

Before you add a printer to your Android device, preparation is key. First, ensure your device is up to date. Check for Android updates and install them. This step keeps compatibility issues at a minimum. Next, charge your device. A full battery will avoid interruptions during the setup process.

Make sure you have the necessary apps. For USB printers, your phone’s built-in printing service should suffice. For Wi-Fi or Bluetooth printers, the printer’s companion app may be needed. Download it from the Google Play Store.

Clear any existing printer setups if you face issues during the new printer addition. This fresh start can often resolve unexpected problems.

Finally, gather all required items. These include USB cables for USB-connected printers, Wi-Fi network details for Wi-Fi printers, or Bluetooth pairing codes for Bluetooth printers.

By following these preparations, you’ll be ready to smoothly add your printer to your Android device and start printing with ease.

epson f2100 dtg printer

Step-by-Step Configuration for Adding a Printer

Once your Android device is prepared, you can proceed with adding a printer. A step-by-step configuration is outlined below for different types of printers.

Connecting a USB Printer

Connecting a USB printer is quite simple. Follow these steps:

  1. Connect the USB cable to your printer and Android device.
  2. A notification may appear on your device. Tap it.
  3. Select ‘Print’ from the options.
  4. Choose your printer from the list, if prompted.
  5. Print a test page to ensure the connection works.

Setting Up a Wi-Fi Printer

For Wi-Fi printers, ensure your printer and device are on the same network:

  1. Open the ‘Settings’ app on your Android device.
  2. Tap on ‘Connections’ or ‘Wi-Fi’.
  3. Connect to the same Wi-Fi network as your printer.
  4. Open the printing app or service on your device.
  5. Look for the ‘Add printer’ to android option and select your printer from the list.
  6. Follow the on-screen instructions to complete the setup.
  7. Print a test page to confirm successful connection.

Pairing with a Bluetooth Printer

To pair with a Bluetooth printer, do the following:

  1. Enable Bluetooth on your Android device and printer.
  2. On your device, go to ‘Settings’, then ‘Bluetooth’.
  3. Find your printer in the list of available devices.
  4. Tap your printer to pair with it.
  5. Once paired, use your printing app to select the printer.
  6. Print a test page to check the connection.

These are standard steps that generally apply to adding a printer to Android. However, consult your printer’s manual for specific instructions. By following these basic steps, you’ll be able to quickly and efficiently add a printer to your Android device.

printer

Printing Documents and Photos from Android Apps

Once you have successfully added a printer to your Android device, printing documents and photos is straightforward. Most apps, like gallery for photos or a PDF reader for documents, have a built-in print function. Here’s how to use it.

  1. Open the app containing the document or photo you want to print.
  2. Access the document or photo.
  3. Look for the print icon, often represented by a printer symbol, and tap on it.
  4. A preview screen may appear, showing how the document/photo will look when printed.
  5. Select your connected printer from the list of available printers.
  6. Adjust the print settings if needed, such as the number of copies, color options, and paper size.
  7. Tap on ‘Print’ to send the document or photo to your printer.
  8. Wait for the printing process to complete.

Remember to check the paper tray and ink levels in your printer before printing to avoid errors. For most Android devices, the ‘Print’ option is found in the ‘Share’ menu of the app. This makes it convenient to print directly from your favorite apps.

By following these simple steps, you can enjoy the full benefits of mobile printing, making the digital-to-physical transition of your files seamless. Whenever you need to print an email, boarding pass, or a snapshot from your latest trip, you now have the knowledge to do so with ease using your Android device and the added printer.

Troubleshooting Common Issues During Setup

When adding a printer to your Android device, you might face some common issues. Here’s how to troubleshoot them:

  1. Printer Not Recognized: Ensure the printer is turned on and in ready mode. Confirm that the USB cable or the Wi-Fi/Bluetooth connection is properly set. Also, check if your Android device supports the printer.
  2. Connection Errors: For Wi-Fi and Bluetooth connections, ensure that both your printer and Android are connected to the same network. Restart both devices to resolve temporary connection issues.
  3. App Not Detecting Printer: Update the printer’s companion app and your Android’s operating system. Sometimes, outdated software causes detection problems.
  4. Unable to Print: Check if the printer has enough paper and ink. Also, make sure the correct printer is selected in your printing app.
  5. Error Messages: Refer to your printer’s manual or online support for specific error codes. Resetting the printer can sometimes clear the error.

By following these troubleshooting steps, you can resolve the most common setup issues encountered when adding a printer to Android.

Future Trends in Mobile Printing Technology

Mobile printing technology is evolving rapidly. The future holds exciting developments as demands increase for easy, efficient printing from mobile devices. Here are some emerging trends:

  1. Cloud-Based Printing Solutions: More printers are integrating with cloud services. This allows users to print from anywhere, as long as they have internet access. Also, cloud storage means you can print without having your device handy.
  2. Advanced Security Features: As printing goes mobile, security becomes crucial. Future printers will feature enhanced security protocols to protect sensitive data. This includes encrypted connections and secure cloud access.
  3. Improved Compatibility and Integration: Expect to see broader compatibility with various mobile operating systems and apps. Future mobile printers will integrate more seamlessly with Android and other platforms.
  4. Eco-Friendly Printing: Sustainability is key. Future mobile printing solutions will focus on reducing waste. This includes using less ink and paper and offering more recycling options.
  5. Portable Printing Advances: Mobile printers are getting smaller and more efficient. Soon, they might be as common as mobile phones. Handy and lightweight, these printers will cater to professionals on the go.
  6. Voice-Activated Printing: With the rise of smart home assistants, voice commands for mobile printers are on the horizon. Saying ‘print my document’ could be enough to start a print job.

These trends aim to make mobile printing more accessible, secure, and environmentally friendly. They focus on enhancing the user experience, providing greater flexibility and integration with mobile technology.

Reasons Why Your Printer is Offline and How to Troubleshoot

Introduction to ‘Printer is Offline’ Problems

Experiencing a ‘printer is offline’ message can be frustrating. It means your printer is not communicating with your computer or network. This issue can halt your productivity, especially if you rely on printing critical documents. Many users face this problem, but the good news is that it is often simple to fix. Understanding why your printer shows as offline is the first step to solve the problem. The reasons can be many, from connectivity issues to outdated drivers. In this section, we will explore the common factors that cause a printer to go offline. We will also set the stage for the solutions covered in the following parts of this blog. Armed with the right knowledge, you’ll be better equipped to get your printer back online quickly.

hp printer

Common Causes of Printer Offline Status

Identifying why your ‘printer is offline‘ is crucial to finding a solution. Various factors can lead to this problem. Here are some common causes:

  1. Connectivity Issues: Often, printers go offline due to poor or disrupted connections. This could be a loose cable, incorrect network settings, or a problem with your Wi-Fi.
  2. Driver Problems: Outdated or corrupted printer drivers can also cause your printer to display an offline status. Drivers are essential for facilitating communication between your computer and printer.
  3. Hardware Malfunctions: Sometimes, hardware issues related to your printer or computer might be the culprit. These could include faulty wiring or a malfunctioning network card.
  4. Power Interruptions: Power surges or failures can temporarily affect your printer’s status by disrupting its operations.
  5. Printer Settings: Incorrect configuration or settings on the printer or on your computer can mislead the system into thinking the printer is offline.

Understanding these causes will help in applying the right solution to bring your printer back online. Each issue demands a slightly different approach, which will be discussed in the upcoming sections.

Quick Fixes for Offline Printers

When your printer displays an ‘offline’ status, there are several quick fixes that you can try. These solutions are often simple and do not require advanced technical knowledge. It’s essential to proceed with these methods one at a time and check if each resolves the issue before moving on to the next step.

  1. Check Physical Connections: Make sure all cables connecting your printer to your computer or network are secure. Loose or unplugged cables are a common culprit.
  2. Restart Your Printer: Turn off your printer and unplug it for a few minutes. This can reset the system and resolve temporary glitches causing the ‘printer is offline’ message.
  3. Verify Printer Settings: Navigate to your printer settings on your computer. Ensure that your printer is set as the default and is not configured to ‘Use Printer Offline’.
  4. Inspect the Print Queue: Clear any paused or stuck print jobs in the queue. These can sometimes block communication between your computer and printer.
  5. Check for Updates: Make sure your printer’s software or firmware is up to date. Outdated software can lead to compatibility issues and the offline status.
  6. Restart Your Computer: Sometimes, the issue can be with your computer. A quick restart can refresh the operating system and eliminate temporary conflicts.

Applying these quick fixes often solves the ‘printer is offline’ problem. If these steps don’t help, you may need to dive deeper into connectivity issues or driver management, as we will cover in the following sections.

HP Printer

Step-by-Step Guide to Resolving Offline Issues

Getting your printer back online might require more detailed steps, especially after quick fixes fail. Follow this structured action plan based on the level of complexity of your problem.

  1. Re-Checking the Printer’s Basic Setup: Double check that the printer is properly connected to your computer or network. Ensure that all cables are firmly connected and that the printer is powered on.
  2. Update Printer Drivers: Visit the manufacturer’s website to find the latest drivers for your model. Install them to see if this resolves the ‘printer is offline’ issue.
  3. Ensure Correct Network Settings: For network printers, verify that the printer’s IP address matches what your network is configured to allow. Re-input these settings if necessary.
  4. Disable ‘Use Printer Offline’ Mode: Open the printer settings on your computer, usually found in the ‘Devices and Printers’ section. Make sure ‘Use Printer Offline’ is not selected.
  5. Clear Printer Queues: Stuck print jobs can halt printer communication. Open your printer queue and clear all pending jobs before attempting to print again.
  6. Reset Printer: Sometimes, a factory reset is necessary to clear persistent problems. Check your printer’s manual for instructions on how to perform a reset.
  7. Test with Another Device: Try connecting your printer to a different computer or smartphone. If the printer works well with another device, the issue might be with your original computer.

If these steps still don’t resolve your problem, it may be time to consult professional help or consider hardware issues. Remember, a ‘printer is offline’ issue is common, and with patience, most can be resolved at home.

Troubleshooting Connectivity Problems for Wireless Printers

Wireless printers add convenience but can often face connectivity issues that lead to ‘printer is offline’ messages. Troubleshooting these problems can get your printer back online. Here’s how to address wireless connectivity issues:

  1. Check Wireless Connection: Confirm that your printer is connected to the correct Wi-Fi network. Incorrect networks will disrupt printer communication.
  2. Reboot Router: Unplug your Wi-Fi router for a minute, then plug it back in. This can fix temporary network glitches.
  3. Printer Proximity: Move your printer closer to the router to improve signal strength. Walls and distance affect connectivity.
  4. Run Wireless Network Test: Most wireless printers have a network test function. Run this test to check for connectivity issues.
  5. Update Wireless Settings: If you’ve changed your Wi-Fi password or settings, update this information on your printer.
  6. Reset Printer’s Network Settings: Use your printer’s interface to restore network settings to factory defaults, then set up the connection anew.
  7. Disable VPNs: Sometimes VPNs can interfere with the network connection. Disable any active VPNs and try reconnecting your printer.
  8. Check for Interference: Devices like microwaves or cordless phones can disrupt Wi-Fi signals. Turn them off or move them away from the printer and router.

Addressing these connectivity issues should solve the majority of wireless printer offline problems. If your printer remains offline, it might be time to explore driver and software updates or reach out for professional support.

HP printer

Managing Printer Drivers and Software Updates

Managing printer drivers and software is crucial in keeping the ‘printer is offline’ issue at bay. Here’s a straightforward guide to ensure your printer drivers and software are always up to date.

  1. Identifying Outdated Drivers: First, determine if your printer drivers are outdated. You can do this by visiting the printer manufacturer’s website and comparing your current driver version with the latest available version.
  2. Downloading the Latest Drivers: If updates are needed, download the latest drivers from the official website. Avoid third-party sources to prevent downloading harmful software.
  3. Installing Updates: Once downloaded, install the drivers. This process typically involves running the downloaded file and following on-screen instructions.
  4. Setting Up Automatic Updates: Many printers offer an option to automatically download and install updates. Enable this feature through your printer’s software settings to keep your drivers updated without regular checks.
  5. Checking Software Compatibility: Make sure that your printer software is compatible with your computer’s operating system. Updates to your OS may require new versions of printer software.
  6. Regular Maintenance Checks: Set up a schedule to regularly check for software and driver updates. This proactive approach can prevent many connectivity issues.

By routinely managing your printer drivers and software, you significantly reduce the risk of encountering an offline printer issue. This maintenance ensures smooth communication between your computer and printer, enhancing overall performance and reliability.

Contacting Support: When to Reach Out for Help

After trying multiple fixes for the ‘printer is offline’ issue, you might still need help. Knowing when to reach out to support is crucial. It ensures you don’t waste time on methods that won’t work. Here are signs it’s time to call in the experts:

  1. Persistent Offline Status: If the printer remains offline after all troubleshooting steps, professional help is advisable.
  2. Error Messages: Unfamiliar or recurring error messages indicate a deeper issue that may require technical expertise.
  3. Hardware Sounds: Grinding or unusual noises from the printer can point to hardware problems that support teams handle best.
  4. Network Complexity: For those with advanced network setups, contacting support can save time and ensure proper configurations.
  5. Software Conflicts: If you suspect the ‘printer is offline’ issue arises from complex software conflicts, professional guidance can be key.
  6. No Response to Fixes: When none of the quick fixes or in-depth steps restore your printer’s status, it’s time to get support involved.

Tip: Have all relevant information ready before contacting support. This includes your printer model, computer operating system, and a summary of attempted fixes. Contact details are usually found on the manufacturer’s website. Choose between phone, email, or live chat support, based on urgency. Sometimes, the manufacturer’s forums or FAQs can provide solutions too.

Remember, reaching out to support not only helps solve the current problem. It can also prevent future issues by ensuring your setup is optimized. Don’t hesitate to reach out when you’ve exhausted your troubleshooting options.

Preventing Future ‘Printer is Offline’ Issues

Preventing recurring ‘printer is offline’ problems involves regular maintenance and proactive measures. Here are essential steps to ensure your printer remains operational:

  1. Regular Updates: Always keep your printer drivers and software up-to-date. This reduces compatibility issues.
  2. Consistent Connectivity Checks: Frequently check your printer’s connection to your computer or network. This helps catch and resolve connectivity issues early.
  3. Scheduled Maintenance: Set calendar reminders for routine printer maintenance. This includes cleaning and checking for any physical damages.
  4. Proper Shutdown: Always turn off the printer using the correct shutdown process. This helps avoid software and hardware malfunctions.
  5. Monitor Printer Settings: Regularly verify that settings have not been altered to ‘Use Printer Offline’. Keep your printer set as the default.
  6. Backup Solutions: Have backup cables and alternative connection methods (like USB if you mainly use Wi-Fi) ready. This ensures you can switch if one fails.

By following these steps, you can minimize the chances of facing ‘printer is offline’ issues in the future. Proactivity is key to uninterrupted printing operations.

What Size is Standard Printer Paper? Tips for Selecting Paper

Introduction to Printer Paper Size Standards

Choosing the correct printer paper size is vital for any printing task. Different regions follow different standards. Understanding these standards is key to ensure proper document formatting and printing accuracy.

North American Paper Size Standards

In North America, paper sizes like Letter, Legal, and Tabloid are common. These sizes use inches for measurement. For example, standard office documents often use Letter size. It measures 8.5 x 11 inches. Legal size is used for longer documents, such as contracts. Its dimensions are 8.5 x 14 inches. Tabloid or Ledger size, at 11 x 17 inches, is great for flyers and menus.

International ISO 216 Standards

Most other countries use the ISO 216 standard. This includes paper sizes like A4, A3, and A1, among others. These sizes are in millimeters. The A4 size, measuring 210 x 297 mm, is similar to the North American Letter but slightly different. It is a standard for office documents globally. A3 size, at 297 x 420 mm, suits larger prints like posters. A1 size is even larger and is often used for major signs and advertising.

Printer

Common North American Paper Sizes

In the realm of printing, choosing the right paper size is a critical decision for achieving the desired outcome. Here, we explore the most frequently utilized North American paper sizes to ensure you select the right one for your projects.

Letter Size: Uses and Dimensions

The most common choice for everyday tasks is Letter size. Measuring 8.5 by 11 inches, it fits standard printers and copiers seamlessly. This size is perfect for documents such as reports, resumes, and memos. Its widespread use makes Letter size the default for most printing needs.

Legal Size: Specific Applications

For documents requiring more length, Legal size is the go-to. It extends to 8.5 by 14 inches, offering extra space for detailed written content. Legal size is typically reserved for official documents including contracts, legal filings, and important forms.

Tabloid Size: Design and Publishing Uses

When larger visuals or layouts are needed, Tabloid size steps in. At 11 by 17 inches, this size provides ample space for substantial graphic elements, making it a prime choice for newspapers, posters, and portfolio pieces. Designers and publishers often rely on Tabloid size for its visual impact in print media.

Common ISO Paper Sizes

Navigating through ISO paper sizes is key for multiple uses and understanding their global applications.

A4 Paper: The Global Standard for Documents

A4 paper, measuring 210 x 297 mm, is the most used worldwide for standard documents. Its size fits most printers globally and features widely in office printing needs. A4 is perfect for letters, forms, and daily business documents. Its dimensions make it ideal for handling and storage, optimizing space usage efficiently.

A3 Paper: Ideal for Larger Displays

The A3 size stands at 297 x 420 mm. It’s about double the size of A4. A3 is excellent for printing larger displays like posters and plans. It provides a bigger surface for detailed graphics or group presentations. Many choose A3 for academic, artistic, and marketing visuals.

A1 Paper: Usage in Signage and Displays

A1, with dimensions of 594 x 841 mm, is one of the largest in the A-series. It is perfect for major signage and large display needs. Professionals use A1 for outdoor advertising, event posters, and architectural plans. Its generous size captures attention and conveys information effectively from a distance.

HP Printer Driver

Choosing the Right Paper Size

Selecting the correct paper size is more than just a technical detail; it’s essential for ensuring your document prints accurately and looks professional. As a blogger well-versed in the nuances of printing, let’s explore what to keep in mind when choosing paper sizes.

Factors to Consider for Selecting Paper Sizes

When determining what size is standard printer paper for your project, consider these key points:

  • Purpose of Document: The document’s intent guides the size selected. Reports and letters typically fit well on Letter or A4 sizes.
  • Printer Capabilities: Your printer may only support certain sizes. Check the manual before choosing.
  • Audience Location: The location of your audience dictates whether to use North American or ISO sizes.
  • Presentation: Larger sizes like Tabloid or A3 are better for visuals and displays.
  • Physical Handling: Consider how people will handle and store the documents. A4 and Letter sizes are easy to file and transport.

By keeping these factors top of mind, you’ll pick the size that aligns best with your needs.

Compatibility Between ISO and North American Sizes

Mixing up ISO and North American sizes can lead to formatting headaches. Despite the similarity, the slight differences between ISO A4 and North American Letter sizes mean documents must be adjusted when printed across systems. It’s essential to ensure compatibility to avoid issues like content cropping or layout shifts.

Anticipating these size discrepancies is part of smart document planning. When sharing documents internationally, specify the paper size upfront to align expectations and avoid printing snafus.

In conclusion, the right paper size adds a layer of polish to your printed documents. From making a great impression with crisp, cleanly printed reports to ensuring your designs are presented as intended, the significance of printer paper size can’t be overstated. If you deal with documents for a global audience, you’ll find that a little knowledge and preparation can go a long way in preventing common printing mishaps.

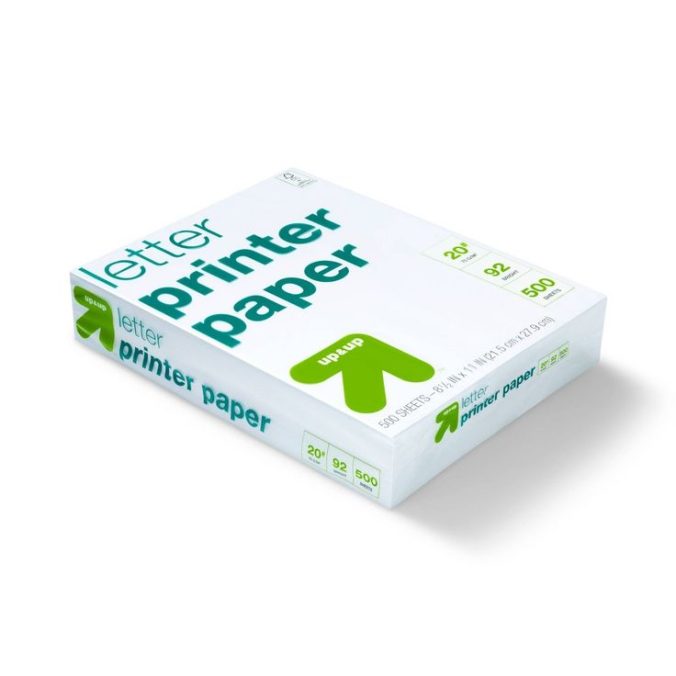
printer paper

Implications of Different Paper Sizes

Different paper sizes across the globe bring unique challenges. In this section, we discuss the implications and risks of cross-country printing and provide solutions to overcome compatibility issues.

Challenges in Cross-Country Printing

Printing documents for international use can be tough. North American and ISO paper sizes do not match perfectly. Even small size differences can lead to big headaches. Misaligned text and cut-off graphics can occur. These issues affect the document’s professionalism and can confuse the reader. For global businesses, this becomes a critical issue. They must ensure that their documents work well everywhere.

Solutions for Printing Compatibility Issues

Luckily, there are ways to make sure your documents print correctly anywhere. First, check your document’s paper size before sending it for printing, especially if it’s for another country. Use print preview to spot any issues. Adjust your document size in your word processor settings if needed. When designing documents, leave enough margin space to accommodate different paper sizes. Lastly, educate your team on these differences. Make them aware of the standard sizes used in the regions you work with.

By understanding the implications of paper sizes, you can avoid mistakes. This ensures your printed materials always look their best, no matter where they are printed.

Conclusion and Additional Resources

As we wrap up our journey through printer paper sizes, it’s clear that knowledge is power. Knowing the standard sizes, whether you’re dealing with North America’s Letter, Legal, and Tabloid, or the international ISO sizes like A4, A3, and A1, sets you up for printing success.

Choosing the right paper size is important for many reasons. It ensures your documents print correctly and look professional. It prevents wastage of materials and saves you time from dealing with printing errors. Most importantly, it reflects your attention to detail and care in your work.

To avoid cross-country printing challenges, always check the paper size of your document before printing or sending. Leave ample margins in your designs to accommodate for size differences. Remember, when in doubt, use preview tools and adjust settings as needed to meet the size requirements of your printer or the destination country.

For more information and resources, always consult your printer’s manual. Online forums and design blogs are great for tips and tricks. Educate your colleagues and clients about the importance of paper sizing. Spread awareness about how simple changes in document setup can ensure seamless international printing.

In conclusion, mastering the subtleties of printer paper sizes can make a big difference in your documentation’s presentation. It’s a crucial skill in our global landscape. So next time you click ‘print,’ consider the size, the location, and the purpose. Print with confidence and make each page count.

Troubleshooting Tips: How to Get a Printer Online When It’s Offline

Confirm the Printer is Powered On and Check Connections

Before diving into more complex solutions, ensure the simplest ones are not overlooked. First, confirm that your printer is powered on. This might seem obvious, but it’s often overlooked. Look for a lit-up power indicator on your printer to verify it’s receiving power. Next, check the connections between your printer and computer or network.

Securely plug in all cables. For USB-connected printers, ensure that the cable is firmly connected at both printer and computer ends. If your printer is network-connected, verify that Ethernet cables are snugly plugged in. A quick way to check this is by printing the network configuration page directly from the printer’s control panel. Sometimes, simply unplugging and replugging the connections can refresh the setup and solve ‘printer offline’ issues. Checking these can often flip your printer status from offline to online without further troubleshooting.

hp 8610 printer

Manually Set the Printer to Online Mode

When your printer displays an ‘offline’ status, the first step is often to manually switch it back to ‘online’. This can usually resolve the simple glitches causing the problem. Here’s how to get a printer online again in a few easy steps:

  1. Begin by clicking the ‘Start’ button, usually found at the bottom left of your computer screen. Navigate to the ‘Control Panel’ and select ‘Devices and Printers’.
  2. In the ‘Devices and Printers’ window, find your printer’s icon, right-click on it, and select ‘See what’s printing’.
  3. A new window will open. Here, click on ‘Printer’ in the menu bar at the top of this window.
  4. In the drop-down menu that appears, look for the option that says ‘Use Printer Online’. Click on this option to change the printer’s status.
  5. If the printer had been paused, or had any ongoing issues, this action should reactivate it and set it back to an ‘online’ status.

Keep in mind these steps might vary slightly depending on your computer’s operating system. However, the general process remains similar across most platforms. Should these steps not resolve the issue, further troubleshooting may be necessary. This could include checking network or Wi-Fi connections, updating printer drivers, or consulting with the printer’s manual or manufacturer for specific advice.

Clear Pending Print Jobs and Reset Spooler

Clearing pending print jobs often helps restore printer functionality. To do this, first open the ‘See what’s printing’ window by right-clicking your printer icon under ‘Devices and Printers’. Here, cancel any ongoing or queued print jobs by right-clicking and choosing ‘Cancel’.

After clearing the print queue, resetting the Print Spooler can further aid in resolving printer issues. Press ‘Win+R’ to open the Run dialog, type ‘services.msc’, and press Enter. Locate ‘Print Spooler’ in the list, right-click, and select ‘Restart’. This action refreshes the service that manages print jobs and connections to your printer.

These steps should help switch your printer status from offline to online by clearing any stuck print commands and restarting key services. If these steps do not resolve the issue, further technical troubleshooting may be necessary.

hp printer

Remove and Reinstall Printer Devices

Sometimes removing and reinstalling your printer from your system can resolve persistent ‘printer offline’ issues. This process refreshes the printer’s system connections and settings, providing a fresh start. Here’s a step-by-step guide to effectively remove and reinstall your printer devices:

  1. Open Control Panel: Click the ‘Start’ menu, type ‘Control Panel’ in the search bar, and open it.
  2. Navigate to Devices and Printers: In the Control Panel, find and click on ‘Devices and Printers’.
  3. Remove the Printer: Locate your printer in the list, right-click on it, and choose ‘Remove device’. Confirm the removal if prompted.
  4. Re-add the Printer: After successfully removing the printer, click on ‘Add a printer’ at the top of the ‘Devices and Printers’ screen. Follow the on-screen instructions to reinstall your printer.
  5. Test the Printer: Once reinstallation is complete, print a test page to ensure that the printer is functioning correctly and appears online.

If this process does not solve the issue, consider updating or reinstalling printer drivers, or consult with the printer’s manufacturer for further technical support.

Update or Reinstall Printer Drivers

Updating or reinstalling your printer drivers can often resolve ‘printer offline’ issues. Printer drivers are the software components that facilitate communication between your computer and printer. Outdated or corrupt drivers can lead to various problems, including the printer showing as offline. Here’s how you can tackle driver-related issues:

Identify If You Need an Update or Reinstall

First, figure out if your drivers simply need an update or a full reinstall. If you’ve recently updated your operating system or your ‘printer offline’ issue persists after other fixes, a driver update is likely required. However, if the printer is unrecognized by your device or errors occur when trying to print, a full reinstall may be necessary.

Steps to Update Printer Drivers

  1. Go to ‘Control Panel’ and select ‘Device Manager’.
  2. Locate your printer in the list of devices, right-click on it, and choose ‘Update Driver’.
  3. Select ‘Search automatically for updated driver software’ and follow prompts.

Steps to Reinstall Printer Drivers

  1. Open ‘Control Panel’ and go to ‘Devices and Printers’.
  2. Right-click your printer and choose ‘Remove device’. Confirm the action.
  3. Restart your computer.
  4. Go to the printer manufacturer’s website to download the latest driver.
  5. Install the driver by following the website’s instructions.
  6. Re-add your printer in ‘Devices and Printers’ to test if the problem is fixed.

Check for Automatic Updates

Some printers have a feature that checks for updates automatically. Consult your printer’s manual to see if this applies and how to enable it.

By keeping your printer drivers up-to-date, you help ensure your device communicates effectively with your computer, minimizing the chances of seeing a ‘printer offline’ message. Remember to reboot your PC after installing new drivers to ensure changes take effect.

printer

Check Wi-Fi or Network Connections

To resolve a printer showing an ‘offline’ status, often checking and rectifying network connections can help. Ensure your printer is properly connected to the same Wi-Fi network as your computer or other devices. This is crucial for wireless printers. Start by verifying the wireless connection through your printer’s control panel. Printers typically have a network settings or configuration menu where you can view the current network status and the signal strength.

Faulty or loose connections often lead to communication issues that result in the printer going offline. It can help to unplug and then replug the Ethernet cable or even try a different cable or port if problems persist.

If your printer is connected and the problem continues, restarting your router can re-establish network connections and solve the issue. Turn off your router for about 30 seconds and then turn it back on. Wait for all lights to stabilize and then attempt to print again.

Furthermore, check the printer’s IP address configuration. Ensure it matches the network’s requirements. Incorrect or static IP configurations can lead to consistent connectivity problems. Refer to your printer’s manual or online support to correct any network settings.

By ensuring these steps, you help secure a stable connection between your printer and network, likely resolving any ‘offline’ status issues. Always make sure that Wi-Fi or network connections are active and stable to maintain your printer online.

Use Windows Troubleshooter or Manufacturer Diagnostics

When persistent ‘printer offline’ issues cannot be resolved through the previous steps, utilizing built-in Windows troubleshooting utilities or seeking help from your printer’s manufacturer can be effective. Both options offer guided assistance in diagnosing and resolving issues that could be causing your printer to display an offline status.

Windows Troubleshooter

Windows Troubleshooter is a valuable tool for resolving numerous issues, including printer connectivity problems. Follow these simple steps to access the troubleshooter:

  1. Open the ‘Start’ menu and click on ‘Settings’.
  2. Navigate to ‘Update & Security’, then click on ‘Troubleshoot’.
  3. Choose ‘Additional troubleshooters’ and select ‘Printer’.
  4. Click on ‘Run the troubleshooter’ and follow the prompts.

The troubleshooter will automatically detect and attempt to fix any problems that are causing your printer to appear offline. It may suggest actions like resetting the printer spooler or checking network connectivity.

Manufacturer Diagnostics

Most printer manufacturers provide their own diagnostic tools to troubleshoot issues specific to their models. These can usually be found on the manufacturer’s website or supplied with your printer software. Examples include HP Print and Scan Doctor or Epson Printer Finder.

Here’s what to do:

  1. Visit the printer manufacturer’s website and look for diagnostic tools.
  2. Download and install the tool recommended for your printer model.
  3. Run the diagnostic tool and follow the on-screen instructions.

These tools often provide a more in-depth examination of your printer’s status and often give more precise directions to resolve any connectivity issues. If these diagnostics still don’t resolve the problem, it may be time to contact the printer’s customer support for further assistance.

Consider Physical Distance to Router for Wireless Printers

Wireless printers must have a strong signal to stay connected. Make sure your printer is not too far from your router. Walls, furniture, and other objects can block the signal. Move your printer closer to the router to improve the connection. Some printers show signal strength; check this on your printer’s display. If the signal is weak, relocating the device can often fix ‘printer offline’ errors.

Installing a Wi-Fi extender can also help improve the printer’s connectivity. Extenders boost the signal’s reach throughout your home or office. They can be particularly useful in larger spaces where the router’s signal may not cover all areas effectively.

By considering the physical distance and obstructions between your wireless printer and the router, you can help ensure that your printer maintains a strong and reliable connection. This can reduce instances of the printer showing as offline and improve overall printing reliability.

Confirm Correct Port and Network Settings

When dealing with a printer that shows as offline, confirming the correct port and network settings is crucial. These steps will help ensure that your printer is configured correctly for your network, which can solve the ‘offline’ status issue.

  1. Check Printer Port Settings:
    • Open ‘Control Panel’ on your computer.
    • Navigate to ‘Devices and Printers’ and right-click on your printer.
    • Select ‘Printer Properties’ and go to the ‘Ports’ tab.
    • Ensure the selected port matches the way your printer connects to the computer (USB, Ethernet, or Wi-Fi).
  2. Verify Network Configuration:
    • Access the printer’s network settings through its on-device menu.
    • Make sure the printer’s IP address matches what is assigned by your router or network settings.
    • Ensure subnet masks and gateways in the printer’s network settings align with your network’s corresponding configuration.
  3. Print a Test Page:
    • After confirming the settings, print a test page to check the new configuration.
    • This helps verify that the printer communicates effectively with your network.

By checking these settings, you can typically resolve the connectivity issues that cause your printer to appear offline. If the problem persists, further investigation into firmware updates or specialized technical support might be necessary. These checks help get your printer back online and ready for use.

Contact Manufacturer Support or Consider Hardware Issues

If your printer remains offline after all troubleshooting steps, contacting manufacturer support may be necessary. Most printer manufacturers offer customer support over phone, email, or live chat. They can provide specialized guidance and additional troubleshooting steps specific to your printer model. Have your printer’s make, model, and serial number ready to expedite the process. In some cases, they may remotely access your printer for diagnostics.

If customer support suggests no software-related issues, hardware problems might be the cause. This could include anything from a faulty network card to a damaged printer port. Printer hardware issues often require professional repair or, depending on the cost, might lead to considering a new printer purchase. Weigh the cost of repairs against the price of a new printer when deciding.

Before reaching out to support, make sure you’ve tried the following:

  • Restarted the printer and computer.
  • Checked and confirmed all connections are secure.
  • Ensured the printer drivers are up to date.
  • Check that the printer is not far from the router to avoid signal issues.

Efficiently troubleshooting with these steps first can save time and possibly identify a simple solution without needing further support.

HP Printer Won’t Print? Quick Fixes for Common Issues

Common Causes of HP Printer Issues

When facing an issue where your HP printer won’t print, identifying the root cause is crucial. Here are common triggers:

  • Outdated or Missing Printer Drivers: Just like any other software, printers need up-to-date drivers to function properly. An outdated driver can lead to communication issues between your computer and printer.
  • Faulty Connections: Sometimes the problem is as simple as a loose cable. Whether it’s the power cable or the connection to your computer, make sure everything is securely in place.
  • Incorrect Configuration: Your printer may face issues if the settings on your computer aren’t configured correctly for the device.
  • Hardware Malfunctions: From time to time, the printer itself may encounter a hardware issue, such as a problem with the ink cartridge or internal mechanics.

Each of these causes has its own set of remedies which we will explore further in the sections below. Whether it’s updating drivers, checking connections, or cleaning hardware, addressing these common causes can restore your HP printer’s functionality.

HP printer

Checking Printer Status and Resolving Connectivity Problems

When your HP printer won’t print, it’s crucial to start by checking its status. Is the printer turned on and properly connected to both power and your computer? A simple oversight here is a common issue. Ensure that all cords are secure and not damaged. If everything is plugged in but the printer is offline, try turning it on again or rebooting it.

Next, resolve any connectivity problems. This might mean checking both hardware connections and software settings. For USB-connected printers, confirm the cable is not only plugged into both the printer and the computer but also that it’s in good condition. For wireless printers, ensure the network connection is active and stable. You might need to reconnect to the network or move closer to your router.

Also, confirming proper configuration within your computer’s settings is key. Navigate to your ‘Devices and Printers’ settings in the Windows Control Panel. Here, you can check if your HP printer is set as the default printer. If not, right-click on the printer icon and choose ‘Set as default printer.’ This action often solves the issue of the HP printer not responding.

By tackling these checks systematically, you can often resolve basic connectivity and status issues without advanced troubleshooting.

Updating or Reinstalling HP Printer Drivers

Keeping your HP printer drivers up-to-date is crucial to resolving printing issues. Outdated or corrupted drivers often cause the ‘HP printer won’t print’ problem. Here are steps to update or reinstall your drivers effectively.

Updating HP Printer Drivers

  1. Access Device Manager: Start by clicking on the ‘Start’ menu, typing ‘Device Manager’, and opening it.
  2. Locate Print Queues: In Device Manager, expand the ‘Print queues’ section. Right-click on your HP printer.
  3. Check for Updates: Choose ‘Update driver’ from the options. Select ‘Search automatically for updated driver software’. Follow the on-screen instructions.

Updating periodically ensures your printer communicates properly with your computer.

HP Printer Driver

Reinstalling HP Printer Drivers

Sometimes updating isn’t enough. Reinstalling the driver might be necessary.

  1. Open Device Manager: Like updating, start in Device Manager.
  2. Uninstall the Printer Driver: Right-click on the HP printer under ‘Print queues’. Choose ‘Uninstall device’. Follow the prompts to remove the driver.
  3. Reinstall the Printer Driver: After uninstallation, click ‘Scan for hardware changes’. Your computer will detect the printer and attempt to reinstall the driver automatically.

Reinstalling the driver can resolve deeper issues that simple updates cannot fix. This process resets the printing system, often clearing persistent errors.

Setting the HP Printer as the Default Printer

Setting your HP printer as the default can fix printing issues. Here are easy steps to do this:

  1. Open Control Panel: Click on the ‘Start’ menu, and select ‘Control Panel’.
  2. Navigate to Printers: Click on ‘Devices and Printers’ or ‘View devices and printers’.
  3. Select Your Printer: Find your HP printer in the list of devices.
  4. Set as Default: Right-click on your HP printer and choose ‘Set as default printer’.

After setting your HP printer as the default device, try to print a test page. If the HP printer won’t print, the problem may not be with printer default settings. In such cases, consider checking other settings or seeking further solutions mentioned in this blog. Remember, setting the default printer is a key step for consistent printer operations.

Ensuring Proper Ink Levels and Cartridge Function

Adequate ink levels are pivotal for optimal printer performance. Here are essential steps to ensure your HP printer’s ink cartridges function correctly.

Check Ink Levels

Regularly monitor your HP printer’s ink levels. This can prevent unexpected ‘out of ink’ issues during printing tasks. To check ink levels, you can use the HP Printer Assistant software available on your computer, or access the ink levels display via the printer’s control panel.

Inspect Cartridge Installation

Ensure that ink cartridges are correctly installed. An improperly seated cartridge can cause HP printer won’t print issues. Remove and reinsert the cartridges to make sure they are well-placed.

Use Quality Ink

Always opt for high-quality or recommended ink cartridges for your HP printer. Low-quality ink can lead to poor print quality and may even damage your printer.

Replace Empty Cartridges

Replace any ink cartridges that are low or empty. Running a printer with empty cartridges can cause air to enter the ink system, which might lead to printing problems.

By keeping up with these simple steps, you can ensure that ink levels and cartridge functions are not the cause of your HP printer won’t print issues.

HP Printer

Cleaning and Maintaining Ink Cartridges and Print Heads

Proper maintenance of ink cartridges and print heads is essential for optimal printer performance. Here are some critical steps you can follow to ensure your HP printer functions smoothly.

Cleaning Ink Cartridges

Clogged or dirty ink cartridges can lead to poor printing quality. To clean them:

  1. Turn off the Printer: Ensure the printer is off before you start.
  2. Remove the Cartridges: Carefully take out the ink cartridges from their slots.
  3. Clean Gently: Use a soft, lint-free cloth slightly dampened with water to wipe the cartridges. Focus on the metal contacts.
  4. Reinstall Cartridges: Once they are dry, place them back in their respective slots.
  5. Run a Cleaning Cycle: Use your printer’s software to run a cleaning cycle. This helps to clear any blockages in the print head.

Maintaining Print Heads

Keeping the print heads clean is vital to avoid blockages and ensure sharp prints.

  1. Access the Printer Menu: On your printer’s control panel, navigate to the setup or maintenance menu.
  2. Select to Clean Printheads: Find the option to clean print heads and select it.
  3. Let the Printer Do the Work: The printer will start the cleaning process. It might take a few minutes.
  4. Perform a Test Print: After cleaning, print a test page to check if the print quality has improved.

Regular maintenance helps prevent issues where the HP printer won’t print properly. It also extends the life of your ink cartridges and print heads, saving you time and money in the long run.

Troubleshooting Tips for Specific Error Messages

Navigating through error messages is key in troubleshooting HP printer issues. Here are tips for some common error messages:

‘Printer Offline’ Error

This message means the printer is not communicating with your computer. First, ensure the printer is on and connected to your network or via USB. Restart both your printer and computer. If the problem persists, check your printer’s network settings or USB connection.

‘Paper Jam’ Error

Paper jams are common but easily fixable. Turn off your printer and gently remove any stuck paper. Check if the paper tray is correctly aligned and if the paper is suitable for your printer. After clearing the jam, restart your printer and try printing again.

‘Low Ink Levels’ Warning

This warning indicates that your ink is depleting. Check ink levels using the HP Printer Assistant or the printer’s control panel. If levels are low, replace the cartridges with high-quality or recommended ink. Avoid third-party inks as they can cause further issues.

‘Cannot Recognize Cartridge’

This error can occur with new or refilled cartridges. Remove the cartridge and reset it to ensure it is properly installed. Clean the cartridge contacts with a lint-free cloth. If the error continues, replace the cartridge with an original HP cartridge.

These troubleshooting steps should help clear up most common error messages and get your HP printer back in action. If issues persist, consider seeking further assistance or contacting HP support.

Final Steps: Contacting HP Support

When you’ve tried all the solutions and your HP printer still won’t print, it’s time to seek help from the experts. Contacting HP support is the last resort to fix the issue. Here’s what you should do:

  1. Gather Your Printer Information: Before you call or chat with HP support, have your printer model and serial number ready. This information will help them understand your issue better.
  2. Use the HP Support Website: Visit the HP website and navigate to the support section. Here, you can find FAQs and resources that might address your problem.
  3. Start a Support Ticket: Choose to either chat with a support representative or submit a ticket. Be clear about the issues you’ve experienced and the steps you’ve already taken to resolve them.
  4. Call HP Support: If you prefer speaking to someone, call the HP support phone number. Phone calls may allow for more detailed conversations about complex issues.
  5. Remote Assistance Option: Sometimes, HP can remotely access your computer to diagnose the problem. Be ready to grant permission if necessary.
  6. Have Patience: Support centers can be busy. Be prepared to wait, but know that dedicated professionals are there to help you get back to printing.

By following these steps, HP support should be able to guide you through any remaining troubleshooting. Remember, they’re there to help ensure your HP printer works as it should.

Toybox 3D Printer Review: Is It Worth the Investment for Families?

Introduction to Toybox 3D Printer

The Toybox 3D Printer offers a unique entry into the world of 3D printing. Designed with simplicity in mind, it caters specifically to young users and beginners. It stands out for its user-friendly design and pre-loaded models that make 3D printing straightforward and fun. This printer not only encourages creativity among its users but also serves as an educational tool. Parents can feel safe with its child-friendly features, making it ideal for introducing the concept of 3D printing to youngsters. Its compact size and one-button functionality simplify the printing process, ensuring a positive experience from the start.

toybox 3d printer

Key Features and Specifications

In this section, we’ll dive into the key features and specifications that make the Toybox 3D Printer a standout choice for families and beginners in the world of 3D printing. This printer’s attributes cater particularly to the needs of young users and infuse learning with fun.

Design and Build Quality

The Toybox 3D Printer boasts a compact and robust design, ideal for fitting into small spaces such as a child’s room. With safety in mind, the design includes rounded edges and an enclosed printing area. This reduces the risk of accidental injuries, a common concern for parents. Its simplicity is evident in its minimalistic one-button operation, making it accessible even to children.

Printing Technology and Materials

This printer uses fused deposition modeling (FDM) technology, popular in 3D printing, to create objects layer by layer from PLA material. PLA is a biodegradable thermoplastic, derived from renewable resources like cornstarch, making it a safer choice for kids and the environment. The Toybox is restricted to using this type of filament, ensuring that the printed toys are non-toxic and safe to handle.

User Interface and Control

User interface is where the Toybox truly shines. It features a LED touch screen that simplifies navigation and provides an intuitive experience. The printer can be controlled through a web app or a smartphone, offering a convenient way to select and print a variety of pre-loaded designs. The platform’s refreshingly straightforward user interface permits a hassle-free printing experience for all age groups.

Setting Up the Toybox 3D Printer

The Toybox 3D Printer is designed for straightforward setup, even for those new to 3D printing. This section will guide you through the unboxing and initial setup, as well as the connectivity and software installation, ensuring you’re ready to start printing in no time.

Unboxing and Initial Setup

Upon receiving your Toybox 3D Printer, you’ll find that it comes almost fully assembled. The box includes the printer itself, one spool of ‘printer food’ or PLA filament, and a power cord. Once you’ve carefully removed these components and placed the printer on a stable surface, you can insert the filament into the feeder. This setup process can be completed within minutes, making it hassle-free and ideal for kids and beginners.

Connectivity and Software Installation

To begin printing, connect the Toybox to your home WiFi network. Then, download the companion app on a smartphone or access the web portal on a computer. Both platforms offer a user-friendly interface that guides you through the initial calibration process and helps manage your print jobs. Thanks to its smart design, you won’t need to fiddle with complicated settings or software installations. Just ensure that the printer is correctly connected to the internet, and you can start exploring various pre-loaded designs and projects right away.

With these steps, your Toybox 3D Printer is set up and ready to inspire creativity with its ease of use and safe, straightforward functionality.

toybox printer

Printing Performance

The Toybox 3D Printer impresses with its printing performance, catering especially to beginners and young users.

Print Quality and Resolution

High-quality prints emerge from the Toybox 3D Printer, with details precise enough to delight its primary young audience. Although it doesn’t compete with high-end models, the resolution is more than sufficient for educational and entertainment purposes. It consistently delivers on its promises, making it a reliable tool for children’s projects.

Speed and Efficiency

The printer works efficiently, completing prints in a reasonable time frame considering its user demographic. It’s worth noting that complex objects may take longer to print, but the machine generally maintains a good speed without sacrificing the quality of toys and small objects that the Toybox is designed to produce.

Expected Lifespan of Printer and Components

Durability is key in a printer designed for children, and the Toybox 3D Printer does not disappoint. Its sturdy build suggests a long lifespan for the printer when used as directed. With proper maintenance and care, users can expect both the printer and components to last through many creative projects and learning experiences.

Ease of Use

The Toybox 3D Printer excels in ease of use, offering a seamless experience from setup to print. Its design eliminates the complexities often associated with 3D printing, inviting users of all ages to engage in the creative process with confidence and curiosity.

User-Friendly Features

  • One-Button Operation: The simplicity of the Toybox is highlighted by its one-button start feature, which allows even the youngest users to begin printing with minimal assistance.
  • Intuitive App and Web Interface: With the accompanying app and web platform, selecting and printing models is straightforward, bypassing the need for intricate technical knowledge.
  • Pre-Loaded Designs: A library of ready-to-print designs is available at the touch of a button, making 3D printing as simple as choosing a toy from a catalog.

These features contribute significantly to the user-friendly nature of the Toybox, making it a solid choice for beginners and children.

toybox 3d printer

Safety Measures and Considerations

  • Enclosed Printing Area: To protect little fingers, the printing area is thoughtfully enclosed, minimizing the risk of accidental contact with hot surfaces.
  • Rounded Edges: The printer’s design includes rounded corners to prevent scrapes or cuts, ensuring a safer environment for children.
  • Non-Toxic PLA Filament: Only PLA filament is used, which is derived from renewable sources and is safe for kids and the environment.

Safety is a paramount concern when it comes to tools designed for children, and the Toybox 3D Printer has addressed this with several thoughtful measures that put parents’ minds at ease.

Comparison with Other 3D Printers

When looking at 3D printers, it’s important to consider how they stack up against one another. The Toybox 3D Printer is designed for a specific audience, with features that distinguish it from other models on the market.

Printing Capabilities

The Toybox 3D Printer offers a user-friendly experience targeted at children and beginners. Unlike more advanced models designed for hobbyists or professionals, Toybox prioritizes simplicity and ease of use over high-end features. It supports only PLA filament, known for its safety and biodegradability, which is a significant factor for its intended young audience. With its limited build volume and layer resolution, it’s ideal for small, simple projects rather than intricate or large-scale creations.

Price Point

In terms of affordability, the Toybox is competitively priced, particularly when considering its niche as a child-friendly printer. While other 3D printers may offer larger build volumes, higher resolution, or the ability to print with various materials, they often come with a steeper price tag and a more complex setup. The Toybox, on the other hand, provides an attractive price point for families or schools looking to introduce 3D printing in a safe, controlled manner.

Target Audience and Use Cases

The Toybox 3D Printer is crafted with a clear vision, focusing on two main arenas: educational settings and home entertainment. Let’s break down its utility in each scenario.

Educational Purposes

In the classroom, the Toybox 3D Printer becomes a hands-on learning tool. It helps students understand the basics of 3D printing and design by bringing their ideas to life. Schools embrace it for its safety features and the use of non-toxic PLA. It supports lesson plans in technology, engineering, art, and mathematics, reinforcing problem-solving and critical thinking skills. With a library full of models, it’s an instant gateway to practical learning experiences.

Home Use and Entertainment

At home, this printer is a source of endless fun. Families find it perfect for crafting toys, games, and decorations together. Kids can easily operate it, thanks to its one-button functionality and pre-loaded designs. Parents appreciate the safe, enclosed design that keeps curious little hands away from hot parts. It’s a fantastic way to spark creativity in children and also serve as a bonding activity for the whole family.

Conclusion and Final Recommendations

After reading the Toybox 3D Printer review, it’s clear that it offers a unique blend of simplicity, safety, and educationally oriented features. It’s not just a printer; it’s a springboard for creativity and learning, especially for children who are its primary audience. While it doesn’t boast the advanced capabilities of more professional 3D printers, it hits the mark for its intended use cases. The straightforward design, ease of use, and pre-loaded models make it highly accessible for youngsters and beginners. Its focus on PLA material underscores its commitment to safety and environmental consciousness.

For families looking to introduce their kids to 3D printing, the Toybox is an excellent investment. Not only does it provide educational value, but it also offers hours of creative entertainment at home. Schools and other educational institutions will find it a valuable tool for making technology more approachable for students.

« Older posts